

Architectural Context: Timber Morphology in Mountain Architecture
Natural materials carry a real physical influence on how people feel inside a home. In biophilic design, we study the direct relationship between natural patterns and human biology. When you step into a mountain home, your senses react immediately to textures, light, and sounds. Smooth drywall, synthetic flooring, and painted plastic surfaces leave your senses starved for natural variation. In contrast, authentic timber surfaces change how a room feels and sounds.
Our visual system evolved to read natural patterns. When you look at weathered wood, your eyes recognize repeating mathematical geometries called fractals. These self-similar forms occur across tree branches, coastlines, and aged timber grain. Studies in environmental psychology show that seeing these natural fractals reduces stress by calming the nervous system. The weathered surface of reclaimed barn wood provides this exact visual stimulation. The cellular texture of genuine aged timber scatters light across micro-grooves. This diffuse reflection softens ambient daylight and eliminates the harsh glare common to modern synthetic surfaces.
Many builders attempt to copy this appearance with printed vinyl, plastic composites, or pressed fiber boards. These imitation products fail both aesthetically and biologically. A printed plank repeats identical grain lines every few boards, which your brain quickly detects as artificial. Composite planks do not breathe, they do not moderate humidity, and they lack physical depth. Real wood is a porous, living cellular structure. Authentic reclaimed barn wood carries a physical history recorded in its growth rings, saw cuts, and weather-beaten surface.
In the Southern Appalachian mountains of East Tennessee, mountain architecture relies on structural honesty. The local landscape is defined by rugged limestone bluffs, steep ridges, and heavy timber stands. Homes built in this region, whether traditional timber frames, hybrid log cabins, or modern mountain retreats, require materials that match the visual weight of the outdoors. An accent wall built with reclaimed barn wood creates an immediate bridge between indoor living spaces and the surrounding forest.
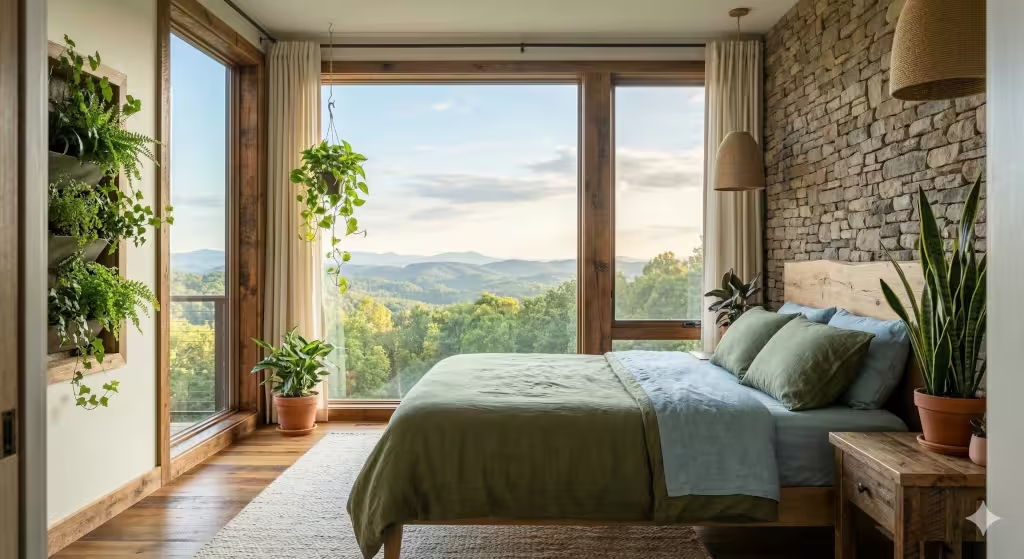
A major design strength of reclaimed barn wood is how naturally it pairs with regional native stone. Fieldstone, river rock, and Tennessee quartzite bring cool gray and buff tones into a room. When you place old weathered wood directly against native stone, you balance cold mineral textures with warm organic fibers. The rough texture of the timber softens the rigid look of stone masonry. This architectural balance anchors a room, making it feel grounded, protective, and permanent.
Material Provenance: Appalachian Sourcing, Species Identification, and Patinas
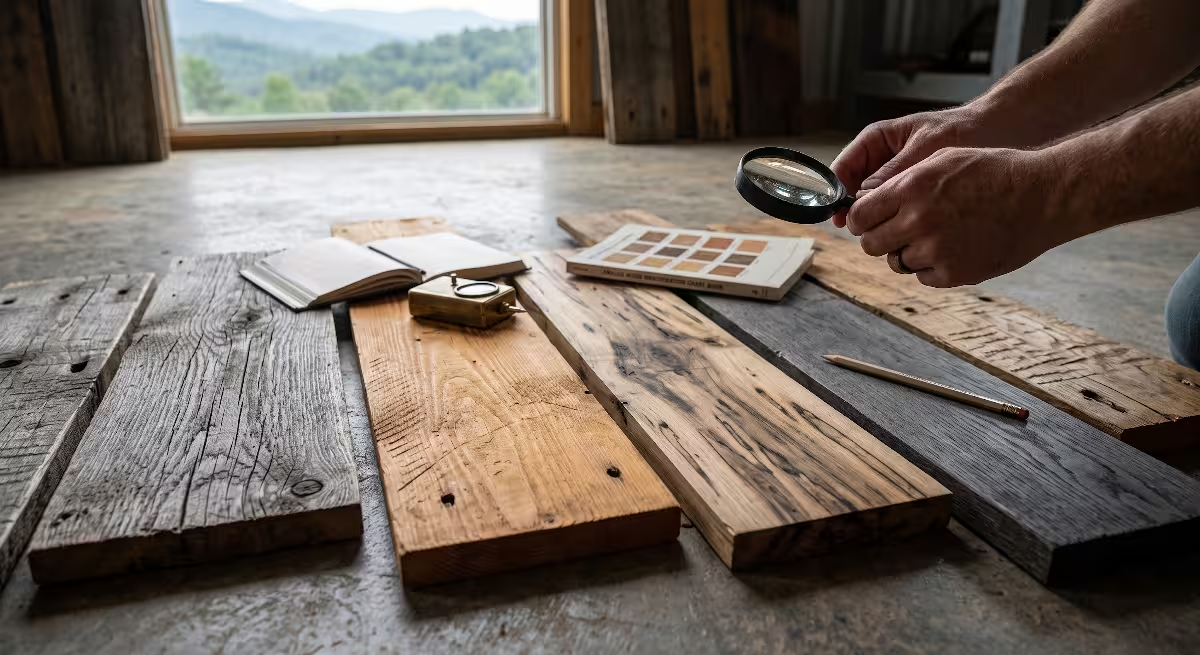
Selecting the right timber for a mountain home requires an understanding of wood species and forest history. The Appalachian mountain range contains some of the richest hardwood biodiversity in North America. When early settlers and farmers built barns throughout this region during the eighteenth and nineteenth centuries, they cleared local trees directly from their homesteads. Because of this practice, old barns represent an irreplaceable archive of historic timber. Using reclaimed barn wood allows homeowners to preserve and showcase this regional botanical history.
Historic Appalachian Wood Typologies
Different tree species age in unique ways. Identifying the species in your timber lot helps you understand how the wood will perform in your home.
1. American Chestnut (Castanea dentata)
Before the tragic blight of the early twentieth century, American chestnut was the dominant canopy tree of the eastern mountains. It grew tall, straight, and fast. Old-growth chestnut wood is lightweight, naturally resistant to decay, and features tight growth rings. Much of the reclaimed barn wood harvested from local barns in Tennessee and Virginia is wormy chestnut. This wood gets its name from small insect pin-holes created after the blight struck standing trees. Wormy chestnut displays a warm honey-caramel tone with a silky surface feel. It is one of the most prized historical timbers available today.
2. White Oak (Quercus alba)
White oak is heavy, dense, and remarkably strong. Unlike red oak, white oak possesses cellular structures called tyloses, which plug its microscopic pores. This makes the wood water-resistant and rot-resistant, which is why farmers chose it for structural sills and heavy framing. When exposed to outdoor air and sun for decades, white oak reclaimed barn wood turns a handsome silver-gray or deep charcoal. The grain shows striking ribbons called medullary rays that reflect light when cut across the growth rings.
3. Eastern Hemlock (Tsuga canadensis)
Eastern hemlock was commonly used for wide siding planks, rafters, and interior cribbing. Hemlock features a distinctive coarse grain with pronounced color variations between earlywood and latewood. When aged indoors away from direct sunlight, hemlock reclaimed barn wood develops rich amber and cinnamon undertones. It is softer than oak, so it works best on vertical accent walls and ceilings where it will not receive heavy physical contact.
4. Yellow Poplar (Liriodendron tulipifera)
Also known as the tuliptree, yellow poplar is a native hardwood that grows exceptionally straight and wide. Builders used poplar for exterior siding because it could be sawn into broad, clear boards. Over a century of weathering, poplar boards take on a smooth, leather-like texture. Poplar reclaimed barn wood displays gentle grain patterns with occasional dark mineral streaks ranging from olive green to purplish gray.
| Wood Species | Historical Origin | Distinctive Visual Traits | Best Interior Application |
| American Chestnut | Appalachian ridge forests | Worm holes, tight grain, warm amber | Living room focal walls, open shelving |
| White Oak | Lowland valleys and hillsides | Dense weight, ray flecks, driftwood gray | Mudrooms, dining spaces, fireplaces |
| Eastern Hemlock | Shaded coves and streams | Deeply grooved ridges, warm cinnamon | Bedroom feature walls, vaulted ceilings |
| Yellow Poplar | Rich mountain hollows | Broad widths, smooth wear, silver patina | Great room walls, vertical board-and-batten |
Understanding Patina Profiles
Not all salvaged boards look the same. The original location of each board on a barn determines its final appearance and surface texture.
- Exterior Siding Patina: Boards taken from the outside walls of an old barn have faced decades of rain, freezing mountain winter winds, and direct summer sun. The ultraviolet rays from the sun break down the wood lignin, turning the surface a soft driftwood silver or pewter gray. Deep longitudinal cracks and grooves give this reclaimed barn wood a rugged, deeply weathered character.
- Threshing Floor and Granary Patina: The interior floor of a barn endured heavy work. Draft horses, wagons, and farm workers walked across these boards for generations. Threshing floor reclaimed barn wood develops a smooth, burnished surface with rounded edges. You can often see the circular saw marks left by early water-powered or steam-powered sawmills. These boards showcase deep golden brown and warm russet colors.
- Tobacco Barn Curing Patina: In East Tennessee and Western North Carolina, tobacco barns were heated to cure tobacco leaves. The wood inside these barns absorbed smoke and natural plant oils for decades. This specialized reclaimed barn wood exhibits a striking dark charcoal or deep espresso color. It carries an extraordinary visual weight that fits modern mountain homes seeking dramatic contrast.
Vertical Board-and-Batten Formats: Amplifying Ceiling Volume
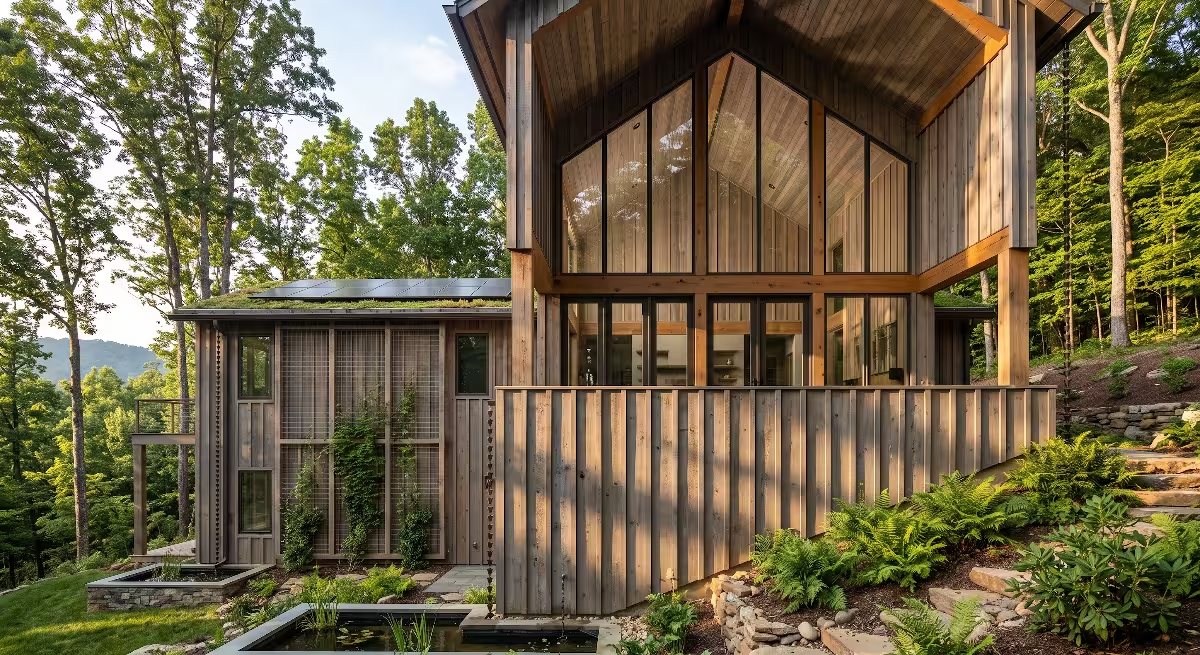
The way you position wall planks influences how human eyes perceive room dimensions. Mountain homes often balance two very different ceiling types. Some rooms feature dramatic double-height vaulted spaces, while other rooms have lower ceilings to keep spaces cozy and warm. A vertical installation using reclaimed barn wood gives you complete control over room proportions.
Running boards vertically draws your eyes upward. In rooms with standard eight-foot or nine-foot ceilings, horizontal wall planks can make a room feel wider but shorter. Installing reclaimed barn wood vertically guides your vision toward the ceiling, creating an immediate sensation of added height and airiness.
+-------------------------------------------------------------+
|  TYPICAL VERTICAL BOARD-AND-BATTEN WALL PROFILE             |
|                                                             |
|   Wide Plank       Batten Strip      Wide Plank             |
|   (6" - 10")         (2" - 3")       (6" - 10")             |
|  +----------+       +----------+    +----------+            |
|  |          |       |          |    |          |            |
|  |          | +---+ |          |    |          |            |
|  |          | |   | |          |    |          |            |
|  |          | +---+ |          |    |          |            |
|  +----------+   |   +----------+    +----------+            |
|                 +-- Recessed or Surface Batten              |
|                                                             |
|  Drywall Substrate painted dark at seams                    |
+-------------------------------------------------------------+
The Modern Board-and-Batten Concept
Traditional board-and-batten siding protected historic barns from wind and driving rain. Farmers nailed wide vertical planks directly to horizontal framing beams, then nailed narrow wood strips, called battens, over the open joints between the wide boards.
You can adapt this functional technique into an elegant interior feature. In mountain homes, a modern board-and-batten wall made from reclaimed barn wood adds architectural depth through strong shadow lines. You can use broad planks between eight and ten inches wide, paired with two-inch wide battens.
For a cleaner, contemporary mountain look, reverse the layout into a board-and-gap design. Mount wide planks of reclaimed barn wood with a half-inch reveal between each board. Paint the wall behind the boards a flat charcoal black. This reveals a clean vertical shadow line between each weathered plank, highlighting the rough edge of the natural timber.
Technical Sizing and Dead-Load Considerations
When mounting heavy timbers to vertical wall framing, weight matters. Rough-sawn timber taken directly from a barn frame can measure a full one-inch or two-inches thick. Installing heavy lumber directly across an entire wall adds hundreds of pounds of dead load to your wall studs and foundation.
To manage wall weight, authentic reclaimed barn wood should be precision milled or planed on the back face to a consistent thickness of 1/2 inch or 5/8 inch. This reduction cuts the overall wall weight by half while preserving the authentic weathered face on the front. Standardizing the board thickness also guarantees that your vertical joints sit flush against your wall framing, preventing uneven board edges that collect dust.
Framing the Mountain Hearth: Fireplace Accent Walls and Clearances
In mountain living, the fireplace serves as the emotional and physical heart of the home. The fireplace anchors the great room, providing heat, light, and a natural gathering place. Framing a fireplace with reclaimed barn wood creates an inviting rustic centerpiece, but working around heat sources requires strict adherence to fire safety protocols.
Material Juxtaposition
A fireplace wall offers a prime opportunity to blend natural elements. Pair a full-height installation of reclaimed barn wood with a natural stone firebox surround. The stone creates a clean, fireproof boundary around the flame, while the wood spreads across the flanking chimney breast.
If your home leans toward modern mountain design, place reclaimed barn wood alongside smooth black plate steel or poured-in-place board-formed concrete. The flat, uniform appearance of steel offers a clean visual counterpoint to the rough knots, nail holes, and grain variations found in the timber.
Fire Codes and Clearance Requirements
Safety must always come before design choices. When installing reclaimed barn wood around any wood-burning, pellet, or gas fireplace, you must comply with the National Fire Protection Association (NFPA 211) standards and the International Residential Code (IRC).
- Clearance to Combustibles: Wood is a combustible material. Building codes strictly state that all combustible materials must maintain minimum clearances from the firebox opening. Standard building code requires that any combustible trim or cladding remain at least six inches away from the edge of the fireplace opening.
- Projection Depth Rules: For every additional fraction of an inch that your reclaimed barn wood projects outward from the wall surface, you must increase the distance from the firebox opening. If a thick timber mantel or deep plank projects twelve inches out from the wall face, it typically must be placed at least twelve inches above the opening.
- Substrate Requirements: Never fasten reclaimed barn wood directly to the metal exterior casing of a zero-clearance fireplace unit. Always use a non-combustible cement backer board, such as Durock or HardieBacker, around the perimeter of the firebox before securing any wood boards.
+-------------------------------------------------------------+
|  HEARTH FIRE SAFETY CLEARANCE DIAGRAM                        |
|                                                             |
|   +-----------------------------------------------------+   |
|   |         Reclaimed Barn Wood Mantel Beam             |   |
|   +-----------------------------------------------------+   |
|                              |                              |
|                              | 12" MINIMUM CLEARANCE        |
|                              v                              |
|   +-----------------------------------------------------+   |
|   |        Non-Combustible Stone or Tile Facing         |   |
|   |      +---------------------------------------+      |   |
|   |  6"  |                                       |  6"  |   |
|   | MIN  |           Firebox Opening             | MIN  |   |
|   | <--> |                                       | <--> |   |
|   |      |                                       |      |   |
|   |      +---------------------------------------+      |   |
|   +-----------------------------------------------------+   |
|   |               Non-Combustible Hearth                |   |
|   +-----------------------------------------------------+   |
+-------------------------------------------------------------+
Structural Floating Mantels
A solid timber mantel anchors a reclaimed wall. A heavy beam carved from a hand-hewn barn rafter or sleeper sill makes an ideal floating shelf. Because these beams are heavy, you cannot rely on simple drywall screws or light brackets.
To hang a heavy mantel over a reclaimed barn wood wall, install threaded steel rods directly into the center of your wall studs. Drill matching pilot holes into the back of your timber mantel beam. Slide the beam over the steel rods and lock it in place using high-strength epoxy adhesive. This hidden mounting technique lets your reclaimed barn wood mantel float effortlessly against the stone or timber wall without visible metal brackets underneath.
Sensory Grounding: Bedroom Feature Walls for Acoustic Attenuation
Your bedroom should serve as a quiet sanctuary for recovery and rest. In many newly built mountain homes, high ceilings, large glass windows, and hardwood floors create an acoustic problem called flutter echo. Sounds bounce rapidly between parallel hard surfaces, producing a subtle ringing noise that increases sensory fatigue. A primary bedroom wall lined with reclaimed barn wood solves this issue while adding warmth and comfort.
The Science of Acoustic Softening
Standard painted drywall is flat, rigid, and dense. It reflects nearly all sound waves that hit it, carrying a very low Noise Reduction Coefficient (NRC) of roughly 0.05. This means drywall absorbs only five percent of sound energy, bouncing the remaining ninety-five percent back into your living space.
Drywall Surface (Rigid, Flat):
Sound Wave  ----->  | (Reflects 95% of sound energy back into room)

Reclaimed Barn Wood Surface (Porous, Micro-Grooved, Irregular):
Sound Wave  ----->  {~~} (Scatters, diffuses, and absorbs sound energy)
In comparison, the open cell structure and rough surface texture of reclaimed barn wood act as a natural sound diffuser and acoustic absorber. The deep grain fissures, uneven board thicknesses, and micro-crevices trap high-frequency sound waves. An accent wall made from reclaimed barn wood can achieve an NRC rating between 0.15 and 0.25. It dampens echoes, softens speech reverberation, and creates a noticeably quieter room.
Thermal and Sensory Grounding
Beyond acoustics, wood alters our thermal experience through tactile interaction. Drywall feels cold to the touch because it conducts heat away from your skin quickly. Wood holds a low thermal conductivity rate, meaning it serves as a natural insulator.
Placing a headboard wall built with reclaimed barn wood behind your bed creates a warm buffer against exterior walls. The deep brown, gray, and honey colors of aged timber establish a feeling of protection. In biophilic design, this feeling is known as “refuge,” an environmental condition that fosters relaxation and deeper sleep.
Concealed Architectural Grazing Light
To showcase the rich texture of your bedroom feature wall, light placement is critical. Avoid standard center-room ceiling fixtures, which cast flat light straight down and wash out surface detail.
Instead, install a concealed linear LED channel in the ceiling six to eight inches away from the wall. Point the light directly down across the surface of the reclaimed barn wood at a grazing angle. This directional grazing light casts soft shadows below every saw mark, knot, and weathered grain line. Use LEDs with a warm color temperature of 2700 Kelvin and a high Color Rendering Index (CRI) of 90 or above. Warm lighting brings out the amber tones of the timber while maintaining a relaxing, restful bedroom ambiance.
Geometric and Fractal Layouts: Chevron, Herringbone, and Dynamic Grain Alignments
While traditional horizontal and vertical installations look timeless, arranging timber into geometric patterns introduces movement and modern artistry into a home. Using reclaimed barn wood in geometric arrangements satisfies our natural desire for order and visual interest.
Chevron vs. Herringbone Configurations
Many people confuse chevron and herringbone patterns, but their cuts and joint geometries are distinctly different.
- The Chevron Layout: In a chevron wall, boards are cut at an angle, usually 45 degrees, on both ends. When the board ends meet, they form a perfectly straight vertical center seam that resembles an arrow pointing upward. A chevron pattern made from reclaimed barn wood creates continuous diagonal grain bands that guide your eye across a room.
- The Herringbone Layout: In a herringbone pattern, planks are cut into uniform rectangular strips with square 90-degree ends. The end of one plank butts directly against the side edge of the next plank, forming an alternating zigzag pattern. A herringbone wall built with reclaimed barn wood creates a woven, textile-like surface that scatters light across multiple angles.
CHEVRON PATTERN (Angled Miter Cuts)       HERRINGBONE PATTERN (Square Butt Cuts)
      /\                                       | |____
     /  \                                      |  ____|
    / /\ \                                     |_|____
   / /  \ \                                    |  ____|
  /_/    \_\                                   |_|____|
  (Continuous Center Joint)                    (Staggered Interlocking Joints)
Horizontal Strata Bands
If you prefer horizontal layouts but want more visual rhythm than uniform planks offer, consider a multi-width horizontal design. Install rows of reclaimed barn wood alternating between three-inch, five-inch, and seven-inch board widths.
This layout mimics the natural sediment layers found in exposed mountain rock bluffs. The varying band widths break up visual monotony, highlighting the color and texture shifts found across individual planks.
Milling and Precision Requirements
Installing geometric patterns with raw salvage lumber presents a common woodworking challenge. Boards pulled straight from an old barn are rarely flat, parallel, or perfectly square. If your planks vary in width by even an eighth of an inch, your pattern will drift off course, leaving unsightly gaps that grow wider with every row.
To build a flawless herringbone or chevron wall, you must mill your reclaimed barn wood before installation. Every board must be straight-line ripped on a table saw so that opposite edges run parallel. Both ends must be cross-cut on a precision miter saw to guarantee clean joints.
Alternatively, you can source pre-milled reclaimed barn wood that features interlocking tongue-and-groove edges. Pre-milled timber allows you to create intricate geometric patterns quickly while ensuring that all joints remain tight over seasonal temperature changes.
Architectural Nooks, Wet Bars, and Staircase Ascents
An accent wall does not have to be limited to a flat expanse in a living room or bedroom. Some of the most successful installations occur in smaller architectural nooks, transition zones, and circulation paths throughout a home. Using reclaimed barn wood in compact areas turns overlooked spaces into rich design features.
Intimate Nooks and Wet Bars
Small recessed spaces, such as home bars, wine displays, and reading alcoves, naturally benefit from the close-up texture of weathered timber. In an entertainment bar or wine room, line the back wall with dark, tobacco-cured reclaimed barn wood.
Pair this dark backdrop with floating open shelves made from heavy thick-slab timber. Add warm under-shelf lighting to illuminate glassware and bottles against the dark wood grain. The weathered surface hides small splashes and scuffs while providing a cozy, pub-like atmosphere well suited to cold mountain evenings.
+-------------------------------------------------------------+
|  WET BAR NICHE DETAIL                                       |
|                                                             |
|   +-----------------------------------------------------+   |
|   |         Reclaimed Barn Wood Cladding Wall           |   |
|   |  +-----------------------------------------------+  |   |
|   |  | Thick Timber Floating Shelf (Stemware Rack)   |  |   |
|   |  +-----------------------------------------------+  |   |
|   |       *   *   *   * (Warm LED Shelf Grazing)        |   |
|   |                                                     |   |
|   |  +-----------------------------------------------+  |   |
|   |  | Second Timber Shelf (Bourbon & Wine Storage)  |  |   |
|   |  +-----------------------------------------------+  |   |
|   |                                                     |   |
|   |  +-----------------------------------------------+  |   |
|   |  | Soapstone Countertop & Lower Cabinet Base     |  |   |
|   +--+-----------------------------------------------+--+   |
+-------------------------------------------------------------+
Multi-Story Staircase Walls
Stairways are often tall, narrow spaces that can feel sterile if left as plain drywall. Cladding a multi-story staircase wall with reclaimed barn wood connects lower and upper levels into a single continuous architectural story.
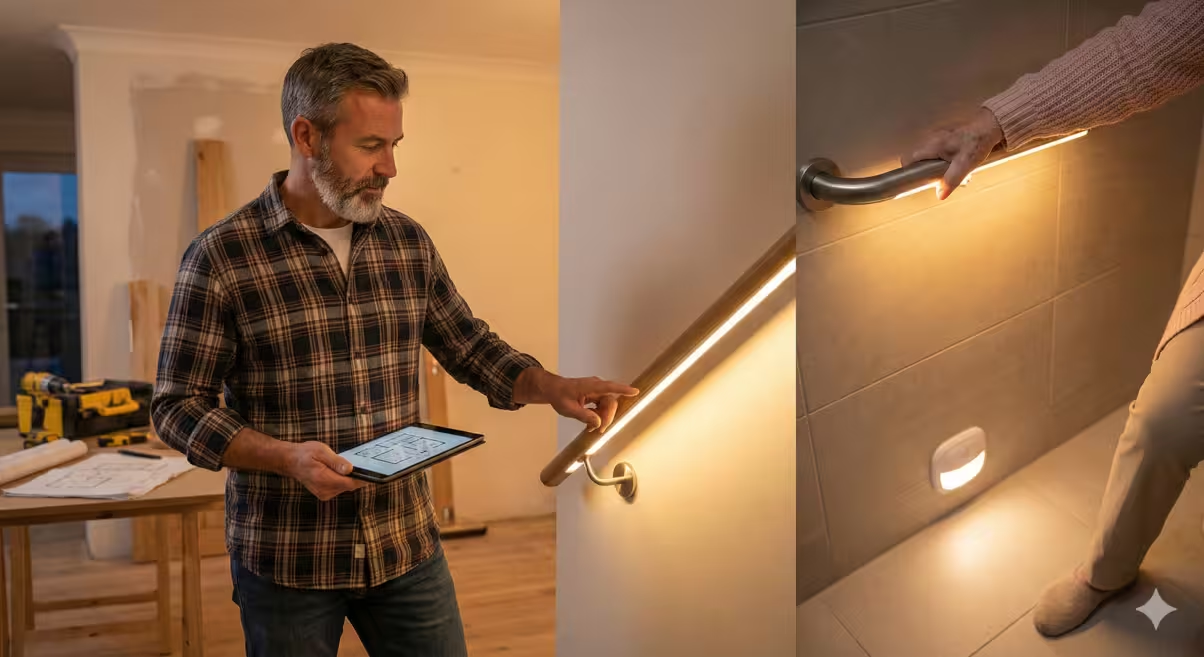
When planning a stair wall, pay close attention to safety handrail mounting. Handrails must carry heavy dynamic weight loads to meet building safety codes. Do not anchor handrail brackets solely to your wood cladding boards. You must drive heavy-duty lag bolts through the face of your reclaimed barn wood directly into the center of the structural 2×4 or 2×6 wall framing studs.
Edge Trims and Metal Transitions
A common mistake in wood wall design is leaving cut board ends exposed at outside corners and doorways. Authentic barn wood has a darker, weathered face, while fresh saw cuts expose bright, unweathered timber cores.
To create clean transitions:
- Mitered Outside Corners: Cut board ends at precise 45-degree bevels so the weathered surface wraps cleanly around the corner without exposing cut end grain.
- Corner Trim Blocks: Install a clean vertical corner post made from an L-shaped timber, then butt your horizontal planks against this post.
- Blackened Steel Angle Iron: For a crisp modern look, frame the outside perimeter of your reclaimed barn wood installation with 1.5-inch blackened steel angle iron. The dark steel frames the natural wood, protecting delicate board edges from bumps and foot traffic while reinforcing an industrial mountain aesthetic.
Indoor Environmental Quality: Preparing Authentic Barn Wood for Safe Indoor Living
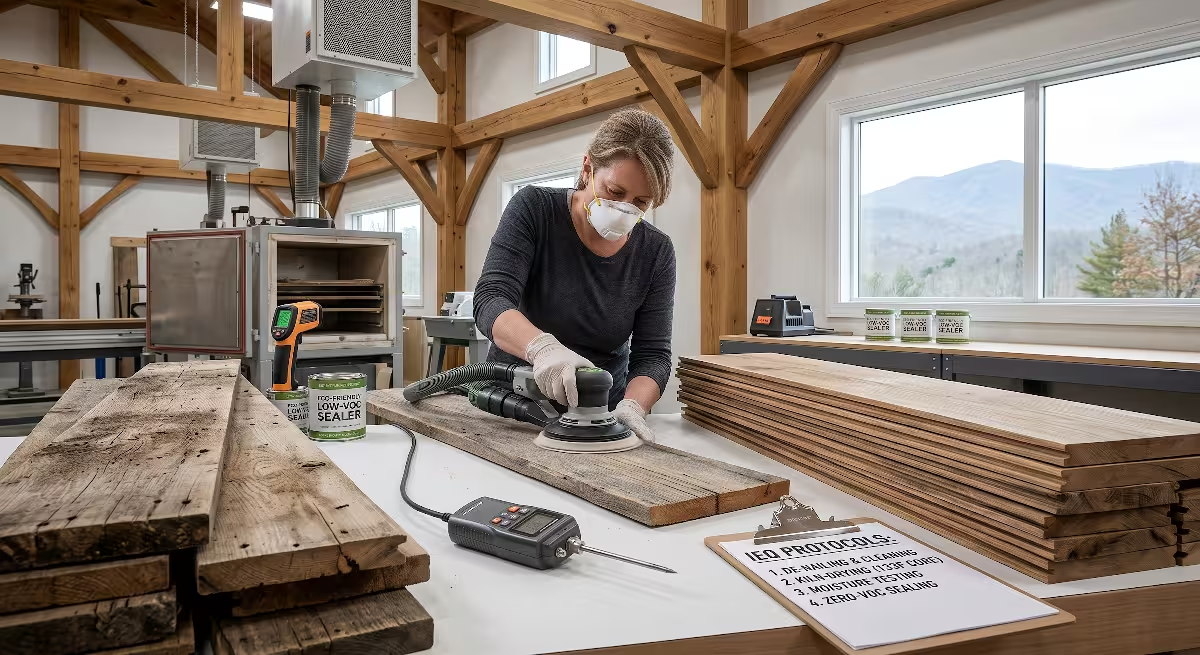
Bringing centuries-old farm timber into a modern living environment requires careful preparation. Authentic agricultural lumber spent decades exposed to weather, insects, and animal activity. To maintain good indoor air quality and protect your family, you must remediate all salvaged timber before bringing it inside.
Entomological Remediation and Kiln Drying
The primary threat hidden within raw salvaged timber comes from wood-boring insects. Powderpost beetles (Lyctinae) are common pests in old hardwood barns. Their larvae live deep within the wood fibers, chewing tunnels through the core of the boards for years before emerging as adult beetles.
+-------------------------------------------------------------+
|  KILN DRYING THERMAL PROFILE                                |
|                                                             |
|  Core Wood Temperature:  133°F (56°C)                       |
|  Minimum Hold Time:      30 Minutes                         |
|  Result: Complete elimination of all insect stages,         |
|          larvae, fungal spores, and excess moisture.        |
+-------------------------------------------------------------+
Surface insect sprays and chemical foggers cannot penetrate deep into dense hardwood to kill hidden larvae. The only dependable, chemical-free way to eradicate insects is thermal kiln drying.
Your reclaimed barn wood must be placed inside a commercial dehumidification or vacuum kiln. The core temperature of the wood must reach at least 133 degrees Fahrenheit (56 degrees Celsius) and remain at that temperature for a minimum of 30 minutes. This thermal exposure destroys all life stages of wood-boring insects, including eggs, larvae, and pupae, while also neutralizing mold spores and fungi.
Chemical and Lead Paint Testing
Prior to the federal ban on residential lead paint in 1978, lead was widely used in paints, exterior barn coatings, and equipment primers. White wash and red barn paint applied to agricultural buildings often contained high concentrations of toxic lead pigments.
Before cutting, sanding, or handling any painted reclaimed barn wood:
- Test the Surface: Use an EPA-recognized chemical swab test kit or hire a certified lead inspector using an X-ray fluorescence (XRF) analyzer to test every color variation on your boards.
- Handle with Care: If lead paint is detected, never sand the boards with dry sandpaper or power tools. Sanding releases fine lead dust that settles into household carpets and air ducts, creating a serious respiratory hazard.
- Encapsulate Stable Paint: If you choose to keep an authentic painted patina, stabilize the surface. Gently wash the boards with water and a soft brush to remove loose flakes. Once dry, seal the timber with a clear, zero-VOC water-based acrylic sealer. This encapsulates the paint, locking it tightly to the wood and preventing lead particles from flaking off into your home.
Hygroscopic Equilibrium and Wood Acclimatization
Wood is hygroscopic, meaning it acts like a natural sponge. It absorbs water vapor when the air is humid and releases water vapor when the air is dry.
Mountain climates experience substantial seasonal shifts in relative humidity. In the summer, warm air carries high humidity into the mountains, causing wood to expand. In the winter, indoor heating systems dry the air, causing wood to contract. If you nail freshly delivered timber to your walls immediately, your wall will quickly develop warped boards, popped nails, or wide unsightly gaps.
To prevent this problem, your reclaimed barn wood must reach its equilibrium moisture content (EMC) before installation:
- Bring the kiln-dried lumber inside the temperature-controlled living space where it will be installed.
- Stack the planks horizontally in neat piles. Place small, uniform wood spacers, called stickers, between every layer of boards to allow room air to circulate across both sides of each plank.
- Allow the wood to acclimate inside the home for 7 to 14 days.
- Use a pinless digital moisture meter to measure the wood. For interior installations in heated and air-conditioned mountain homes, the moisture content of the wood should stabilize between 6% and 8% before you begin fastening boards to your walls.
Step-by-Step Installation: Fastening, Backing, and Structural Integrity
Installing an accent wall made from reclaimed barn wood is an achievable project for skilled carpenters and homeowners. Following proper building techniques guarantees that your feature wall remains straight, tight, and secure for decades.
Required Tools and Materials
Before beginning, gather the correct professional tools:
- Digital stud finder and 48-inch spirit level (or cross-line laser level)
- Miter saw with a sharp, fine-tooth carbide blade
- Table saw (for straight-line ripping and trimming width rows)
- 16-gauge or 18-gauge pneumatic or battery-powered finish nailer
- 2-inch and 2.5-inch finish nails
- High-strength, low-VOC polyurethane construction adhesive (such as Loctite PL Premium)
- Flat black or dark gray interior wall paint and roller
- Standard electrical box extender rings
+-------------------------------------------------------------+
|  FASTENING SCHEDULE DETAIL                                  |
|                                                             |
|           Wall Stud (16" On-Center Spacing)                 |
|           |                                                 |
|           v                                                 |
|       +-------+                                             |
|       |       |                                             |
|       |       |  <-- 1/2" Gypsum Drywall (Painted Dark)     |
|   +---+-------+---+                                         |
|   |   | *   * |   |  <-- Polyurethane Adhesive Beads        |
|   +---+-------+---+                                         |
|   |   | \   / |   |                                         |
|   |   |  \ /  |   |  <-- Two Finish Nails Driven at         |
|   |   |   X   |   |      Opposing 45-Degree Angles          |
|   |   |  / \  |   |                                         |
|   +---+-------+---+                                         |
|   | Reclaimed |                                             |
|   | Barn Wood |                                             |
|   | Plank     |                                             |
|   +-----------+                                             |
+-------------------------------------------------------------+
Phase 1: Wall Substrate Preparation
- Safety First: Shut off electrical power at the main breaker box for any outlets and light switches located on the target wall. Remove all switch plates and outlet cover covers.
- Paint the Drywall: As seasonal humidity changes, boards will expand and contract slightly. If your underlying drywall is painted bright white, thin white lines may show between board joints during dry winter months. Roll a coat of flat black or deep charcoal paint across the entire drywall surface. Dark paint hides seams, creating natural-looking shadow lines between planks.
- Locate and Mark Studs: Use your stud finder to locate every wall stud. Studs are typically spaced 16 inches or 24 inches on center. Use your four-foot level and a carpenter pencil to draw crisp vertical guide lines down the center of every stud from the ceiling to the floor.
Phase 2: Board Layout and Fastening Schedule
- Establish a Level Base Line: Do not assume your floor or ceiling is level. Mountain homes settle over time, and subfloors often slope. Measure up from the floor, set up your laser level, and snap a perfectly level horizontal chalk line across the middle of your wall. Starting your installation along this true level line prevents your rows from sloping downward.
- Apply Construction Adhesive: For a permanent, rattle-free installation, combine mechanical fasteners with structural adhesive. Apply a steady, serpentine bead of polyurethane construction adhesive along the back of each board of reclaimed barn wood. Keep the adhesive an inch away from the board edges to prevent glue from squeezing out between joints.
- Blind and Face Nailing: Press the board firmly against the wall along your guide line. Drive two finish nails through the board wherever it crosses a wall stud. Angle your nails slightly in opposite directions, driving one nail at a positive 45-degree angle and the second nail at a negative 45-degree angle. This cross-nailing technique forms an internal mechanical wedge that locks the timber to the wall stud while the construction adhesive cures.
- Stagger Your End Joints: Never align board end joints between adjacent rows. Stagger your end joints by at least twelve inches from one row to the next. This brick-laid pattern distributes structural stress evenly across the wall and looks more natural.
Phase 3: Outlets and Electrical Extensions
When you add a layer of reclaimed barn wood over existing drywall, your wall thickness increases by 1/2 inch to 3/4 inch. This leaves your electrical outlet and switch boxes recessed too deeply inside the wall, which violates the National Electrical Code (NEC).
Electrical receptacles must sit flush with the finished wall surface to prevent sparks from contacting wood.
- Install a non-conductive plastic box extender ring (often called a “spark ring”) onto every electrical box.
- The extender slides inside the existing box and extends the perimeter forward so it sits flush with the new front face of your wood wall.
- Use longer 6-32 machine screws to re-mount your switches and receptacles securely into the extended box before reattaching your faceplates.
Frequently Asked Questions About Reclaimed Wood Walls in Mountain Cabins
Homeowners frequently ask important questions when planning an accent wall project. Here are clear, direct answers based on building science, safety standards, and interior design practices.
Is reclaimed barn wood safe to use indoors?
Yes, authentic reclaimed barn wood is completely safe for indoor use, provided it has been properly inspected, cleaned, and remediated. Untreated wood pulled directly from a collapsed field barn should never be brought directly into living spaces because it may harbor live insects, wood rot, mold spores, or animal waste.
To ensure safety, only use timber that has undergone professional thermal kiln drying to eradicate pests and fungi. The wood should be tested for historic lead paint and finished with a zero-VOC water-based protective sealer. You must also avoid any industrial timber that was chemically treated with hazardous preservatives such as creosote, commonly found in old railroad ties, or pentachlorophenol, frequently used on utility poles.
How much does a reclaimed wood accent wall cost per square foot?
The cost of a reclaimed wood wall varies depending on whether you purchase raw salvage material, order pre-milled boards, or hire a professional installation contractor.
- Raw Salvage Planks: Purchasing rough, unprocessed boards directly from a salvage supplier generally costs between $5 and $9 per square foot. However, these boards require extensive manual labor, including metal detection to remove hidden nails, surface scrubbing, kiln drying, and edge milling.
- Pre-Milled Architectural Planks: Purchasing kiln-dried, de-nailed, and precision-milled tongue-and-groove reclaimed barn wood ranges from $12 to $24 per square foot. While material costs are higher, pre-milled planks reduce installation labor, waste, and project time.
- Professional Labor: Hiring an experienced finishing carpenter to install your wall adds roughly $8 to $16 per square foot, depending on the complexity of your design. Simple horizontal walls fall at the lower end of that range, while complex diagonal chevron or herringbone patterns require extra precision cutting and cost more.
+-------------------------------------------------------------+
|  ESTIMATED COST BREAKDOWN (PER SQUARE FOOT)                 |
|                                                             |
|  Material Options:                                          |
|  * Raw Salvage Planks:            $5  - $9   / sq. ft.      |
|  * Pre-Milled Engineered Planks:  $12 - $24  / sq. ft.      |
|                                                             |
|  Installation Labor (Carpentry):                            |
|  * Standard Horizontal Layout:    $8  - $11  / sq. ft.      |
|  * Intricate Geometric Layout:    $12 - $16  / sq. ft.      |
|                                                             |
|  Total Finished Investment:       $13 - $40  / sq. ft.      |
+-------------------------------------------------------------+
Do I need drywall behind a reclaimed wood accent wall?
Yes, you should always maintain a continuous layer of drywall behind your wood planks. Modern residential building codes require an approved thermal barrier, typically 1/2-inch gypsum board (or 5/8-inch Type X gypsum board near garages and utility rooms), between living spaces and wall framing studs. Gypsum drywall serves as a crucial fire-stop that slows flame spread in the event of a household fire.
Fastening reclaimed barn wood directly to open wall studs without drywall violates local fire and life-safety codes. Leaving out the drywall also degrades room acoustics, allows drafts to blow through wall cavities, and leaves gaps where pests can nest. Installing your wood over existing drywall provides a solid, safe, fire-rated backer that supports strong mechanical and adhesive fastening.
How do you clean and maintain a rough barn wood wall?
Maintaining an interior wall of reclaimed barn wood is simple, but standard cleaning methods like wet mopping or chemical wiping should be avoided.
- Regular Dusting: Dust your wall once every three to four months using a canister vacuum fitted with a soft horsehair dusting brush attachment. The soft bristles loosen dust, lint, and cobwebs from deep grain crevices without abrading the natural patina of the wood.
- Spot Cleaning: If a spot becomes soiled, do not soak the wood with water or spray it with harsh household cleaners. Dampen a clean microfiber cloth with warm water and a few drops of mild castile soap. Gently dab the stained area without rubbing hard, then dry the spot immediately with a clean, dry towel.
- No Heavy Oils or Waxes: Avoid applying heavy lemon oils, paste waxes, or silicone-based furniture polishes. These products trap ambient dust in the open pores of the timber, leaving a sticky, dark film that is almost impossible to remove.
How do you seal reclaimed barn wood without changing its natural weathered color?
Sealing rough wood protects it from shedding fibers and makes dusting easier, but traditional oil-based polyurethane finishes will ruin the appearance of weathered timber. Oil-based finishes soak deep into wood pores, turning silver-gray boards into a dark, muddy amber color with an unnatural artificial sheen.
To seal reclaimed barn wood while preserving its authentic light gray or soft brown weathered color, choose an ultra-matte, water-based acrylic-polyurethane protective sealer. High-performance commercial finishes, such as Bona Traffic HD (Extra Matte) or General Finishes Dead Flat, provide reliable surface protection without altering the color. These waterborne finishes contain no ambering oils and dry to an invisible, non-reflective sheen. The finished timber looks completely raw, dry, and natural to the eye, while remaining protected from stains, dust, and daily wear.