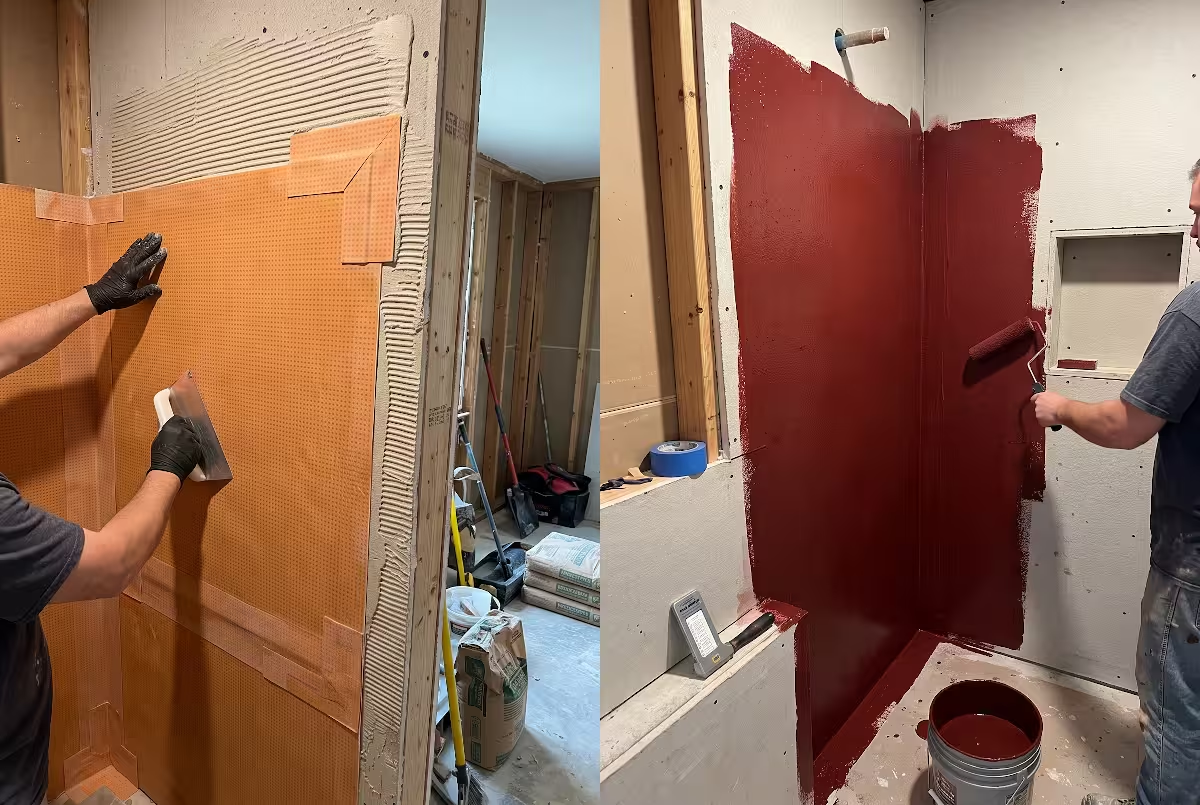


When you step out of bed on a crisp winter morning in Northeast Tennessee, the first thing your feet touch tells you everything about how your home was built. For decades, standard residential construction relied on forced-air furnaces and heat pumps to push hot air through sheet metal ducts. You hear the equipment kick on with a rush of noise, feel a blast of dry air around your ankles, and watch the dust dance across the room. Within fifteen minutes, the blower shuts off, the room cools down, and the cycle repeats.
There is a fundamentally better way to heat a home. It relies on basic laws of physics that builders have used since the Roman Empire, refined with modern materials and computerized controls. That method is radiant in-floor heating.
When installed properly,
The Physics of True Thermal Comfort
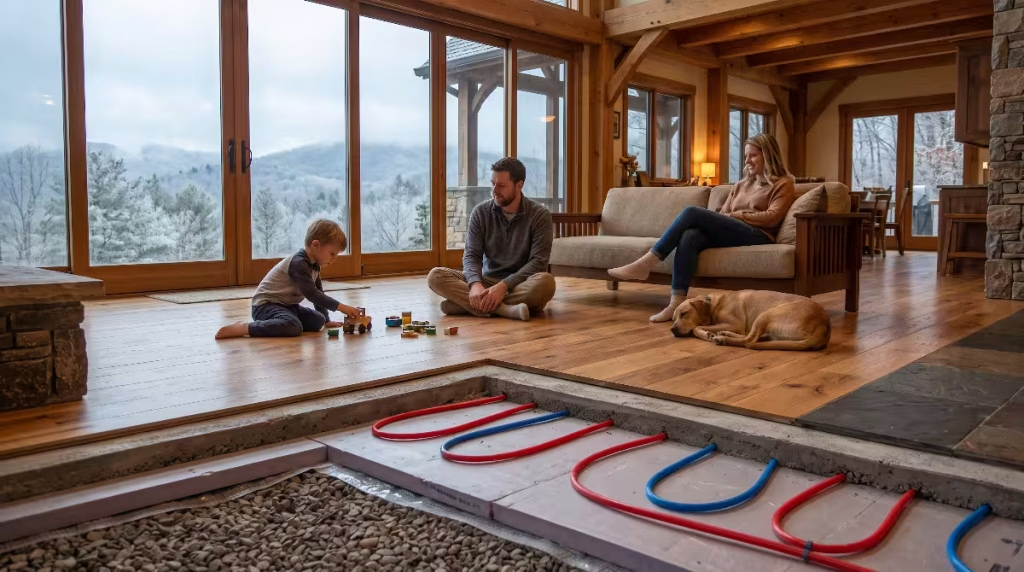
To understand how radiant in-floor heating works, you first have to understand how the human body experiences temperature. Most heating systems heat the air in the room, hoping that the air will eventually warm you up. But your body does not just exchange heat with the air. Your body exchanges heat with every surface around you.
Hook and Paradigm Shift: Moving Beyond Forced Air
Standard forced-air systems heat a house by heating air volume. A blower pulls cold air from return grilles, pushes it across a hot electric coil or gas heat exchanger, and forces it out of supply vents at high velocity. Because hot air is less dense than cold air, that hot air rises straight to the ceiling.
In a room with nine-foot or vaulted ceilings, you can easily end up with a temperature of 76 degrees near the crown molding, while the floor where your family walks sits at an uncomfortable 64 degrees. To feel warm at the couch level, you have to crank the thermostat higher. That wastes energy, dries out your sinuses, and creates constant drafts.
A home with radiant in-floor heating flips this entire picture upside down. Instead of dumping super-heated air at the ceiling, radiant in-floor heating warms the room starting at the absolute lowest point:
The Technical Baseline: Surface Area as a Giant Radiator
At its engineering foundation, radiant in-floor heating turns the entire floor of your home into a massive, low-temperature radiator.
Old-fashioned steam radiators had to run at extremely high temperatures, often between 160 and 180 degrees Fahrenheit, because their surface area was tiny compared to the room. If you touched one, you could burn your skin.
With radiant in-floor heating, you are taking an entire room surface, such as four hundred square feet of tile, concrete, or hardwood, and warming it gently. Because the surface area is so huge, the floor only needs to be warmed to between 75 and 82 degrees Fahrenheit to heat the entire room. You get gentle, steady warmth across the entire room with no hot spots and no scorched dust.
The Sunlight Indoors Analogy: Infrared Energy Explained
The most accurate way to picture radiant in-floor heating is to think about stepping out into the sun on a cool spring day. Even if the air outside is only 55 degrees, the moment the sun hits your jacket, you feel warm.
The sun is not heating the air between space and your body. The sun produces radiant electromagnetic waves, specifically infrared energy, that travel straight through the atmosphere until they strike a solid object. Once those waves hit an object, such as your skin, a brick patio, or a stone wall, their energy converts directly into sensible heat.
This is exactly how radiant in-floor heating operates inside your home. The warmed floor emits gentle infrared energy. That energy travels upward through the room and warms the sofa, the dining table, the walls, and the people walking across the floor. Those objects absorb the heat and reflect it back into the room. The air warms up as a secondary result of touching the warm surfaces, rather than the other way around.
Mean Radiant Temperature: The Real Secret to Comfort
In building science, heating engineers evaluate comfort using a metric called Mean Radiant Temperature, often abbreviated as MRT. Mean Radiant Temperature measures the average temperature of all the surfaces surrounding an occupant in a room, including the floors, walls, ceiling, and windows.
Your body is constantly radiating heat outward to its environment. If you sit next to a cold, single-pane window in the winter, you feel chilly even if the furnace has pushed the room air to 72 degrees. That chill happens because your warm body is radiating heat directly toward that freezing window glass.
When a house uses radiant in-floor heating, the Mean Radiant Temperature of the room rises substantially. The floor, furniture, and baseboards are all warm. Because the surrounding surfaces are warm, your body loses its own heat at a much slower, more natural rate.
Because radiant in-floor heating elevates the Mean Radiant Temperature, you can set your thermostat two to four degrees lower than you would with a heat pump and feel just as warm. A room heated to 68 degrees by radiant in-floor heating often feels warmer and more comfortable than a room heated to 72 degrees by a forced-air furnace.
+---------------------------------------------------------------+
|                      FORCED AIR HEATING                       |
|  76°F Hot air pools at ceiling (wasted heat)                  |
|  70°F Air cools as it falls                                   |
|  64°F Cold drafty floor (cold feet, high dust)                |
+---------------------------------------------------------------+
|                  RADIANT IN-FLOOR HEATING                     |
|  68°F Gentle warmth near ceiling                              |
|  70°F Consistent warmth at standing & sitting height          |
|  75°F-82°F Warm floor surface (maximum human comfort)         |
+---------------------------------------------------------------+
The Two Core System Types: Hydronic vs. Electric
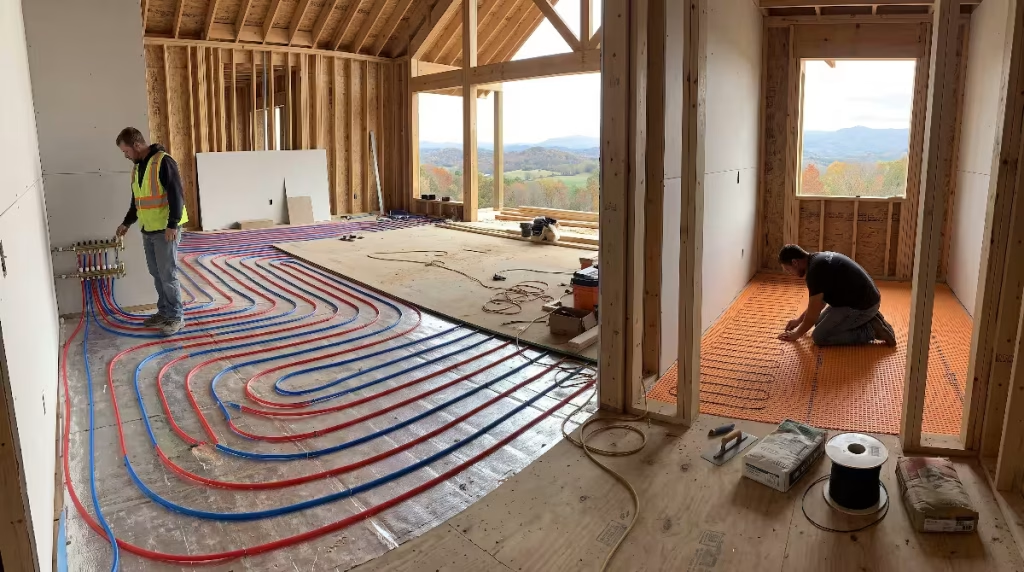
While all radiant floors work on the principle of thermal radiation, they generate heat through two completely different fuel and distribution pathways. Choosing the right path is the most critical decision a builder or homeowner makes during the design phase.
Hydronic Radiant Systems: Closed-Loop Liquid Heating
Hydronic radiant in-floor heating uses warm liquid pumped through continuous loops of specialized tubing embedded beneath the flooring. It is the gold standard for full-home heating applications.
In a modern hydronic system, a central heat source warms water, or a non-toxic mixture of water and propylene glycol for freeze protection. A series of circulator pumps moves this liquid through closed loops of cross-linked polyethylene pipe, universally referred to in the construction trade as PEX tubing.
The liquid travels through the floor, gives up its heat energy to the surrounding concrete, gypsum, or wood subfloor, and returns to the heat source several degrees cooler to be reheated. Because liquid carries roughly 3,500 times more heat per cubic foot than air, hydronic radiant in-floor heating transfers large amounts of thermal energy using very little mechanical pumping electricity.
Hydronic radiant in-floor heating systems are fuel-agnostic. The liquid can be heated using:
- High-efficiency modulating condensing natural gas or propane boilers.
- Modern air-to-water or geothermal water-to-water heat pumps.
- Electric boilers.
- Biomass or solar thermal storage systems.
Because hydronic radiant in-floor heating relies on plumbing loops that last for generations, you can swap out the heat plant thirty years down the road without ever touching the floors inside the house.
Electric Radiant Systems: Thermal Resistance Cables
Electric radiant in-floor heating uses specialized electric resistance cables installed directly beneath the finished floor covering. When an electric current passes through these high-resistance alloy wires, electrical energy converts directly into thermal energy.
Electric systems are built in two main ways:
- Pre-spaced mesh mats: Thin heating cables are woven into fiberglass mesh rolls that an installer unrolls and embeds directly into a layer of tile mortar.
- Uncoupling membrane systems: A dimpled plastic waterproof membrane, such as Schluter DITRA-HEAT, is bonded to the plywood or concrete subfloor. The installer snaps loose electric heating wire into the dimples at custom spacing before spreading thin-set mortar and laying tile.
Electric radiant in-floor heating operates on dedicated 120-volt or 240-volt circuits protected by Class A Ground Fault Circuit Interrupters (GFCI). The temperature is controlled by a dedicated digital thermostat that relies on a physical sensor probe embedded in the mortar bed right next to the heating wire.
Electric radiant in-floor heating is exceptional for spot warming. It has a very low profile, adding less than a quarter-inch of height to the floor assembly, which makes it ideal for bathroom remodels and kitchen updates. However, because heating an entire home solely with electric resistance wire can cause electric utility bills to climb quickly, electric radiant in-floor heating is rarely chosen for whole-house applications.
Hydronic vs. Electric Comparison
To see which system fits a specific building project, it helps to compare the engineering parameters directly:
| Feature / Metric | Hydronic Radiant In-Floor Heating | Electric Radiant In-Floor Heating |
| Best Application | Whole homes, full additions, basement slabs | Bathrooms, kitchens, small sunrooms |
| Square Footage Practical Limit | 500 sq. ft. up to 10,000+ sq. ft. | Typically spot warming under 300 sq. ft. |
| Upfront Installation Cost | High initial investment for mechanical equipment | Moderate initial cost, low equipment overhead |
| Operating Cost per BTU | Low to moderate (very efficient) | High (pure electric resistance power) |
| Floor Height Impact | 0.5 inches to 4 inches depending on method | 0.125 inches to 0.375 inches |
| Heat Plant Lifespan | 15 to 25 years (boilers and heat pumps) | Thermostats last 10 to 15 years |
| In-Floor Component Lifespan | 50+ years for PEX-a oxygen barrier pipe | 30+ to 50+ years for resistance wire |
| Maintenance Requirements | Annual inspection of pumps, valves, and fluid | Virtually zero maintenance once tiled |
System Anatomy: How the Mechanical Puzzle Fits Together
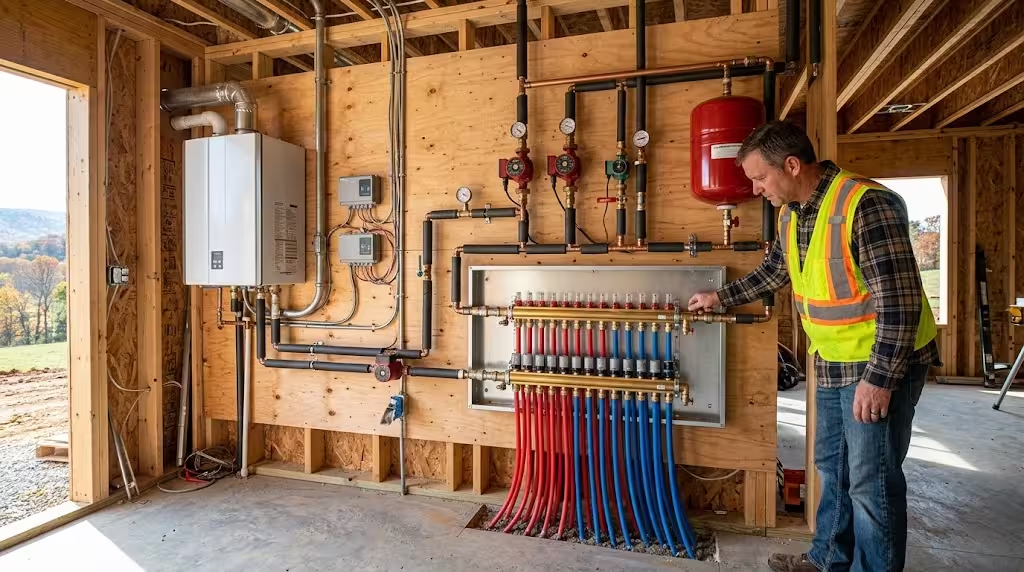
A successful installation of hydronic radiant in-floor heating is an integrated system where every component balances heat production, fluid flow, and heat transfer. If one part is undersized or poorly planned, the whole system suffers.
The Heat Plant: Low-Temperature Efficiency
Decades ago, boilers pumped water at 180 degrees Fahrenheit into large cast-iron baseboards. Modern hydronic radiant in-floor heating requires far cooler water, typically running between 85 and 115 degrees Fahrenheit depending on outdoor temperatures and floor construction.
This low operating temperature makes modern heat sources perform at their highest theoretical efficiency:
- Condensing Boilers: Natural gas and propane condensing boilers only hit their rated 95% or 98% efficiency ratings when return water temperatures are low enough to condense flue gases. Because radiant in-floor heating returns cool water back to the boiler, it keeps the boiler in high-efficiency condensing mode all winter long.
- Air-to-Water Heat Pumps: In all-electric custom home builds, air-to-water heat pumps extract heat from the outside air and transfer it directly to a water loop. Because the heat pump only has to raise water to 105 degrees instead of 140 degrees, the equipment operates with exceptionally high efficiency.
The Distribution Manifold: The Traffic Controller
The distribution manifold is the central nervous system of any hydronic radiant in-floor heating installation. It consists of two machined brass or stainless steel bars: a supply manifold and a return manifold.
[From Boiler] ---> (Supply Manifold) ---> Loop 1 (Living Room) ---> (Return Manifold) ---> [To Boiler]
                                     ---> Loop 2 (Kitchen)     --->
                                     ---> Loop 3 (Master Bed)  --->
Water from the heat plant flows into the supply manifold, which divides that single stream of warm water into individual continuous loops of PEX tubing. Each loop circulates through a specific room or zone and returns back to the return manifold.
A professional manifold includes several critical components:
- Flow Meters: Clear sight glasses on each loop that display water flow in Gallons Per Minute (GPM). This allows the builder to balance the flow so shorter loops do not steal heat from longer loops.
- Balancing Valves: Adjustable ports used to fine-tune the exact water volume flowing through each circuit.
- Electro-Thermal Actuators: Small motorized valves wired to individual room thermostats. When a room calls for heat, the actuator opens that specific loop on the manifold.
- Air Purge and Drain Ports: Crucial connections used during initial startup to flush every pocket of air out of the PEX loops using high-pressure water.
Zone Controls and Mixing Valves: Protecting the System
Different areas of a house lose heat at different rates. A living room with fifteen-foot ceilings and expansive glass requires more heat than an interior bedroom. A multi-zone radiant in-floor heating system solves this by grouping loops into distinct zones governed by dedicated thermostats.
Furthermore, water leaving a boiler might be 130 degrees, which is too hot for direct contact with sensitive flooring like hardwood or engineered planks. A thermostatic mixing valve, or a motorized three-way mixing valve, blends cool return water coming back from the floor with hot water coming from the boiler. This guarantees that water entering the radiant in-floor heating loops never exceeds the maximum safe temperature calculated for that specific floor covering.
Installation Substrates and Thermal Mass
The performance and responsiveness of radiant in-floor heating depend directly on how the tubing is installed in the floor assembly. Builders choose from four primary installation methods:
1. Embedded Slab-on-Grade
In this method, workers lay sheets of rigid foam insulation across a prepared gravel base, lay out welded wire mesh or reinforcing rebar, and tie the PEX tubing directly to the mesh. Then, they pour a standard four-inch to five-inch structural concrete slab over the top.
The entire concrete slab becomes a massive thermal sponge. Once heated, it holds warmth for hours, making it ideal for basements, detached workshops, and modern slab-on-grade custom homes.
2. Thin-Slab Gypsum Overpour
For framed wood subfloors on a second story or over a crawlspace, builders often choose a thin-slab overpour. Workers fasten PEX tubing directly to the plywood subfloor and pour a self-leveling mixture of gypsum concrete, commonly known as Gyp-Crete, at a thickness of 1.25 to 1.5 inches.
This creates a smooth, crack-resistant thermal mass that delivers even heat distribution without requiring the heavy structural engineering needed for standard concrete.
3. Dry Modular Aluminum Panels
When a homeowner does not want the weight or moisture of concrete in a framed home, dry modular panel systems provide an advanced alternative. Products like Warmboard or heavy grooved plywood panels are lined with factory-bonded aluminum sheets.
The installer screws the panels directly to the floor joists and snaps the PEX tubing into pre-cut grooves. Because aluminum conducts heat roughly four hundred times faster than concrete, dry radiant in-floor heating panels heat up rapidly and provide precise room-by-room temperature control.
4. Staple-Up and Joist Cavity Systems
In remodeling projects where existing hardwood or tile floors cannot be torn up, installers can fit radiant in-floor heating from underneath. Working in the basement or crawlspace, the crew attaches extruded aluminum heat transfer plates directly to the underside of the wooden subfloor and snaps PEX tubing into the plates.
Installers then pack thick fiberglass or rockwool batt insulation into the joist cavities beneath the tubing. The insulation drives the heat upward into the floor above, preventing energy from escaping into the crawlspace.
The Thermal Boundary Rule: Under-Slab and Edge Insulation
No matter how sophisticated your boiler or manifold is, radiant in-floor heating cannot work efficiently if you do not control where the heat travels. Heat follows the path of least resistance, moving from warm materials toward cold materials.
When installing radiant in-floor heating inside a concrete slab, you must install continuous rigid foam insulation, such as Extruded Polystyrene (XPS) or Expanded Polystyrene (EPS), directly underneath the slab and along all exterior slab edges. Under-slab insulation should provide a minimum thermal resistance of R-10, with R-15 to R-20 recommended for cold climates.
If a builder skips under-slab insulation, a massive percentage of the thermal energy produced by the radiant in-floor heating system will migrate downward into the cold earth beneath the foundation. That heat loss wastes money and leaves the living space feeling cold.
+-----------------------------------------------------------+
| [Finished Flooring: Tile, Stone, or Wood]                 |
| [Concrete Slab or Gypsum Bed with PEX Tubing Embedded]    |
|===========================================================|
| [Vapor Barrier Membrane]                                  |
| [R-10 to R-15 Rigid Foam Insulation Board]                |
|-----------------------------------------------------------|
| [Crushed Stone Gravel Base & Subsoil Earth]               |
+-----------------------------------------------------------+
Flooring Compatibility and The R-Value Blanket Limit
A common myth among home buyers is that you can only use tile with radiant in-floor heating. In reality, modern radiant in-floor heating works under almost any floor covering, provided you follow basic thermal rules during construction.
Conductive Winners: Stone, Tile, and Polished Concrete
These materials have high thermal mass and high thermal conductivity. They do not resist the flow of heat. When the tubing underneath warms up, tile and stone pull that heat upward quickly and radiate it into the room. They act as permanent thermal batteries, holding warmth long after the boiler or heat pump cycles off. Furthermore, stone and tile will never warp, shrink, or separate when subjected to seasonal temperature swings.
Hardwood Realities: Engineered vs. Solid Hardwood
Wood floors pair beautifully with radiant in-floor heating, but wood requires careful engineering because it expands and contracts when temperature and moisture change.
- Engineered Hardwood: Engineered wood flooring is the most stable choice for radiant in-floor heating. Because it is manufactured with multiple cross-laminated plies topped by a real hardwood wear layer, it resists the seasonal swelling and shrinkage that occurs with humidity changes.
- Solid Hardwood: Solid hardwood can be installed over radiant in-floor heating, but it requires strict attention to detail:
- Narrow boards, such as two-and-a-quarter to three-inch planks, perform significantly better than wide planks because expansion and contraction are distributed across more individual joints.
- Quartersawn lumber is far more dimensionally stable across its width than plainsawn lumber.
- The wood must be completely acclimated to the home’s operational humidity levels before installation.
- The mechanical controls for the radiant in-floor heating must include a floor surface temperature limit sensor set to shut down the zone if the wood surface reaches 80 to 82 degrees Fahrenheit. Heating wood beyond that limit can cause board shrinkage, surface checking, and permanent cupping.
The Carpet and Pad Bottleneck
Carpet and carpet padding are designed to be insulators. An insulator resists heat transfer, which makes carpet the natural enemy of radiant in-floor heating.
Putting thick carpet and dense foam padding over a heated floor is like throwing a heavy winter parka over a heating vent. The heat gets trapped inside the subfloor, driving heat downward into the crawlspace or framing while starving the room above.
If you must install carpet over radiant in-floor heating, follow these strict engineering limits:
- The total combined thermal resistance of the carpet and the pad should never exceed R-2.5.
- For optimal system performance, builders recommend keeping the combined value under R-1.5.
- Choose a thin, dense, high-conductivity carpet pad, such as commercial sponge rubber or felt, rather than a thick, airy bonded urethane foam pad.
Luxury Vinyl Plank and Laminate Considerations
Luxury Vinyl Plank (LVP) and high-density laminate floors have become popular in modern home construction. Most manufacturers approve their products for use over radiant in-floor heating, but you must read the product specifications carefully.
Most LVP brands require that the floor surface temperature never exceed 85 degrees Fahrenheit, with many capping the limit at 80 degrees. If radiant in-floor heating gets hotter than the manufacturer rating, the vinyl core can soften, leading to edge warping, joint separation, and off-gassing of volatile compounds.
When installing LVP over radiant in-floor heating, always install floor-sensing thermostats that strictly regulate and limit floor temperature.
Operational Realities: Living With Thermal Mass
Living in a home with radiant in-floor heating feels luxurious, but it requires a different mindset than living with a conventional forced-air system. The same physical properties that make in-floor heat comfortable also dictate how you run the equipment.
Thermal Inertia and Response Time
Thermal inertia refers to the speed at which a material absorbs and releases heat. Because radiant in-floor heating systems warm solid materials like concrete, gypsum, wood, and tile, they respond more slowly than systems that simply blow heated air.
- High-Mass Concrete Slabs: A four-inch concrete slab embedded with radiant in-floor heating tubing has high thermal inertia. If the slab is completely cold, it can take anywhere from four to eight hours to warm up to operating temperature. However, once that slab reaches its target temperature, it
holds that heat for many hours, smoothing out exterior temperature drops. - Low-Mass Dry Systems: Grooved aluminum subfloor panel systems have very low thermal inertia. Because aluminum transfers heat quickly, an aluminum-based radiant in-floor heating system can change room temperatures within thirty to forty-five minutes.
Understanding thermal inertia prevents homeowners from making common operating mistakes, such as turning the thermostat up ten degrees when they feel chilly, expecting immediate heat.
The Setback Myth: Why Set It and Forget It Wins
With standard forced-air systems, energy experts often tell homeowners to program setbacks, such as dropping the thermostat from 70 degrees down to 62 degrees while at work, and raising it back up in the evening.
With high-mass radiant in-floor heating, aggressive setbacks waste energy and undermine home comfort.
If you drop the temperature on a concrete slab system by eight degrees during the day, the slab cools down completely. When the thermostat calls for heat in the evening, the boiler must work at maximum output for five hours straight just to pump heat back into the slab before the room air warms up. By the time the floor is warm, you are going to bed, and the room may overheat in the middle of the night as the slab releases that stored energy.
For optimal efficiency with radiant in-floor heating, the best rule is simple: set it and forget it. Pick a comfortable temperature, such as 68 or 70 degrees, and leave the thermostat at that setting all winter long. The system will sip fuel steadily, keeping the floor’s thermal mass charged and maintaining continuous, even comfort.
The Cooling Limitation: Pairing with Cooling and Dehumidification
A frequent question from home buyers is whether radiant in-floor heating can also cool the home in the summer by pumping chilled water through the pipes.
While radiant cooling is used in dry desert climates or industrial facilities, it presents serious challenges in humid regions like East Tennessee. If you run 55-degree chilled water through a floor when the indoor relative humidity is high, the floor will reach the local dew point. The moment the floor drops below the dew point, water vapor condenses on the flooring.
Your hardwood, tile, or laminate floor will sweat, turning the floor into a slippery surface and encouraging mold growth under baseboards.
For this reason, high-end custom homes pair radiant in-floor heating with a completely independent cooling and air quality system:
- Ductless Mini-Splits or High-Velocity Ducted Systems: Provide targeted summer cooling and primary dehumidification.
- Whole-Home Dehumidifiers: Maintain indoor relative humidity below 50% through hot, humid summer months.
- Energy Recovery Ventilators (ERVs): Bring in fresh outdoor air, pre-cool it, and exhaust stale indoor air without losing climate control.
This combined approach provides the best of both worlds: silent, draft-free radiant in-floor heating in the winter, and crisp, dry air conditioning in the summer.
Common Questions About Radiant In-Floor Heating
When home buyers begin researching their heating options, several practical questions arise repeatedly. Here are direct, factual answers based on job site engineering.
Can radiant in-floor heating heat an entire house?
Yes, radiant in-floor heating can easily heat an entire house without any supplemental heating equipment.
To heat an entire house successfully, the heating system must be designed based on a professional Manual J heat load calculation. This calculation analyzes your home’s wall insulation, window quality, air infiltration rates, and ceiling heights to determine the exact number of BTUs each room loses on the coldest day of the year.
As long as the home has modern insulation, properly specified windows, and correct PEX tubing spacing, hydronic radiant in-floor heating can maintain comfortable indoor conditions even when outside temperatures drop well below zero.
Is radiant in-floor heating expensive to run?
Hydronic radiant in-floor heating is typically 15% to 30% less expensive to operate each month than a standard forced-air heating system.
These operational savings come from three distinct engineering advantages:
- No Duct Losses: Standard forced-air systems lose between 15% and 25% of their thermal energy through duct air leaks, conduction through sheet metal, and unconditioned attic spaces. Hydronic radiant in-floor heating uses closed, insulated fluid pipes with zero air leakage.
- Lower Water Temperatures: Condensing boilers and air-to-water heat pumps operate at peak mechanical efficiency when producing water between 90 and 110 degrees, compared to old systems that require 180-degree water.
- Lower Thermostat Settings: Because the floor is warm and the Mean Radiant Temperature is high, occupants feel comfortable at room air temperatures two to four degrees lower than in a home heated by forced air.
However, electric radiant in-floor heating systems are expensive to run if used over large areas. Electric resistance heating uses significant amounts of power. For that reason, electric floor heat should be limited to small, targeted rooms like primary bathrooms.
How long does it take for radiant in floor heating to heat up?
The time it takes for radiant in-floor heating to warm up depends entirely on the mass of the material surrounding the heating elements:
- Thick concrete slabs (4 to 5 inches): Cold start to full operating warmth takes between 4 and 8 hours.
- Gypsum concrete overpours (1.25 to 1.5 inches): Warmup takes between 1.5 and 3 hours.
- Dry grooved aluminum subfloor panels: Warmup takes only 30 to 45 minutes.
- Electric tile warming mats: The thin mortar bed under the tile warms up in 20 to 40 minutes.
What are the biggest disadvantages of radiant floor heating?
While radiant in-floor heating offers unmatched comfort, it has trade-offs that homeowners should weigh before building:
- Upfront Installation Cost: Hydronic radiant in-floor heating costs more to install than a basic forced-air heat pump system. The boilers, manifolds, PEX tubing, valves, and labor require a higher initial investment.
- Mechanical Complexity: A multi-zone hydronic system requires specialized mechanical knowledge to design, balance, and maintain over its operational life.
- No Cooling Capability: Radiant in-floor heating only heats your home. You must install a separate ducted or ductless system to provide summer air conditioning and indoor humidity control.
- Slower Temperature Adjustments: Because high-mass concrete floors retain heat for so long, you cannot rapidly cool down a warm room if the outdoor temperature swings unexpectedly from freezing to unseasonably warm in an afternoon.
Does radiant floor heating damage wood floors?
Radiant in-floor heating will not damage wood floors if the heating system is designed, installed, and operated according to industry standards.
Wood damage, such as cupping, cracking, or gapping between planks, only occurs when two mistakes are made:
- Excessive Water Temperatures: Supplying water that is too hot can drive moisture out of the wood too fast. Professional systems utilize automated mixing valves and floor-temperature limit sensors that physically cut off hot water flow if the subfloor exceeds 80 to 82 degrees Fahrenheit.
- Improper Acclimation: Installing wet wood over a dry slab, or dry wood over a green, un-cured concrete slab, causes floor issues. The slab must be fully cured, the radiant in-floor heating system must be commissioned beforehand to drive out residual concrete moisture, and the wood must acclimate to the home’s indoor humidity before fastening.
When engineered with appropriate temperature controls, radiant in-floor heating works reliably with both engineered wood and quality solid hardwood.
How long do radiant floor systems last?
The components inside the floor structure of a radiant in-floor heating system are built to last for decades.
- PEX Tubing: High-quality cross-linked polyethylene tubing (such as PEX-a) has no moving parts, does not scale or corrode, and carries an expected operating lifespan of more than 50 years.
- Electric Resistance Wire: When embedded permanently in mortar beneath tile, electric heating cables typically last 30 to 50 years, often outlasting the tile floor above them.
- Mechanical Equipment: The above-ground mechanical equipment, including condensing boilers, circulator pumps, motorized zone valves, and expansion tanks, has an average operational life of 15 to 25 years. Because these components are located in an open mechanical room, they can be serviced or replaced without disturbing the living space.
Field Checklist: The Builder Pre-Pour Verification
If you are building a custom home with radiant in-floor heating, the most critical day of the entire project is the day concrete or gypsum gets placed. Once that wet material cures, repairing a damaged pipe or fixing a design oversight is difficult and expensive.
Here is the exact pre-pour checklist our project managers use on-site to verify that a hydronic radiant in-floor heating installation will perform reliably for decades.
                    PRE-POUR VERIFICATION CHECKLIST
 [ ] 1. Heat Loss Verification: Room-by-room Manual J calculations matched to loop spacing.
 [ ] 2. Insulation Inspection: Continuous R-10 to R-15 foam with taped seams and thermal breaks.
 [ ] 3. Pressure Testing: Manifold pressurized to 60-100 PSI with gauge monitored continuously.
 [ ] 4. Physical Tubing Audit: Minimum bend radii respected; protective sleeves at expansion joints.
 [ ] 5. Photo Documentation: High-resolution photos of every loop with reference tape measures.
 [ ] 6. Sensor Conduit Placement: Rigid conduit installed for future floor temperature probes.
1. Room-by-Room Manual J Calculations
Never let a mechanical trade crew install radiant in-floor heating based on generic rules of thumb. Every room must have an engineered heat loss calculation.
Rooms with large window areas or exterior corners require tighter tubing spacing (often six-inch centers along exterior perimeters) to offset cold drafts, while interior spaces can transition to nine-inch or twelve-inch centers. The manifold plan must balance loop lengths, keeping every individual PEX run under 300 linear feet to avoid excessive fluid friction and pump strain.
2. Insulation Continuity and Thermal Breaks
Inspect every square foot of rigid foam underlayment before the tubing is tied down. The seams must be tightly fitted and taped to prevent wet concrete from leaking underneath the foam boards, which can lift the insulation during the pour.
Verify that thermal edge insulation stands vertically around the entire perimeter of the slab. This vertical perimeter insulation decouples the heated slab from the exterior foundation stem walls, keeping your heat from escaping directly outdoors.
3. Continuous Pressure Testing
This step is non-negotiable on any radiant in-floor heating job site. Before a concrete truck or gypsum pump arrives, the entire PEX tubing network must be filled with air or water and brought to test pressure, typically between 60 and 100 PSI.
The pressure gauge at the distribution manifold must be monitored before the pour begins, during the pour while workers are walking over the pipes, and for a full 72 hours after the pour is complete. If a concrete screed, shovel, or finishing tool punctures a pipe, the pressure gauge drops immediately, alerting the crew to find and fix the damage before the material hardens.
4. Physical Tubing and Sleeve Inspection
Walk the loops to ensure that no tubing was kinked during layout. While PEX-a can be repaired with a heat gun if kinked, any damaged section of PEX-b or PEX-c must be spliced using approved compression fittings.
Check that every PEX line passing through a planned concrete expansion or control joint is protected by a sturdy plastic or foam sleeve at least twelve inches long. These sleeves allow the concrete slab sections to shift and crack along control joints without pinching or shearing the embedded radiant in-floor heating tubing.
5. High-Resolution Photo and Drone Documentation
Before the first wheelbarrow of concrete rolls onto the site, document the entire radiant in-floor heating layout thoroughly.
Take high-resolution, wide-angle photographs and video of every single loop, zone, and manifold connection. Lay down physical tape measures across the subfloor so the photographs clearly show the exact distance of every PEX run from exterior walls, interior framing plates, plumbing cleanouts, and floor drains. Store these photos in your permanent home records so you know where it is safe to drill holes for future door stops, wall additions, or floor anchors.
6. Installing Floor Temperature Sensor Conduits
Thermostat floor sensor probes can occasionally fail after ten or fifteen years of service. If you embed a small electrical sensor wire directly into wet concrete, replacing it later requires chipping into the floor.
Instead, route a continuous piece of smooth, half-inch electrical conduit from the wall thermostat box directly down into the floor, terminating in a sealed sweep between two radiant in-floor heating tubing runs. The sensor probe can then be slid through the conduit into the floor. If the sensor ever fails, you can pull the old wire out and slide a brand-new sensor in place within five minutes, without damaging the floor covering.
The Verdict on In-Floor Warmth
A home is one of the largest financial investments you will ever make, and the mechanical systems you bury inside its walls and floors determine how comfortable you feel inside that home every single day.
Standard forced-air systems will always have a place in home building because they are cheap to install and easy to run. But if your goal is quiet efficiency, steady temperatures, and a house that feels inviting from the ground up, nothing compares to the engineering behind radiant in-floor heating. By turning your floors into gentle, low-temperature radiators, radiant in-floor heating delivers quiet, draft-free comfort that changes the way you experience your home.