
Ergonomic Kitchen Work Triangles
When you step into a kitchen to cook a meal, your body performs hundreds of small physical movements. You reach for food in the refrigerator, carry heavy pots to the sink, chop vegetables on a flat counter, and lean over a hot stove. In custom home building, the way these three major stations connect is called the work triangle. For nearly a century, builders have treated this layout as a simple geometric shape on a floor plan. However, true architectural design must look at human biology, joint movement, and posture.
When we design kitchen work triangles for custom homes, we cannot rely on one-size-fits-all measurements. A counter height that feels natural to a person who is six feet two inches tall will cause neck and shoulder pain for someone who is five feet one inch tall. Standard dimensions force our bodies to adapt to rigid wood and stone, when the wood and stone should adapt to us.
Designing height-specific kitchen work triangles means studying how the human spine rests, how arms swing, and how steps are taken across a room. By understanding anthropometrics, which is the study of human body measurements, we can build custom kitchens that eliminate physical strain. In this comprehensive guide, we will break down the science of counter elevations, station spacing, biophilic material selection, and structural rough-in details. Whether you are building a new mountain home in Johnson City, a craftsman build in Kingsport, or renovating a historic home in Bristol, properly configured kitchen work triangles will transform how your home supports your daily health.
+-------------------------------------------------------------------------+
|                  THE ANTHROPOMETRIC WORK TRIANGLE                       |
|                                                                         |
|                          [ COLD STORAGE ]                               |
|                       (Pantry / Refrigerator)                           |
|                               /     \                                   |
|                              /       \                                  |
|            Clear Prep Path  /         \  Unobstructed Travel            |
|            42" - 54" Aisle /           \ 42" - 54" Aisle                |
|                           /             \                               |
|                          /               \                              |
|           [ PREPARATION & SINK ] -------- [ COOKING & THERMAL ]         |
|             Counter: ERH - 4" to 6"           Counter: ERH - 7" to 9"   |
|             (Deep Basin + Task Deck)          (Drop-in Range / Cooktop) |
+-------------------------------------------------------------------------+
The Biomechanics of Food Preparation and The Failure of Standard Dimensions
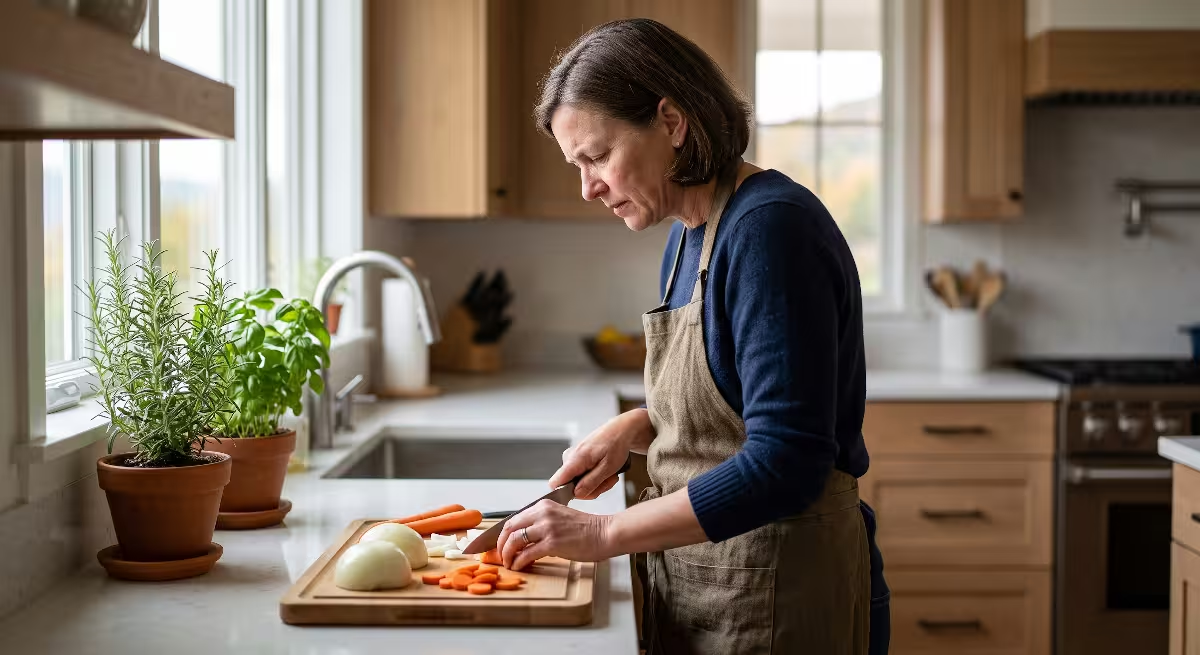
Every time you prepare a meal, your musculoskeletal system carries a mechanical load. When you stand over a counter, your spine maintains your center of gravity. If the counter is even two inches too low, you must bend your head and tilt your upper back forward. This posture creates what physical therapists call forward head carriage and lumbar torque. The muscles along your neck, shoulders, and lower back must work continuously just to keep you from falling forward. Over months and years, this constant muscle activation causes chronic fatigue, joint inflammation, and back pain.
The standard kitchen counter height in North America is 36 inches off the finished floor. This number did not come from an ergonomic study of your individual spine. It was established in the 1940s as a standard manufacturing guideline based on the average height of women at that time. Today, human statures vary widely across households, yet production builders still install 36-inch base cabinets everywhere. When standard layouts are used, kitchen work triangles fail to provide true physical comfort because they force different human bodies onto a single fixed plane.
       POOR ERGONOMICS                      NEUTRAL SPINE ALIGNMENT
   (Standard 36" Counter)                    (Custom Height Counter)

         O  [Head tilted down]                     O  [Head balanced]
        /|\ [Back hunched forward]                /|\ [Spine upright]
       / | \                                     / | \
      /  |  \ [Forearms bent down]              ---|--- [Forearms 90°-105°]
         |                                         |
        / \                                       / \
     ========= [36" Fixed Deck]                ========= [Elbow Height - 4"]
To solve this problem in custom home construction, we look at the baseline metric known as Elbow-Rest Height. To find this measurement, a person stands naturally in their typical footwear with their upper arms hanging loosely at their sides and their elbows bent at a 90-degree angle. The distance from the floor to the bottom of the elbow represents the primary reference line for all manual tasks. In properly planned kitchen work triangles, the primary food preparation counter should sit four to six inches below the user’s elbow height. This clearance allows the forearms to work within a neutral angle of 90 to 105 degrees, keeping the shoulders relaxed and the spine completely upright.
           CALCULATING YOUR OPTIMAL COUNTER ELEVATIONS

   Standing Floor Level
      |
      +---> Measure: Floor to Under-Elbow = Elbow-Rest Height (ERH)
      |
      +---> Prep / Knife Station Height  = ERH minus 4" to 6"
      |
      +---> Heavy Mixing / Rolling Deck  = ERH minus 7" to 8"
      |
      +---> Cooktop / Range Deck Height  = ERH minus 7" to 9"
      |
      +---> Sink Rim Working Height      = ERH minus 2" to 3"
A single counter height also fails because different kitchen tasks require completely different body mechanics. Consider three common cooking actions:
- Fine precision tasks, such as peeling fruit or decorating pastries, are easiest when the work surface is higher, around three to four inches below elbow height, bringing the items closer to eye level without requiring neck flexion.
- Heavy downward force tasks, like kneading bread dough or carving meat, require upper body leverage, which works best when the counter sits seven to eight inches below elbow height.
- High-sided vessel cooking, such as managing a deep stockpot on a burner, requires looking down into the pot, meaning the burner surface must sit lower than the surrounding food prep counters.
When custom builders install uniform horizontal surfaces across an entire kitchen, the workflow suffers. Effective kitchen work triangles must incorporate stepped work surfaces that match these distinct vertical demands.
Re-Engineering the Work Triangle for Variable Human Scales
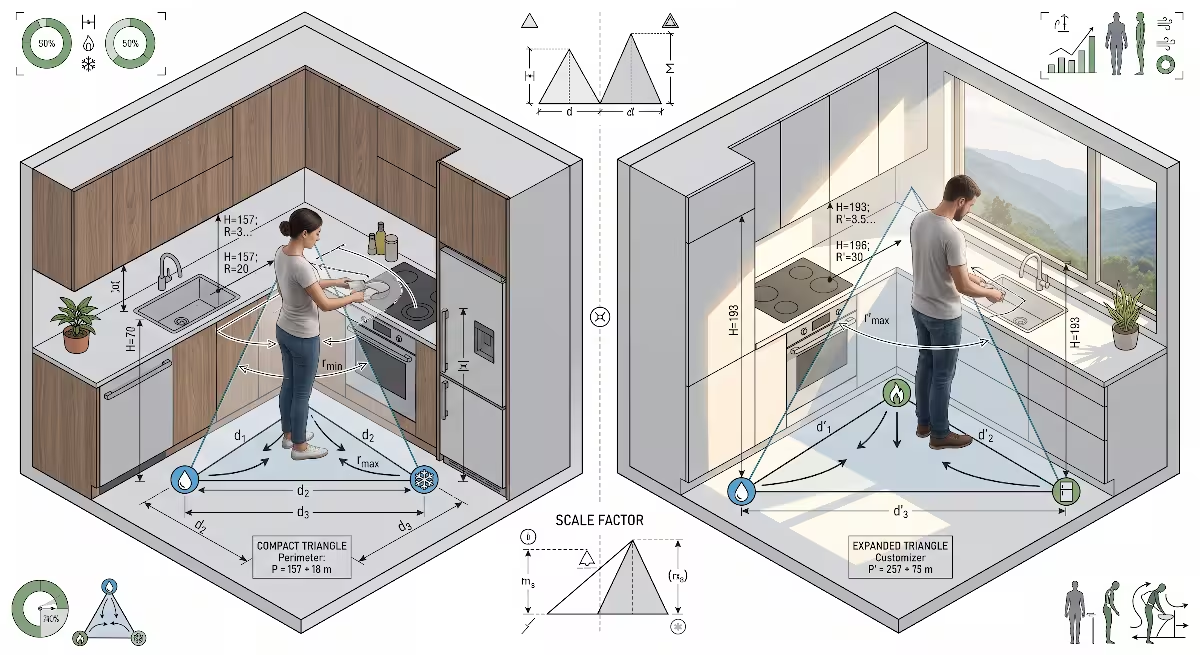
The traditional concept of the kitchen work triangle was developed by the University of Illinois School of Architecture in the late 1940s. Its primary goal was to save steps by connecting the three core work hubs: the refrigerator (storage), the sink (cleaning and preparation), and the stove (cooking). The original guideline stated that the three legs of the triangle should total between 13 and 26 feet, with no single leg measuring less than four feet or more than nine feet.
While the geometric footprint of this rule remains a useful starting point, classic kitchen work triangles do not account for step size, body rotation, or reach envelopes. A person who is five feet tall takes shorter steps and has a shorter forward reach than someone who is six feet four inches tall. If the path between the sink and the refrigerator is eight feet long, a shorter cook must take five or six steps to cross it, while a taller cook crosses it in three. When you repeat that journey thirty times while preparing a large dinner, the energy difference is substantial. Modern kitchen work triangles must balance these physical distances with the body dimensions of the primary users.
             FUNCTIONAL REACH ENVELOPES AT WORKSTATIONS

          [ Maximum Reach: 24" - 28" (Shoulder Extension) ]
        -----------------------------------------------------
        [ Comfortable Reach: 14" - 18" (Forearm Sweep)     ]
      ---------------------------------------------------------
      [ Primary Grip Zone: 8" - 12" (Hands in Neutral Rest)    ]

                           ( USER POSTURE )
To create high-efficiency kitchen work triangles, we must look at how each of the three vertices functions on its own:
1. The Cold Storage Vertex
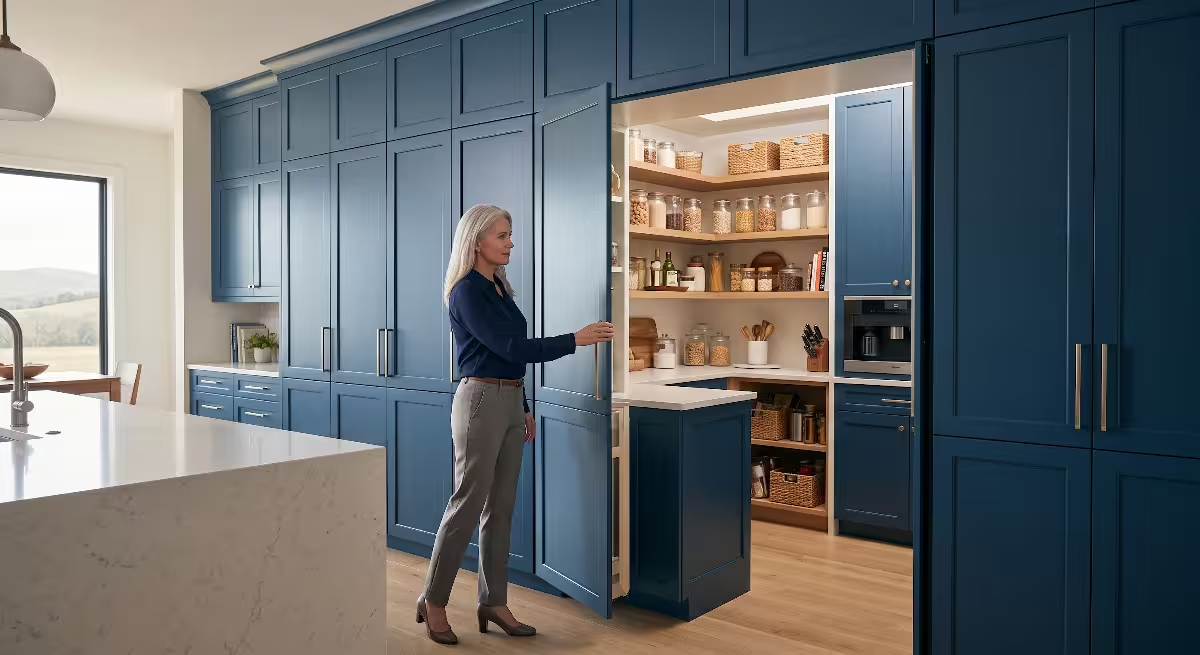
The refrigerator and pantry hub serves as the entry point for raw ingredients. The physical movement here involves lifting items of various weights and transferring them to a landing surface. In height-tailored kitchen work triangles, the primary landing zone next to the refrigerator should match the user’s comfortable reach envelope. The reach envelope is the area a person can reach comfortably without bending their back or straining their shoulders. Deep shelves placed higher than 72 inches force shorter users to stretch onto their toes, while low crisper drawers set near the floor force taller cooks to bend double. Custom builds address this by using tall base cabinet pull-outs, intermediate drawer refrigeration, and vertical pantry layouts that place frequently used ingredients between knee height and eye level.
2. The Prep and Sink Vertex
The sink and prep counter is where a cook spends up to 60 percent of their active time in the kitchen. This station presents a unique physical challenge: while the counter rim might sit at 36 inches, the actual work happens at the bottom of the sink basin, which is often eight to ten inches deeper. A tall homeowner working at a standard 36-inch counter must bend forward to touch the bottom of a ten-inch undermount basin, creating immediate lower back fatigue. In height-optimized kitchen work triangles, the sink elevation must be calculated based on the basin depth. For taller individuals, the sink rim should be raised to 38 or 40 inches. For shorter individuals, using an integrated sink ledge with a drop-in cutting board allows food prep to happen right at the ideal counter level without losing basin capacity.
       DEEP SINK ERGONOMIC DEFICIT (TALL USER AT 36" COUNTER)

                O    <-- Head bent 35 degrees forward
               /|\   <-- Thoracic spine under continuous load
              / | \
             /  |  \
           =====|===== <-- 36" Standard Counter Rim
           |   | |   |
           |   | |   | <-- 10" Basin Depth = 26" Real Working Plane
           |____v____|     (Forces severe lumbar flexion)
3. The Thermal Vertex
The range or cooktop represents the heat and transformation zone. The working height here is not the top of the counter, but the top rim of your pans and pots. When you place a six-inch-deep pot on a standard 36-inch counter, the actual cooking surface is 42 inches in the air. For a shorter cook, stirring the bottom of that pot requires raising the elbow and shoulder into an unnatural wing-like position, causing rapid shoulder fatigue. In thoughtful kitchen work triangles, the cooktop should be dropped two to three inches lower than the adjacent food prep surfaces. This step-down keeps the top of tall pots below shoulder level, giving the cook comfortable visibility and better mechanical leverage when stirring or lifting heavy pans.
           STEP-DOWN COOKTOP ALIGNMENT FOR SAFE VISIBILITY

     [ Prep Deck ]                [ Cooking Zone ]
       37" Height                   34" Height           [ Pan Rim at 40" ]
   +----------------+           +----------------+        +==============+
   |                |           |   [Cooktop]    |        |  6" Stockpot |
   |  Food Cutting  |           +----------------+        +--------------+
   |  & Preparation |           | Base Cabinet   |        | Drop-down    |
   |  Station       |           | Drop-down Box  |        | Burner Deck  |
   |                |           |                |        |              |
Clearance paths between these three hubs determine how freely you can move through your space. In standard builds, walkways are often squeezed down to 36 inches. In custom kitchen work triangles, single-cook walkways should maintain a minimum clear width of 42 inches, while dual-cook households require 48 to 54 inches. These clearances ensure that open appliance doors, pull-out trash bins, and moving family members never block the flow between the three primary stations.
Stature-Specific Custom Build Specifications for Kitchen Work Triangles
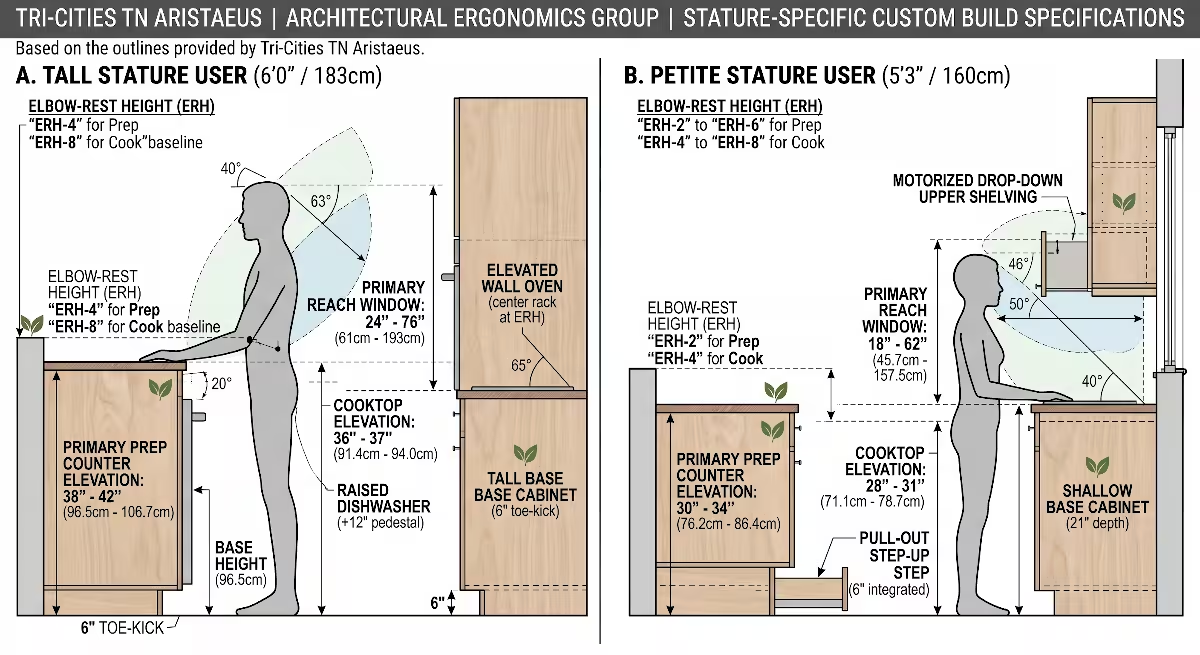
When building a custom home, every physical element can be tailored to the dimensions of the homeowner. By breaking away from factory cabinet standards, we can build custom kitchen work triangles that fit tall users, petite users, and households with multiple cooks of different statures.
+---------------------------------------------------------------------------------------------------------+
|                              STATURE-BASED SPECIFICATION MATRIX                                         |
+---------------------+-------------------+-------------------+-------------------+-----------------------+
| Anthropometric      | Primary Prep Deck | Cooktop Surface   | Primary Reach     | Core Structural       |
| User Profile        | Elevation (ERH-4")| Height (ERH-8")   | Envelope          | Millwork Adaptation   |
+---------------------+-------------------+-------------------+-------------------+-----------------------+
| Tall Stature        | 38" to 42"        | 35" to 37"        | 24" to 76" from   | 6" toe-kicks;         |
| (> 6'0" / 183 cm)   |                   |                   | finished floor    | +12" raised dishwash; |
|                     |                   |                   |                   | elevated wall ovens   |
+---------------------+-------------------+-------------------+-------------------+-----------------------+
| Petite Stature      | 31" to 34"        | 28" to 31"        | 16" to 62" from   | Pull-out step decks;  |
| (< 5'3" / 160 cm)   |                   |                   | finished floor    | motorized upper drop; |
|                     |                   |                   |                   | 21" shallow bases     |
+---------------------+-------------------+-------------------+-------------------+-----------------------+
| Multi-Height        | Split-tier        | 33" to 34" with   | Zoned / Dual      | Stepped islands;      |
| Household           | 34" and 39"       | induction top     | Independent       | dual prep sinks;      |
|                     | stations          |                   | Stations          | motorized worktables  |
+---------------------+-------------------+-------------------+-------------------+-----------------------+
Tall Stature Design (> 6’0″)
For tall homeowners, standard cabinetry creates continuous physical strain. When tall cooks lean over low work surfaces, they round their thoracic spine and strain their neck muscles. To build ergonomic kitchen work triangles for tall homeowners, we apply several key modifications:
- Raise base cabinet boxes to 38, 40, or 42 inches using tall framing boxes or six-inch toe-kicks rather than standard four-inch kicks.
- Install dishwashers on raised structural platforms, lifting the appliance 10 to 14 inches above the floor. This eliminates the deep forward bend usually needed to load the bottom rack.
- Position wall ovens and built-in microwaves so the center rack sits precisely at elbow height, allowing heavy roasts to be lifted horizontally without spine bending.
- Elevate ventilation hoods to 32 to 36 inches above the cooking deck so taller cooks have an unobstructed view of the rear burners without bumping their foreheads.
          RAISED DISHWASHER PLINTH DETAIL FOR TALL COOKS

          +-----------------------------+
          |                             |
          |     Standard Dishwasher     |  <-- Controls at 48" Height
          |     Wash Unit               |
          |                             |
          +-----------------------------+
          | [ Pull-Out Storage Drawer ] |  <-- 12" Raised Plinth Base
          +=============================+      Eliminates deep bending
          | Finished Flooring Surface   |      for bottom rack access
Petite Stature Design (< 5’3″)
For shorter cooks, standard kitchen counters create constant shoulder elevation, forcing the arms to work in a raised position that restricts blood circulation. In petite-tailored kitchen work triangles, we implement specialized millwork details:
- Lower primary chopping and prep decks to 31, 32, or 33 inches from the finished floor.
- Lower the cooktop station to 28 to 30 inches, allowing easy sightlines and safe, direct leverage over high-sided pots.
- Reduce upper cabinet mounting heights so the bottom shelf begins 14 inches above the counter rather than the standard 18 inches.
- Install motorized drop-down shelving hardware or internal pull-down baskets inside upper wall cabinets, bringing items down 12 inches into easy reach.
- Reduce base cabinet depth in secondary stations from 24 inches to 21 inches, allowing the user to reach the back wall without leaning over the counter edge.
       DROP-DOWN UPPER CABINETRY (PETITE USER ACCESSIBILITY)

       +-----------------------+
       | Upper Cabinet Shell   |
       |  +-----------------+  |
       |  | Drop-Down Shelf |  |
       |  | Mechanism       |  |
       |  +--------|--------+  |
       +-----------|-----------+
                   |
                   v   Lowers shelf contents 12" downward and 10" forward
               [=======] into comfortable, unassisted reach zone
Multi-Height Households
Most custom homes house multiple family members of different heights. In these settings, designing static kitchen work triangles around a single measurement creates a compromise where neither cook is fully comfortable. The solution is creating zoned, multi-height stations:
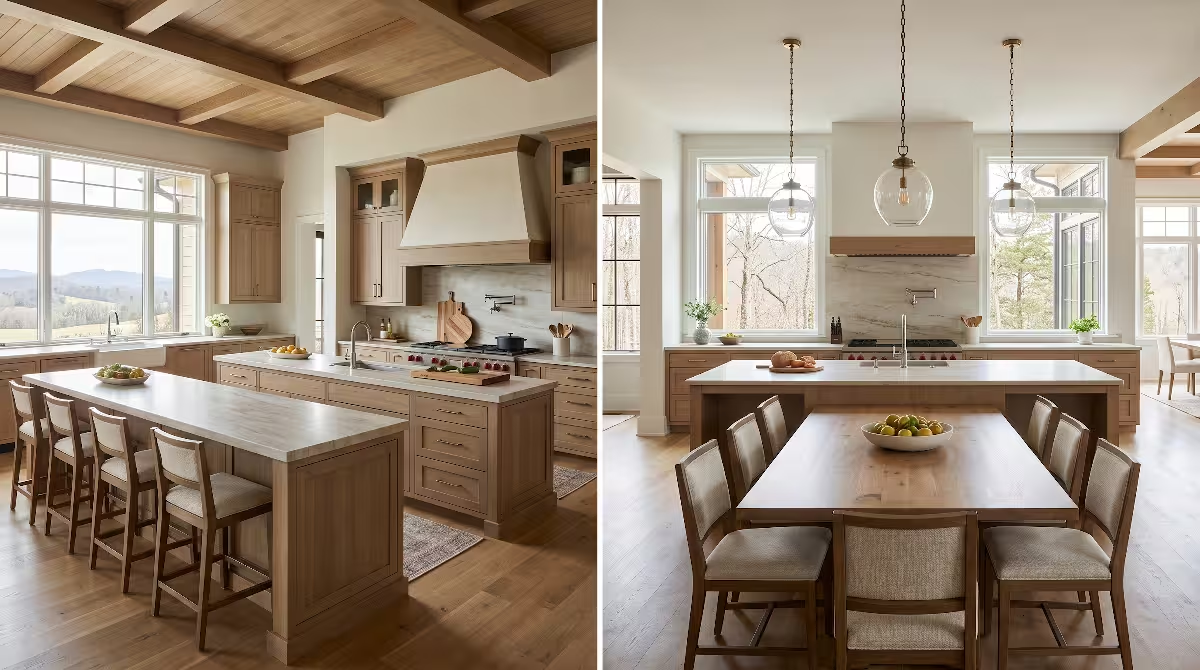
- Build a stepped kitchen island with two distinct surface levels. One side features a 39-inch prep deck for the taller cook, while the opposite side or connected peninsula drops to a 33-inch surface for the shorter cook or baking tasks.
- Integrate two separate prep sinks into the kitchen work triangles, placing one at each elevation to support multiple cooks working simultaneously.
- Use induction cooktops flush-mounted into a 34-inch counter. Induction surfaces stay cool to the touch outside the pan area, allowing the surface to double as a prep counter when burners are turned off.
- Incorporate motorized adjustable-height island sections. These heavy-duty screw-drive lifts, hidden inside custom millwork columns, allow a four-foot section of butcher block or stone to move smoothly from 30 inches to 42 inches at the touch of a button.
          STEPPED ISLAND PROFILE FOR MULTI-HEIGHT HOMES

          [ 39" Tall Prep Station ]
          +-----------------------+
          | Hardwood Butcher Block|
          | (Taller Cook Station) |  [ 33" Low Baking / Prep Station ]
          |                       |  +-------------------------------+
          | Base Cabinet Structure|  | Quartzite Surface             |
          |                       |  | (Shorter Cook Station)        |
          +-----------------------+  +-------------------------------+
          | Standard 4" Toe Kick  |  | Standard 4" Toe Kick          |
          +=======================+==+===============================+
Biophilic Flow and Spatial Geometry in East Tennessee Architecture
Biophilic design is the practice of connecting buildings and their occupants with nature. In the Appalachian mountains and rolling ridge-and-valley topography of the Tri-Cities, our homes sit within a distinct natural environment. When we design custom kitchen work triangles, we do not simply place boxes along interior drywall. We align human movement inside the home with sunlight patterns, outdoor views, and organic regional materials.
               CIRCADIAN SOLAR WORK TRIANGLE ALIGNMENT

                   [ EAST / MORNING SUNLIGHT ]
                                |
                                v
               +---------------------------------+
               |  Primary Prep & Sink Vertex     |
               |  (Morning Task Preparation)     |
               +---------------------------------+
                               \
                                \   Natural Light Corridor
                                 \
   [ SOUTH SOLAR AXIS ] -------- [ CENTRAL ISLAND ]
                                 /
                                /   Evening Warmth Corridor
                               /
               +---------------------------------+
               |  Thermal Cooking Vertex         |
               |  (Evening Meal Preparation)     |
               +---------------------------------+
                                ^
                                |
                   [ WEST / DUSK AMBIENT GLOW ]
Circadian Sunlight Alignment
The human body operates on a natural 24-hour biological clock called the circadian rhythm. Morning exposure to blue-rich natural daylight boosts cortisol, increases alertness, and supports healthy metabolism. Late-day exposure to warm, low-angle light encourages melatonin release, preparing the body for deep sleep. In East Tennessee custom homes, we orient the legs of the kitchen work triangles to follow these solar vectors:
- Position the primary prep sink and main preparation counter along an East-facing or Southeast-facing exterior wall with large windows. This arrangement bathes the cook in natural morning light during breakfast and early meal prep.
- Place the cooking and thermal station where it receives indirect southern or western light during late afternoon and evening meal preparation, avoiding harsh direct sun glare while maintaining a connection to the setting sun.
- Avoid placing key preparation vertices in dark, enclosed interior corners where the cook must rely entirely on artificial fluorescent or low-quality LED lighting.
Regional Tactile Materials
Biophilic architecture uses natural textures to reduce stress and create a sensory connection to the outdoors. The materials we touch while moving between the stations of our kitchen work triangles have a direct impact on our physical comfort:
- Use locally sourced Appalachian hardwoods, such as White Oak, Black Walnut, or Sugar Maple, on primary prep islands. Wood has a natural cellular structure that absorbs sound, provides a warm touch, and yields slightly under the feet and hands, reducing muscle strain compared to cold, hard surfaces.
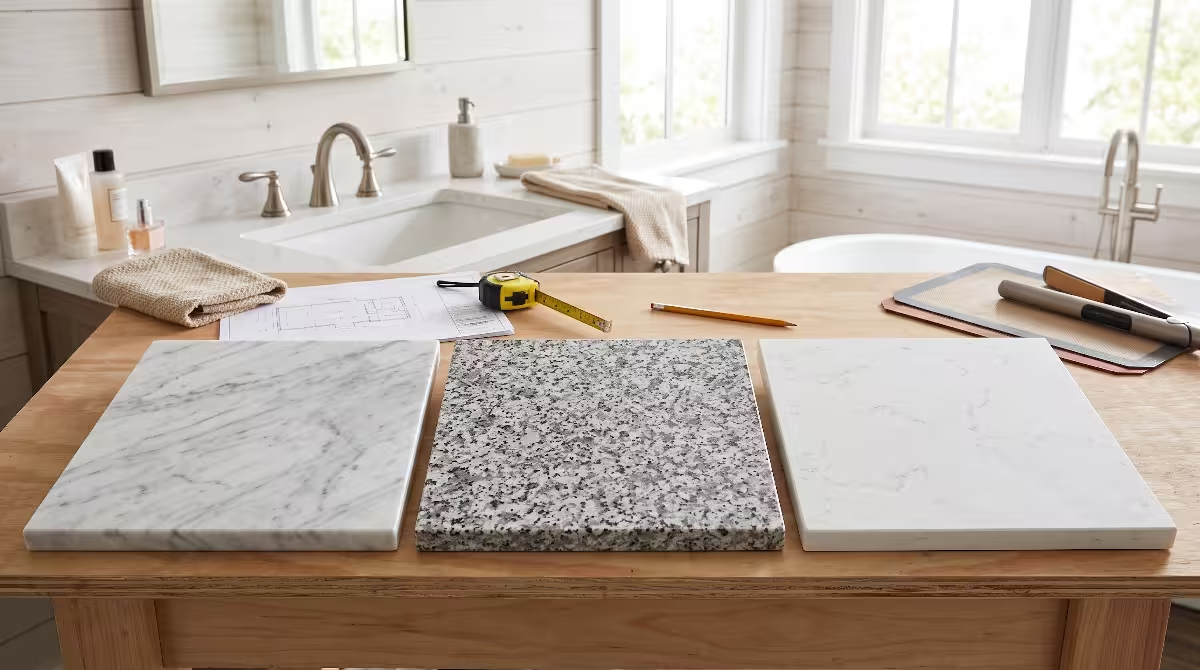
- Select matte, honed, or leathered stone surfaces like regional soapstone or natural quartzite for counters. High-gloss polished granite creates sharp specular glare under recessed lights, causing subtle eye fatigue during precision knife work. Honed stone scatters light gently, creating a calm visual workspace.
- Install continuous natural cork or end-grain wood flooring through the primary walking corridors of your kitchen work triangles. These natural materials provide shock absorption for the ankles, knees, and lower back during long hours of food preparation.
              SPECULAR REFLECTION VS. HONED LIGHT DIFFUSION

    High-Gloss Countertop (Glare)          Honed Natural Stone (Comfort)

         \     Light Ray     /                  \     Light Ray
          \                 /                    \
           \               /                      \  .  :  .  : (Scattered)
     =======v=============^=======          =======v=============v=======
     [ Concentrated Eye Strain ]            [ Soft, Diffused Visual Ease ]
Visual Prospect and Refuge
In architectural psychology, “prospect” refers to an open, expansive view that allows a person to survey their environment, while “refuge” refers to a safe, enclosed space that provides comfort. Balancing prospect and refuge reduces subconscious stress:
- Position the main prep vertex of your kitchen work triangles on a central island looking outward through expansive window walls toward the Holston Mountain range, Roan Mountain, or rolling woodland lots. This orientation lets the cook look up from detailed knife tasks and refocus their eyes on distant horizons, relieving ocular strain.
- Keep the cooking station backed against a solid wall or sheltered architectural alcove to provide a feeling of stability and physical protection while handling open heat and hot liquids.
Frequently Asked Questions about Kitchen Work Triangles
How do you calculate the ideal kitchen counter height for your body?
To find your ideal food prep height, measure your standing Elbow-Rest Height while wearing your everyday house shoes. Stand straight, relax your shoulders, and bend your elbow to 90 degrees. Have someone measure the distance from the floor to the underside of your elbow. Subtract four inches for light prep work and chopping stations. Subtract seven inches for heavy mixing, kneading, or cooktop decks. If you plan to use an extra-thick wood butcher block cutting board, remember to subtract the board’s thickness from the base cabinet height so the final working surface sits at your target elevation.
       STEP-BY-STEP CALCULATION WORKFLOW

       1. Stand upright in normal kitchen shoes.
       2. Bend elbow to 90 degrees; measure from floor to elbow underside.
       3. Baseline Elbow Height (e.g., 43 inches).
       4. Subtract 4 inches for general preparation = 39-inch finished counter.
       5. Subtract 7 inches for range/cooktop deck = 36-inch finished burner top.
       6. Subtract 2.5 inches for heavy butcher block = 36.5-inch raw cabinet top.
Can a kitchen island serve as a primary vertex in kitchen work triangles?
Yes. In modern custom architecture, the kitchen island frequently houses either the primary prep sink or the main cooking surface, making it an active vertex. When placing a vertex on an island, ensure that the path connecting it to the other two wall stations remains clear of family traffic routes. If the island holds the sink, locate the trash pull-out and dishwasher within the same island structure to keep the preparation and cleaning cycle self-contained within that single leg of the layout.
            ISLAND VERTEX CIRCULATION PATTERN

            [ Perimeter Wall: Refrigeration & Dry Pantry ]
                                  |
                                  | 48" Primary Clear Aisle
                                  v
            +-------------------------------------------+
            |  CUSTOM ISLAND (Primary Prep & Sink)       |
            |  [ Dishwasher ] [ Sink ] [ Trash Pullout] |
            |  38" High Counter                         |
            +-------------------------------------------+
                                  ^
                                  | 48" Secondary Clear Aisle
                                  |
            [ Perimeter Wall: Thermal Cooking Hub ]
What is the difference between a work triangle and a dynamic work zone?
A classic work triangle links three specific appliances: the sink, the refrigerator, and the range. A dynamic work zone expands this concept into larger functional areas: Conserve (refrigeration and pantry), Prepare (sinks, cutting zones, small appliance garages), Cook (ranges, ovens, warming drawers), Clean (dishwashers, trash sorting, drying racks), and Serve (island seating and dishware storage). In larger custom homes, kitchen work triangles act as the geometric core inside these broader functional zones, ensuring that multiple cooks can work in different zones simultaneously without crossing paths.
+-------------------------------------------------------------------------+
|                  FIVE-ZONE DYNAMIC KITCHEN LAYOUT                       |
|                                                                         |
|  [ CONSERVE ]  -->  [ PREPARE ]  -->  [  COOK  ]  -->  [  SERVE  ]     |
|   Pantry &           Prep Sink &       Range &          Plating &       |
|   Cold Storage       Cutting Deck      Wall Ovens       Buffet Island   |
|         ^                                                   |           |
|         |                                                   v           |
|         +----------------<  [  CLEAN  ]  <------------------+           |
|                             Dishwashers                                 |
|                             & Waste Hub                                 |
+-------------------------------------------------------------------------+
How can custom kitchen work triangles accommodate aging-in-place?
Designing for lifetime accessibility does not require an institutional look. In custom homes, we incorporate Universal Design principles seamlessly into the layout:
- Install multi-level counters that allow a cook to work comfortably from either a standing position or while seated on an ergonomic stool.
- Build roll-under open knee spaces beneath the primary prep sink and food prep deck, finishing the interior with decorative hardwood panels that match the cabinetry.
- Specify full-extension, soft-close drawer bases instead of deep lower cabinets with fixed shelves, bringing all stored items out into full view without requiring kneeling.
- Choose wide, continuous D-shaped handles or integrated touch-latch hardware rather than small, slippery knobs that are difficult for arthritic fingers to grip.
          CONCEALED ROLL-UNDER ACCESSIBLE PREP STATION

          +-------------------------------------------+
          | Finished Hardwood Countertop Deck (33" H) |
          +-------------------+---+-------------------+
          | Shallow Drawer    |   | Shallow Drawer    |
          +-------------------+   +-------------------+
          |                                           |
          |   Open Knee Clearance Recess              |
          |   (30" Wide x 27" High Clear Opening)     |
          |   Finished with matching rear wood veneer |
          |                                           |
          +===========================================+
How do custom counter heights affect future home resale value?
Homeowners often worry that non-standard counters will hurt resale value. In custom luxury builds, thoughtful ergonomic design is a premium selling feature when executed with balance. Using stepped multi-height islands provides surfaces for both tall and shorter future buyers. Furthermore, custom cabinet bases can be built with modular, removable toe-kick plinths. If a future owner wants to change the counter height from 39 inches back to 36 inches, a carpenter can simply remove the custom base spacer without damaging the fine cabinetry or stone tops.
Mechanical, Electrical, and Millwork Implementation Details
Designing height-tailored kitchen work triangles requires precise coordination during the framing, rough plumbing, and millwork phases of construction. Standard installation guides do not account for custom elevations, so architects, builders, and trades must work from coordinated dimensional drawings.
           MODULAR ADJUSTABLE BASE PLINTH SYSTEM

       +---------------------------------------------+
       | Custom Base Cabinet Box (31" High)          |
       |                                             |
       |                                             |
       +---------------------------------------------+
       | Removable Modular Leveling Plinth (3" to 7")|  <-- Height adjusted
       +=============================================+      here without
       | Subfloor & Finished Hardwood Layer          |      cabinet changes
Custom Cabinetry Framing
Standard production base cabinets use a fixed 30.5-inch box sitting on an integrated 4.5-inch toe-kick, topped with a 1.5-inch stone slab to reach the traditional 36-inch finished height. For custom builds, we separate the cabinet box from the toe-kick plinth:
- Build structural leveler bases from 3/4-inch exterior-grade plywood on site, setting the plinth height between two inches (for petite kitchens) and seven inches (for tall kitchens).
- Set full-height custom cabinet boxes on top of this independent plinth, locking them to wall studs with heavy-duty structural screws.
- For extended island cantilever overhangs designed for seated food prep, reinforce the substructure with hidden, solid 1/2-inch cold-rolled steel support plates routed flush into the top of the cabinet frames. This provides rigid support for heavy natural stone without requiring obstructive knee posts.
          CONCEALED CANTILEVER STEEL SUPPORT DETAIL

          [ 3cm Natural Quartzite Slab ]
       =================================================
       ------------[ 1/2" Steel Plate ]-----------------  <-- Embedded
       +-------------------------+                     |      in frame
       | Cabinet Face Frame      |  Clear Seating Area |
       |                         |  Under Counter      |
       | Base Cabinet Body       |                     |
Rough Plumbing Adjustments
Raising or lowering the sink vertex in kitchen work triangles directly changes the rough-in plumbing heights inside the wall cavity:
- In a raised 40-inch sink counter with a deep 10-inch undermount basin, the drain outlet of the sink sits at 29 inches above the floor. If the rough-in drain pipe inside the wall is installed at the standard 16-inch center, the vertical drop is excessive, which can lead to noisy draining and siphon issues.
- In a lowered 32-inch accessible sink, a deep basin drops the sink drain outlet down to 22 inches. The wall sanitary tee must be roughed in lower, at 12 to 14 inches off the subfloor, to ensure the P-trap has adequate fall into the branch drain line.
- Water supply lines must be roughed in four inches higher for elevated sink stations to allow easy shut-off valve operation without long, looping supply hoses.
           ROUGH PLUMBING HEIGHTS FOR VARYING COUNTERS

   Standard (36" Deck)       Tall Custom (40" Deck)     Low Custom (32" Deck)

    [ Counter Top: 36" ]      [ Counter Top: 40" ]       [ Counter Top: 32" ]
    | Basin Rim: 34.5"        | Basin Rim: 38.5"         | Basin Rim: 30.5"
    | Drain Base: 25.5"       | Drain Base: 29.5"        | Drain Base: 21.5"
    |                         |                          |
    | [Supply: 20" AFF]       | [Supply: 24" AFF]        | [Supply: 16" AFF]
    | [San Tee: 16" AFF]      | [San Tee: 18" AFF]       | [San Tee: 12" AFF]
   ===================       ===================        ===================
Ventilation Hood Capture and Sizing
When the thermal cooking vertex in your kitchen work triangles is dropped to a comfortable 32 or 34 inches, the distance between the burners and the overhead range hood increases:
- Residential building codes and manufacturer guidelines specify that a range hood must sit between 24 and 36 inches above the cooking surface. If the hood is mounted too high, cooking fumes and vaporized grease escape into the home; if it is mounted too low, it blocks the cook’s sightlines.
- When using a lowered cooktop deck, install a ventilation hood that is six inches wider than the cooking surface (for example, a 42-inch hood over a 36-inch cooktop). This wider capture area traps the expanding thermal grease plume effectively across the greater vertical distance.
- Calculate ventilation blower power based on the extended capture distance. For custom high-output gas or induction cooking zones, specify blowers rated for 600 to 1,000 Cubic Feet per Minute (CFM), paired with a dedicated makeup air damper system to balance indoor air pressure in modern, tightly sealed homes.
               EXPANDING THERMAL GREASE PLUME DYNAMICS

               +--------------------------------------+
               |   42" Range Hood Capture Canopy      |  <-- 6" Wider
               +--------------------------------------+      than cooktop
                     \                          /
                      \   Expanding Heat Cone  /
                       \                      /   32" - 34" Clean Sightline
                        \                    /    Vertical Distance
                         \                  /
                     +--------------------------+
                     | 36" Lowered Cooktop Deck |
                     +--------------------------+
Task Lighting and Glare Control
Illuminating the paths and vertices of your kitchen work triangles requires a layered lighting strategy that avoids shadows and harsh direct glare:
- Install under-cabinet architectural LED channel lighting with a high Color Rendering Index (95+ CRI) and a neutral, daylight-balanced color temperature of 3000K to 3500K. This lighting should be placed near the front bottom edge of the upper cabinets, angled backward toward the wall, illuminating the prep surface evenly without shining directly into the cook’s eyes.
- For stepped islands, use dedicated ceiling recessed downlights with 30-degree beam spreads, positioned directly over the work zones rather than behind the cook’s standing position. This placement prevents the cook’s head and shoulders from casting shadows over cutting boards and stoves.
- Use matte-finish aluminum extrusions and frosted micro-prismatic light diffusers to eliminate individual LED diode reflections on polished counter surfaces, creating an even, comfortable visual field throughout the kitchen.
              TASK LIGHTING POSITIONING OVER PREP DECK

            ( Recessed Ceiling Fixture )
                        |
                        | Direct Downward Beam (30 Deg Spread)
                        v
                 +--------------+
                 | Upper Cabin  |
                 | [LED Channel]| ---> Light angled back to wall
                 +--------------+
                        |
                        v
                 ================  <-- Clean, Shadow-Free Work Surface
Building a custom home gives you the opportunity to look beyond standard builder practices and create a space tailored to your daily life. When you design kitchen work triangles around human biology, proper vertical clearances, and natural regional materials, your kitchen becomes an inviting, strain-free center for cooking and gathering.
By taking the time to measure your reach envelopes, calculate your elbow heights, and coordinate your mechanical rough-ins during the design phase, you invest in your long-term health and daily comfort. A home built around your body and connected to the beauty of the East Tennessee landscape provides lasting joy and effortless function for years to come.