

Your front entry is far more than a simple door. It is the architectural focal point of your entire front of the house. It is the threshold where structural craftsmanship meets personal hospitality.
When autumn rolls into the Appalachian Highlands, our hardwood ridges ignite in deep amber, burnt copper, and crimson. Many homeowners want to bring that seasonal warmth directly to their door. However, store shelves are flooded with flimsy, mass-produced plastic pieces that feel artificial and tear apart in the first brisk mountain breeze. In custom home building, we never compromise on materials or construction methods, and your front porch decor deserves that same thoughtful approach.
Building a rustic appalachian fall garland by hand allows you to combine native botanical beauty with sound structural techniques. In this detailed guide, we will walk step by step through measuring your entry, foraging authentic native elements, assembling a durable framework, anchoring the piece securely without harming your door trim, and weatherproofing it so it stays vibrant from September through Thanksgiving.
The Entrance as an Elevation Focal Point
In custom home design, the front entrance carries the highest visual weight of any exterior feature. When architects draft an elevation, every line, roof pitch, and column proportion directs the eye straight toward the front door. The doorway provides a sense of arrival. It tells guests what kind of care and attention to detail they will find on the other side.
When you install seasonal decor, your front door serves as the frame. A thin, cheap trim piece gets swallowed up by wide siding boards, tall stone pediments, and broad covered porches. On the other hand, a substantial rustic appalachian fall garland frames the trim casing properly. It adds natural texture, visual depth, and rich shadow lines that complement your siding, brickwork, and paint choices.
By treating your doorway as an architectural elevation, you create harmony between your home structure and the wild beauty of our East Tennessee hills. A balanced display feels intentional, solid, and welcoming.
The Appalachian Mountain Aesthetic
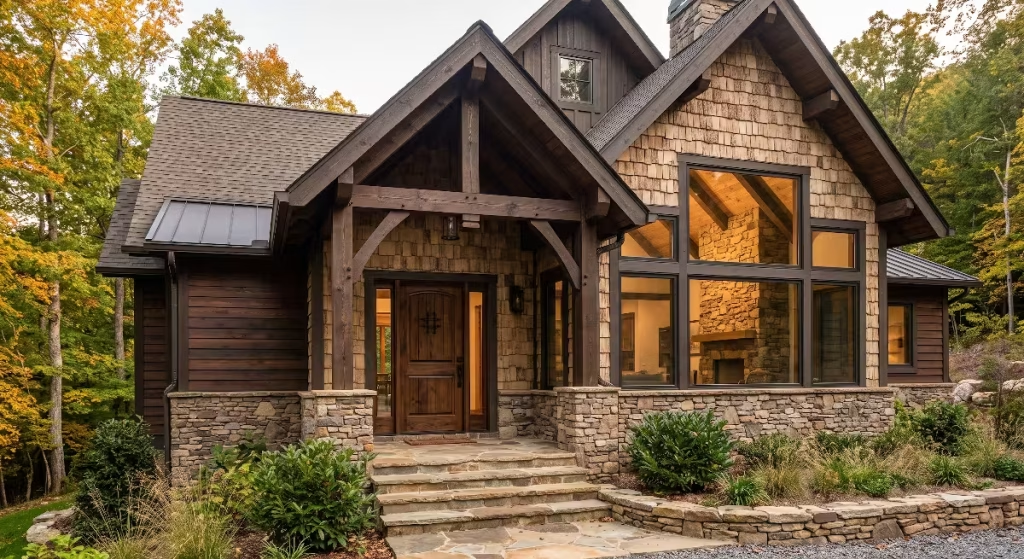
The Appalachian aesthetic is deeply rooted in resourcefulness, natural balance, and regional authenticity. Our mountain ancestors did not buy disposable seasonal accents. They stepped outside into the woods and hollows to harvest what the land offered.
Authentic mountain style is never glossy or stiff. It is textured, weathered, and layered. A genuine rustic appalachian fall garland relies on wild grapevine, sturdy white pine, dry hydrangeas, acorn caps, and textured sweetgum pods. These components tell a local story.
When you source native textures, you introduce colors that naturally complement the regional stone and timber commonly used in Appalachian architecture. You capture the earthy browns of weathered barn wood, the dusty greens of rhododendron and hemlock, and the soft cream tones of field grass. That honest connection to the land is what gives mountain curb appeal its enduring charm.
Project Overview
Before we pick up our pruners, let us review the scope of this project. A properly built rustic appalachian fall garland is an engineered assembly. It needs a rigid spine to hold its shape, flexible ties to bind the layers, and durable materials that withstand direct sunlight, rain, and autumn gusts.
We will build this piece in three stages:
- Constructing the core framework using wild grapevine or heavy natural rope.
- Layering evergreen branches, dried native florals, and mountain accents.
- Anchoring the finished piece to your doorway using non-invasive hardware that prevents wood rot, moisture traps, or surface scratches.
This project is beginner-friendly, requires zero power tools, and takes approximately two to three hours to assemble once your materials are prepared.
Measuring for Proportion and Scale
In carpentry, accurate measurements prevent costly mistakes. In garland design, measuring ensures your installation looks balanced rather than skimpy or overwhelming.
Start by measuring the exterior dimensions of your door casing:
- Measure the vertical height of both side jambs from the porch floor to the top corner of the trim.
- Measure the horizontal width across the head jamb (the top horizontal trim board).
For a standard 3 foot wide by 6 foot 8 inch tall exterior door, your trim perimeter measures roughly 7 feet on each side and 3.5 feet across the top. Adding those together gives you 17.5 linear feet. If you have an 8 foot custom door or double entry doors with a glass transom window overhead, your total perimeter can easily exceed 22 to 26 linear feet.
When calculating your materials, you must account for the drape factor. A garland should never be pulled bone-tight like a drumstring. It needs a relaxed sweep across the upper lintel and gentle returns down the sides. To achieve this graceful look, add a 15 to 20 percent length allowance to your total measurement. For a standard 17.5 foot door trim, aim for an 18 to 20 foot rustic appalachian fall garland. Having slightly extra length lets the base pool softly at the porch floor beside your planters.
Tools and Structural Materials List
Gathering the right tools ahead of time keeps your workspace organized and ensures every component is mechanically sound.
Structural Framework
- Wild grapevine coil or 3/4-inch unbleached jute rope: 18 to 22 linear feet. The grapevine provides a self-gripping natural lattice, while jute rope offers a flexible, heavy-duty core.
- Green paddle floral wire (22-gauge): This gauge provides the perfect balance of tensile strength and pliability. It bends easily without snapping in cold weather.
- UV-resistant black or green zip ties (8-inch): Use these for primary structural connections. Sunlight quickly degrades standard interior cable ties, so choose UV-stabilized nylon.
- Natural jute twine: For tying delicate stems and blending visible connection points.
Hanging and Fastening Hardware
- Heavy-duty outdoor adhesive hooks or spring-tension garland hangers: Ensure adhesive hooks are rated for exterior temperature swings.
- Padded brick clips: If your door is framed by exterior brick or stone veneer, these clips clamp directly onto the mortar joint without any drilling.
- Clear silicone bumper pads: These small peel-and-stick cushions prevent branch friction against painted wood trim.
Hand Tools
- Bypass hand pruners: For clean branch cuts without crushing plant stems.
- Heavy-duty wire cutters: Never use your good pruner blades on floral wire.
- Heavy leather work gloves: Essential for protecting your hands from thorns, rough bark, and sap.
- Standard 25-foot tape measure: For verifying spans and branch cluster spacing.
Native and Regional Foraging Guidelines
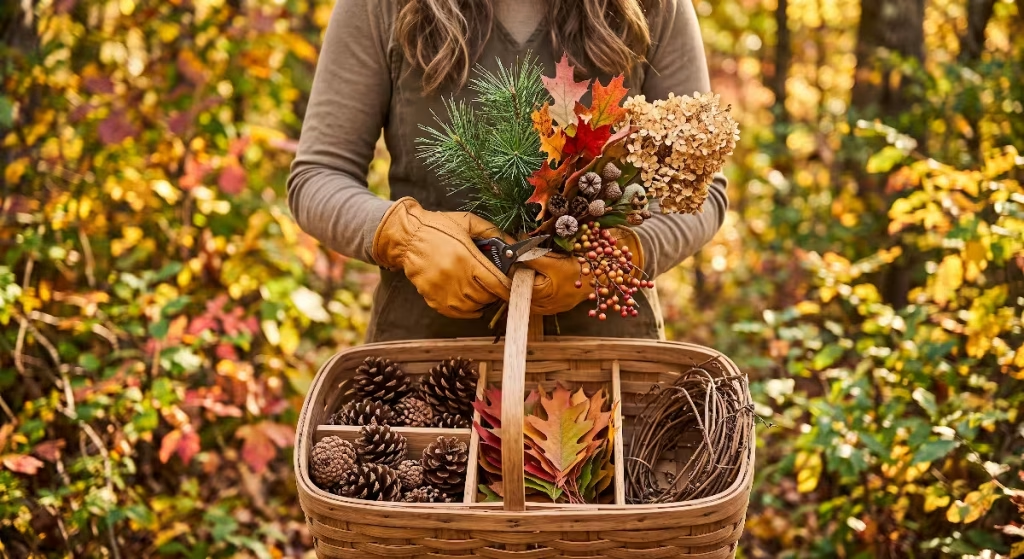
One of the great pleasures of building a rustic appalachian fall garland is gathering materials directly from nature. Our regional forests, fence rows, and home gardens offer an incredible variety of textures.
When gathering materials, follow these guidelines:
- Conifer foliage: Snip small branches of Eastern white pine and hemlock. Their flexible needles add soft volume and provide a natural base.
- Hardwood branches: Look for fallen oak, sweetgum, and red maple branches that still carry their leaves.
- Cones and seedpods: Collect Fraser fir cones, white pine cones, spiky sweetgum burrs, and thick hickory nut husks.
- Dried garden florals: Snip dried Annabelle hydrangeas or PeeGee hydrangeas. In early fall, their flower heads turn a lovely antique parchment and dusty sage hue.
- Ornamental grasses: Gather dried plumes of switchgrass, little bluestem, or Indian grass from field borders.
Always practice responsible foraging. Only harvest on your own property or where you have explicit permission. Snip judiciously, taking only a few small clippings from any single plant so it continues to thrive.
Pest and Moisture Remediation (The Builder’s Step)
In home construction, we never install wet lumber or materials that might harbor wood-boring insects. You should apply that same standard to the organic elements in your rustic appalachian fall garland.
Wild pinecones, seed pods, and dried branches often carry small outdoor insects, spider eggs, and hidden moisture. If you hang moist materials directly against a painted door jamb, you risk trapping condensation, causing mildew, or even staining your exterior paint.
Follow this simple cleaning process:
- Oven baking for pinecones and seedpods: Line a large baking sheet with aluminum foil. Spread your cones, sweetgum burrs, and acorn caps in a single layer. Place them in your oven at 200 degrees Fahrenheit for 40 to 45 minutes. This gentle heat dries out sticky sap, kills hidden insect eggs, and causes closed pinecones to fan open into full, gorgeous shapes. Keep an eye on them throughout the process.
- Moisture inspection for branches: Gently shake all foraged branches over an outdoor tarp to dislodge loose debris, dust, and dried soil. Inspect each stem for fungal growth or decay. Discard any brittle, rotting pieces.
- Dehydrating garden florals: Hang hydrangea stems upside down in a dark, dry garage or basement for 4 to 5 days before assembly. This locks their stem stiffness and keeps the petal clusters intact during wire attachment.
Accents with Mountain Heritage
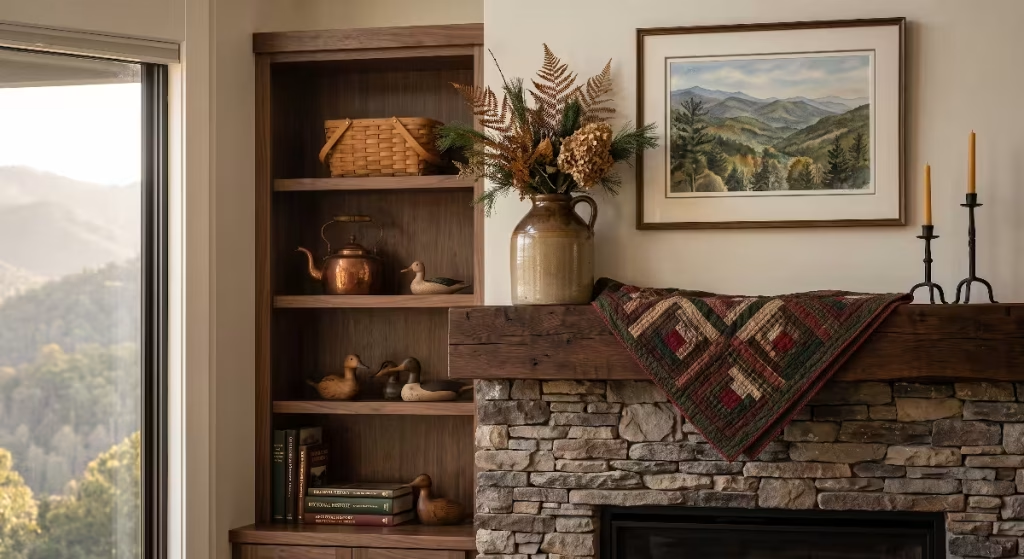
To elevate your project from a basic greenery swag to an authentic rustic appalachian fall garland, incorporate subtle accents that honor traditional mountain crafts.
- Frayed natural burlap ribbon: Choose untreated, open-weave jute burlap. Cut it into 4-inch wide strips and gently pull two or three threads along the edges to create a soft, rustic fringe.
- Weathered copper bells: In old Appalachian mountain settlements, forged livestock bells were everyday items. Small antiqued copper or brass cowbells tied into your garland corners add historic charm and a pleasant chime in the breeze.
- Dried heritage corn husks: Pale cream corn husks gathered into fan shapes provide striking color contrast against deep green pine boughs and dark brown cones.
- Cinnamon sticks and dried orange slices: Bundle three to four long cinnamon sticks with jute twine for warm visual texture and a gentle seasonal fragrance.
Step 1: Establishing the Structural Spine
Every sound structure needs a dependable foundation. For this project, that foundation is your structural spine.
Lay your grapevine coil or 3/4-inch jute rope flat along an outdoor patio or clean garage floor. If using wild grapevine, it may feel stiff and brittle straight from storage. If needed, spray it lightly with water from a garden hose and let it rest for 20 minutes to restore flexibility.
Uncoil the vine until it matches your total required length (door perimeter plus your drape allowance). Trim off excessively wild, unruly tendrils with your bypass pruners, but leave enough interlaced branching to catch your wire ties.
If you prefer using jute rope, tie a secure 2-inch loop at each end using an overhand knot. These end loops will serve as primary anchoring eyelets when you lift the finished rustic appalachian fall garland into place. Use your tape measure to mark three critical reference points along the spine with small pieces of bright painter tape: the exact center (which aligns with the top door keystone) and the two upper corner bends.
Step 2: Layering the Evergreen and Foliage Bed (Base Layer)
With your structural spine laid out flat, it is time to build the background greenery layer. This foliage bed hides the underlying core, protects your door trim from rough branch edges, and creates visual depth.
In carpentry, directional flow matters, and the same principle applies here. Foliage should mimic natural growth:
- Along the top horizontal section, orient your evergreen stems so they sweep inward from both outer corners, meeting gracefully at the marked center point.
- Along both vertical legs, orient your evergreen tips pointing downward toward the porch floor. This allows the boughs to cascade naturally with gravity.
Gather small bundles of white pine, hemlock, and oak foliage. Each bundle should have three to four small sprigs, about 8 to 10 inches long. Wrap the stem base of each bundle securely with 22-gauge paddle floral wire.
Attach the bundles to your grapevine spine one by one, overlapping each new bundle over the stems of the previous one like shingles on a roof. Pull the floral wire snug around both the bundle stem and the spine. For high-wind areas, reinforce every third bundle with an 8-inch UV-resistant zip tie. Snip off any excess zip tie tails cleanly with your wire cutters.
Step 3: Integrating Focal Clusters and Appalachian Elements (Middle Layer)
Now that your base greenery is secure, you can add your character pieces. This middle layer gives your rustic appalachian fall garland its distinctive mountain personality.
Instead of scattering single pinecones or flowers randomly along the garland, organize them into focal clusters. Groupings of three or five items look far more balanced and natural to the human eye:
- Hydrangea anchors: Place dried hydrangea heads at the two upper corners of the garland and one right at the center point. Wire them deeply into the grapevine base so their delicate stems are protected by the surrounding pine needles.
- Pinecone and seedpod medallions: Group two large white pine cones with three sweetgum burrs. Wrap paddle wire firmly around the base scales of the pinecones and twist the wire ends together to form a sturdy stem. Push this wire stem directly through the grapevine weave and twist it around the back of the spine.
- Woodland branch accents: Tuck small twigs of colorful maple leaves or yellow birch into the bundles. Let these twigs extend slightly outward beyond the evergreen base to create an airy, three-dimensional silhouette.
Step back every few minutes to review your work from six to eight feet away. Check for visual balance, making sure neither side feels noticeably heavier than the other.
Step 4: Softening with Textiles and Movement (Top Layer)
The final construction step adds softness, movement, and refined mountain charm. A fully wooden and evergreen garland can look stiff without textiles to break up the hard lines.
Take your frayed 4-inch burlap ribbon. Rather than wrapping it tightly around the garland like a bandage, weave it through the branches in loose, gentle loops. Let the ribbon dip behind a cluster of pinecones, emerge over an evergreen bough, and cascade downward.
At the two top corners, secure a loose, two-loop shoestring bow made from burlap or earthy green velvet ribbon. Allow the ribbon tails to hang down 18 to 24 inches along the vertical sides. When autumn breezes sweep across your front porch, these soft fabric tails will sway gently, adding life and movement to your entryway display.
If you are using antique copper bells, tie them to the corner ribbon knots with natural jute twine. Ensure they rest against soft pine boughs rather than directly against your painted door trim to prevent scuffing.
Surface-Specific Attachment Methods
Generally the most common surface damage is caused by improperly hung decor. Nails, screws, and cheap metal staples puncture wood casings, pierce composite jambs, and crack delicate mortar joints. Each puncture creates an entry point for rainwater, leading to rot, paint peeling, and expensive repairs.
You can safely hang a heavy rustic appalachian fall garland without putting a single nail hole into your trim:
Painted Wood and Composite (PVC) Casings
Use heavy-duty exterior adhesive hooks rated for at least 5 pounds each. Thoroughly clean the mounting spot on your trim with a 50/50 mix of water and rubbing alcohol to remove dust and porch grime. Let the surface dry completely before applying the adhesive strips.
For maximum security on standard doors, consider an adjustable spring-tension garland hanger. This metal bar fits snugly inside the door jamb using outward spring pressure and padded rubber feet, leaving zero marks on your paint.
Brick and Stone Veneer
Never drill into exterior brick or mortar joints for seasonal items. Instead, use tempered steel brick clips. These clips hook under the bottom edge of a standard brick and grip the top edge with spring tension. They install in seconds, hold up to 25 pounds, and snap off cleanly when the season ends.
Metal and Fiberglass Doors
If you are framing a door casing that sits flush against metal siding or metal lintels, heavy-duty neodymium magnetic hooks provide incredible holding power without adhesives or fasteners.
Wind-Load Mitigation
Our East Tennessee autumn weather can shift rapidly. A calm, 70-degree afternoon in early October can turn into a gusty mountain cold front overnight, bringing 30-mile-per-hour wind gusts down off the ridges.
A loosely secured garland acts just like a sail. Wind catches behind the broad greenery, slapping the branches against your house siding and eventually tearing the fasteners loose.
To eliminate wind movement, secure your rustic appalachian fall garland using a five-point structural anchor plan:
- Anchor Point 1 (Top Center): Secures the crown at the center of the head jamb to carry the horizontal weight.
- Anchor Points 2 and 3 (Top Left and Right Corners): Lock down the critical 90-degree transitions where wind catches most easily.
- Anchor Points 4 and 5 (Bottom Terminations): Fasten both vertical legs roughly 8 to 12 inches above the porch floor.
By locking down the bottom ends, you prevent the vertical sides from swaying sideways like a pendulum during high winds. Additionally, stick small clear silicone bumper pads to the back of your grapevine spine every two feet. These soft pads lift rough twigs slightly off your door trim, preventing vibration rub marks while allowing air to circulate freely.
Preserving Botanicals Against Rain and Sun
Prolonged exposure to direct UV sunlight and damp autumn air can cause organic materials to fade and turn brittle over time. A south-facing front entry without a deep porch roof takes the brunt of this weathering.
To extend the fresh appearance of your rustic appalachian fall garland, apply a protective seal before hanging:
- UV and moisture barrier: Lay the finished garland flat on an outdoor drop cloth. Spray the foliage and florals lightly with an exterior-grade matte acrylic craft sealer or a specialized floral anti-desiccant spray. This clear coating seals microscopic pores in the needles and leaves, locking in cellular moisture and preventing needle drop.
- Avoid heavy, glossy sprays: Never use high-gloss polyurethane or thick lacquer. Glossy coatings reflect light unnaturally, ruining the authentic mountain look, and can cause dried hydrangea petals to turn yellow.
- Periodic hydration: If you experience an unusually dry, warm October spell, mist the evergreen portions of the garland with cool water from a clean spray bottle once a week in the early morning.
Extending Life from September through Thanksgiving
A well-constructed rustic appalachian fall garland can easily evolve through the entire autumn season with just a few minor adjustments.
September: The Early Harvest Look
Focus on warmer early-season tones. Emphasize dried hydrangeas, golden switchgrass, pale corn husks, and lighter green pine boughs. This pairing complements late-summer porch planters and sunny September afternoons.
October: Peak Mountain Foliage
Introduce deep amber tones. Tuck fresh cuttings of brilliant red maple branches and burnt-orange oak leaves directly into the existing floral wire ties. The dried grapevine core will securely grip these additional stems.
November: The Late Autumn Transition
As Thanksgiving approaches and deciduous leaves drop, remove any dried maple leaves that have become brittle. Replace them with extra white pine boughs, magnolia leaves, bundles of long cinnamon sticks, and rich burgundy ribbons.
This modular approach protects your initial investment of time and materials, keeping your front entryway fresh and welcoming all season long.
How do you hang heavy garland around a front door without damaging trim?
Homeowners often ask how to safely hang heavy decorations without leaving permanent scars on their exterior trim. As someone who builds and installs custom entry frames, I recommend avoiding mechanical fasteners like nails, staples, or drywall screws entirely.
The most reliable non-invasive method for standard door frames is an exterior spring-tension garland bar. This tool functions like a heavy-duty shower curtain rod designed specifically for exterior door jambs. You adjust the width to match your jamb opening, turn the tension rod until the padded rubber ends press firmly against the wood stops, and hang the garland directly on the integrated hooks. It holds up to 20 pounds safely, leaves no holes, and prevents paint peeling.
For doors without deep inner jamb stops, use exterior-rated adhesive hooks designed specifically for low temperatures. Clean the trim surface thoroughly with isopropyl alcohol before mounting. When it is time to take the display down, pull the adhesive tab straight downward along the trim surface to release the bond without stripping your finish paint.
How long will a DIY fresh fall garland last outdoors?
The lifespan of your outdoor garland depends largely on your balance of dried versus fresh organic components, as well as your porch roof depth:
- Dried elements and grapevine cores: Wild grapevine, baked pinecones, sweetgum burrs, and dried hydrangeas will easily last through the entire three-month autumn season. In fact, you can pack these components away in a dry storage container and reuse them for several years.
- Fresh evergreen and foliage cuttings: Fresh white pine, hemlock, and hardwood clippings typically stay vibrant for three to five weeks outdoors. If your front door sits beneath a deep covered portico that shields it from afternoon sun and rain, fresh cuttings can last six weeks or longer.
If you want your rustic appalachian fall garland to look flawless from mid-September through Thanksgiving Day, build the permanent base using dried grapevine, cones, and preserved florals. Then, simply refresh the small evergreen bundles once in late October to carry the display through your holiday celebrations.
How many feet of garland do I need for a standard front door?
Determining the correct length comes down to a straightforward architectural formula. Measure your three primary door dimensions: the left vertical trim jamb, the top horizontal header, and the right vertical trim jamb.
For a standard residential single door measuring 3 feet wide by 6 feet 8 inches tall (roughly 7 feet with exterior trim):
Left Jamb (7 ft) + Header (3.5 ft) + Right Jamb (7 ft) = 17.5 linear feet
However, you should never buy or build a garland that matches your doorway perimeter exactly. A flat, tight garland looks rigid and skimpy.
To achieve a classic drape with soft corner curves and slight pooling at the porch floor, add a 15 to 20 percent drape allowance to your baseline measurement:
17.5 ft 1.15 = 20.125 ft
Plan to build an 18 to 20 foot rustic appalachian fall garland for a standard single doorway. If you have a larger 8-foot entryway, double entry doors, or an arched transom window, your total length requirement will increase to 24 to 28 linear feet.
How do you keep outdoor garland from blowing away in high winds?
Preventing wind damage requires solid anchor spacing and proper tension management. Wind damages garlands when it gets behind loose vertical sections, repeatedly whipping the branches back and forth until fasteners snap.
To keep your garland secure in gusty weather:
- Anchor at five distinct points: Do not rely only on two top corner hooks. You must anchor the top center, both upper corners, and both vertical legs roughly one foot above the porch floor.
- Minimize the sail effect: Keep the profile of your garland relatively close to the door casing rather than building an excessively wide, bushy arrangement that catches every passing breeze.
- Use UV-stabilized ties: When securing the grapevine core to mounting brackets or tension bars, use heavy-duty UV-stabilized zip ties rather than standard household twine, which can fray and snap in damp, windy conditions.
- Weight the bottom returns: If you prefer your garland to pool onto the porch floor, place a heavy decorative iron lantern or a 15-pound heirloom pumpkin directly over the bottom stems on each side. This provides a steady base that holds the vertical legs in place.
Balancing the Threshold
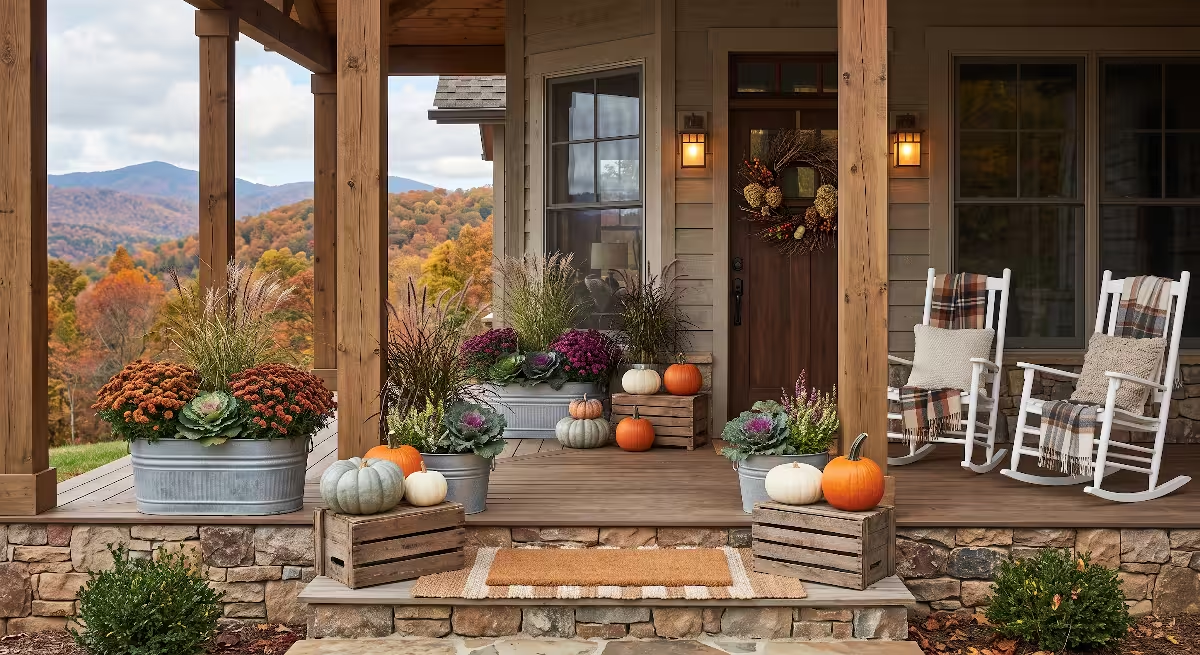
A stunning entryway garland should not exist in isolation. In high-end exterior design, we focus on layered composition. The garland frames the upper elevation, but your threshold and porch floor anchor the lower elevation.
To create a balanced look, carry the Appalachian mountain theme all the way down to the porch decking:
- Heirloom squash and pumpkins: Skip standard bright orange carving pumpkins in favor of heirloom varieties with muted, architectural tones. Look for ribbed blue Jarrahdale pumpkins, pale green Long Island Cheese squash, and rich terracotta Cinderella pumpkins. Arrange them in cascading clusters around the garland bases.
- Vintage orchard accents: Use weathered wooden apple crates or galvanized metal wash tubs turned upside down as display risers. Placing potted bronze or burgundy chrysanthemums at varied heights creates an appealing visual transition from the ground up to your door.
- Cohesive lighting: Check the color temperature of your exterior porch sconces. Cool white LED bulbs (4000K to 5000K) create a harsh glare that washes out warm autumn tones. Switch to warm white bulbs (2700K) to highlight the rich amber leaves, deep pine needles, and textured burlap of your rustic appalachian fall garland, greeting family and friends with true mountain hospitality.
Crafting Summary and Seasonal Care Guide
To help you plan your build and keep your entry looking sharp all season, keep this quick reference guide handy at your workbench:
| Project Phase | Primary Materials Needed | Key Builder Tip | Estimated Time |
| 1. Preparation | Tape measure, notepad, pruners | Add 15-20% drape allowance to trim perimeter | 15 minutes |
| 2. Remediation | Sheet pans, aluminum foil, oven | Bake cones at 200°F for 40-45 minutes to clear pests | 45 minutes |
| 3. Spine Assembly | Wild grapevine or 3/4″ jute rope | Mark center point and corners with painter’s tape | 20 minutes |
| 4. Greenery Base | Pine/hemlock boughs, 22g wire | Angle branches downward on verticals, inward on header | 45 minutes |
| 5. Accent Styling | Cones, dried hydrangeas, burlap | Group items in clusters of 3 or 5 for balance | 40 minutes |
| 6. Installation | Tension bar or exterior brick clips | Secure at 5 structural points to withstand winds | 30 minutes |
With sound construction methods, authentic regional materials, and proper non-invasive hardware, your front entryway will celebrate the finest craftsmanship and seasonal beauty our Appalachian home has to offer. Enjoy the project, take pride in your work, and have a wonderful autumn season.