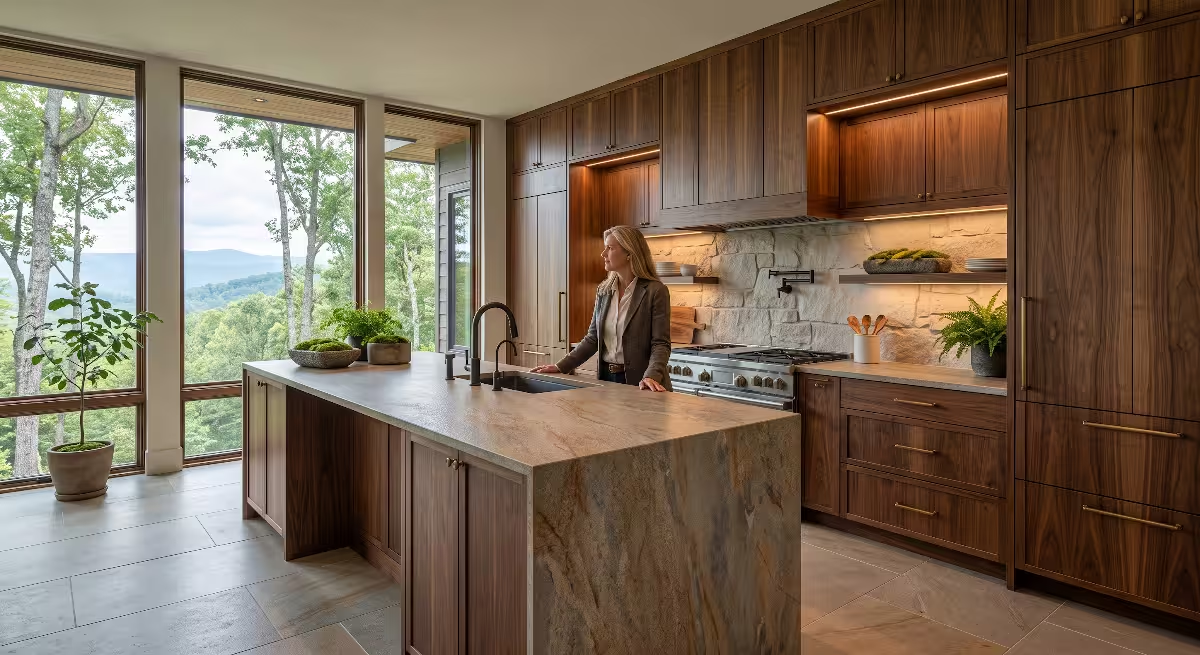


Introduction to Kitchen Work Triangles
When you build a custom house, you are not just selecting granite, paint swatches, or cabinet hardware. You are shaping how your household moves, communicates, and restores itself at the start and finish of every single day.
For many homeowners, the kitchen serves as the emotional and physical anchor of daily life. When planning a new kitchen, people often get drawn in by stunning tile backsplashes and gorgeous countertops. However, if the floor plan beneath those surfaces lacks practical geometry, the space quickly feels frustrating to use. If you have to dodge family members, walk unnecessary laps just to get milk, or bang an open oven into a trash bin, the room works against you.
Real comfort comes from functional spatial design. In this guide, we will explore the engineering, clearances, and daily movement paths that make cooking, cleaning, and gathering simple and intuitive. Let us walk through the blueprint choices, measurements, and structural details that ensure your custom build supports your everyday life for decades to come.
Why Spatial Geometry Dictates Kitchen Longevity
The Blueprint Reality
When you walk into a model home or browse custom kitchen galleries, your eyes naturally fall on the decorative touches. You notice quartz countertops with graceful veining, soft under-cabinet lights, custom wood range hoods, and polished faucets. These surfaces look wonderful, but they do not make a room easy to live in. True longevity in residential construction depends on spatial geometry.
Spatial geometry refers to how objects sit within physical space, how their clearances relate, and how people walk around them. A kitchen with costly European cabinets and professional gas ranges will still cause frustration every morning if the primary cook cannot open the refrigerator door while someone stands at the sink.
No amount of luxury finishes can salvage a dysfunctional footprint. Countertop stone can always be swapped down the road, and wall colors can change in an afternoon. However, shifting a sink drain cast in a concrete foundation or moving a gas range line across an open-concept great room can cost thousands of dollars once framing and rough-in work wrap up. Getting the spatial geometry right on the blueprints is the single most valuable investment you can make during the planning phase.
Defining the Standard Beyond the 1940s Rule of Thumb
Many homeowners hear about layout geometry and recall the historic rule developed during the 1940s at the University of Illinois School of Architecture. That original formula gave birth to what builders call the kitchen work triangle. Back then, researchers looked at compact, closed-off rooms where one person cooked alone. The kitchen work triangle linked three primary stations: the cold food storage area, the cleaning and prep basin, and the cooking surface.
Modern living has evolved far past the lifestyle of the mid-twentieth century. Today, kitchens are open, social gathering spaces. They flow directly into dining areas, living rooms, and covered back porches. Often, two people cook together, children unpack school lunches at the island, and guests gather around food displays.
Because modern living has changed, we cannot simply rely on an old rule of thumb without thinking it through. We must apply precise architectural thinking to make sure the kitchen work triangle functions effectively in modern custom plans. When we study the kitchen work triangle today, we treat it as an engineered circulation network. We measure path vectors, evaluate door swings, and preserve sightlines so the room handles busy mornings and relaxed family gatherings with equal grace.
The Daily Human Impact
Consider the daily human impact of kitchen movement. Preparing meals is a physical activity made up of hundreds of tiny, repetitive tasks. You move between the refrigerator, sink, cutting board, trash can, spice drawer, and cooktop.
If your kitchen layout adds five wasted steps between your refrigerator and your sink, those steps accumulate quickly. Over a single year of making breakfast, lunch, and dinner, those extra steps add up to miles of unnecessary walking across hard floor surfaces. This causes real physical fatigue.
Beyond extra walking, poor planning creates awkward physical friction. When counter clearances are cramped, two people cannot work near each other without bumping elbows or backing into each other. When an open appliance door blocks a central walkway, it creates a traffic jam that irritates everyone in the room. A thoughtfully engineered kitchen work triangle removes this daily stress. By refining your layout, your kitchen feels quiet, spacious, and effortless to cook in, day after day.
Mathematics and Clearance Tolerances
             [ Refrigerator ]
                 /        \
    4 to 9 ft   /          \   4 to 9 ft
               /   ISLAND   \
              /   (Clear)    \
             /                \
        [ Sink ] ------------ [ Cooktop ]
                   4 to 9 ft
    Total Perimeter: 13 ft Min / 26 ft Max
Dimensional Benchmarks
The National Kitchen and Bath Association establishes clear dimensional guidelines for residential design. These guidelines help architects and builders evaluate floor plans to ensure comfortable, reliable performance. When designing a kitchen work triangle, these benchmarks keep work stations close enough to prevent fatigue, yet far enough apart to prevent crowding.
- Individual Leg Limits: Every leg of the kitchen work triangle should measure at least 4 feet long, but no more than 9 feet long. If a leg measures less than 4 feet, the stations feel uncomfortably cramped, leaving little room for prep counter space. If any single leg exceeds 9 feet, you will spend too much energy walking back and forth with heavy pots or wet vegetables.
- Total Perimeter Limits: When you add the three legs of the kitchen work triangle together, the sum must measure at least 13 feet, and it should never exceed 26 feet. A total path under 13 feet creates a tight, bottlenecked room. A path over 26 feet makes preparing a meal feel like running laps.
- Linear Measurement Method: Remember that you measure these paths along the actual walking line, from the center of the sink, to the center of the cooktop, to the center of the refrigerator front. You do not measure through solid obstacles like islands or barstools. The path must represent an unobstructed, real-world walking route.
Aisle Widths and Through-Traffic
Aisle width is where many stock plans fall short. Blueprints that look open on paper can feel narrow once full-depth base cabinets, hardware pulls, and appliance handles are in place.
In a custom home, you need to plan for two types of kitchen aisles: work aisles and through-traffic walkways.
- Single-Cook Work Aisles: A work aisle where only one cook operates should measure a minimum of 42 inches wide from counter edge to counter edge. Standard builder designs often default to 36 inches. While 36 inches works for basic residential code hallways, it feels far too tight between kitchen workstations.
- Multi-Cook Work Aisles: If two people regularly prepare meals together, or if family members tend to help with cleanup, the work aisle should measure at least 48 inches wide. This extra width allows one person to stand at the cooktop while another person walks comfortably behind them without turning sideways.
- Through-Traffic Walkways: Walkways that cut through the kitchen to reach a back patio, pantry, or mudroom should maintain a clear width of at least 36 inches, though 42 inches is much better. More importantly, these major family traffic routes should never cut directly across the path of your primary kitchen work triangle.
| Aisle Type | Minimum Width | Recommended Width | Primary Benefit |
| Single-Cook Work Aisle | 42 inches | 44 inches | Allows easy bending to access base drawers. |
| Multi-Cook Work Aisle | 48 inches | 50 to 52 inches | Enables two people to pass without collisions. |
| Edge Walkway / Perimeter | 36 inches | 42 inches | Moves family traffic away from active cooking. |
| Seated Island Clearance | 44 inches | 48 to 54 inches | Leaves walking room behind pulled-out barstools. |
Door Swing and Appliance Depth Accounting
Cabinet dimensions shown on basic drawings can be misleading. Base cabinets are normally 24 inches deep. However, after counter fabricators add a standard 1.5-inch overhang, your perimeter base measures 25.5 inches deep.
Appliances complicate this math even further. A standard-depth refrigerator often measures 30 to 35 inches deep, excluding its handles. If your layout features a standard-depth refrigerator across from an island, that refrigerator box will extend well past the cabinet face, narrowing your walking aisle.
+---------------------------------------------------------+
|                  WALL CABINET LINE                      |
+---------------------------------------------------------+
| [Counter Edge: 25.5 in]                                 |
|                                                         |
| <================ 48 in Clear Aisle ==================> |
|                                                         |
| [Open Door: 22 in]               [Extended Drawer: 21 in]|
| (Remaining passing space: 5 inches if fully extended)  |
+---------------------------------------------------------+
|                     ISLAND FACE                         |
+---------------------------------------------------------+
When checking your plans, you must account for every appliance in its open position:
- Dishwasher Doors: A dishwasher door folds straight down into the aisle, typically projecting 24 to 27 inches past the cabinet frame. If you have only a 36-inch aisle, you are left with less than a foot of room to step around the open door when loading dishes.
- Oven Doors: Range and wall oven doors fold down, projecting 20 to 22 inches into the work aisle. When taking a heavy, hot pan out of the oven, you need at least 15 to 18 inches of clear floor space in front of that open door to stand safely with balanced footing.
- Refrigerator Doors: French door and side-by-side refrigerators require clearance for both their forward door swings and their pull-out freezer drawers. The doors must be able to open a full 90 to 135 degrees so interior bins and shelves can slide out for cleaning without hitting an adjacent wall.
Accounting for these door swings protects the flow of your kitchen work triangle, keeping your paths safe and comfortable during everyday use.
The Tri-Point Ergonomic Analysis
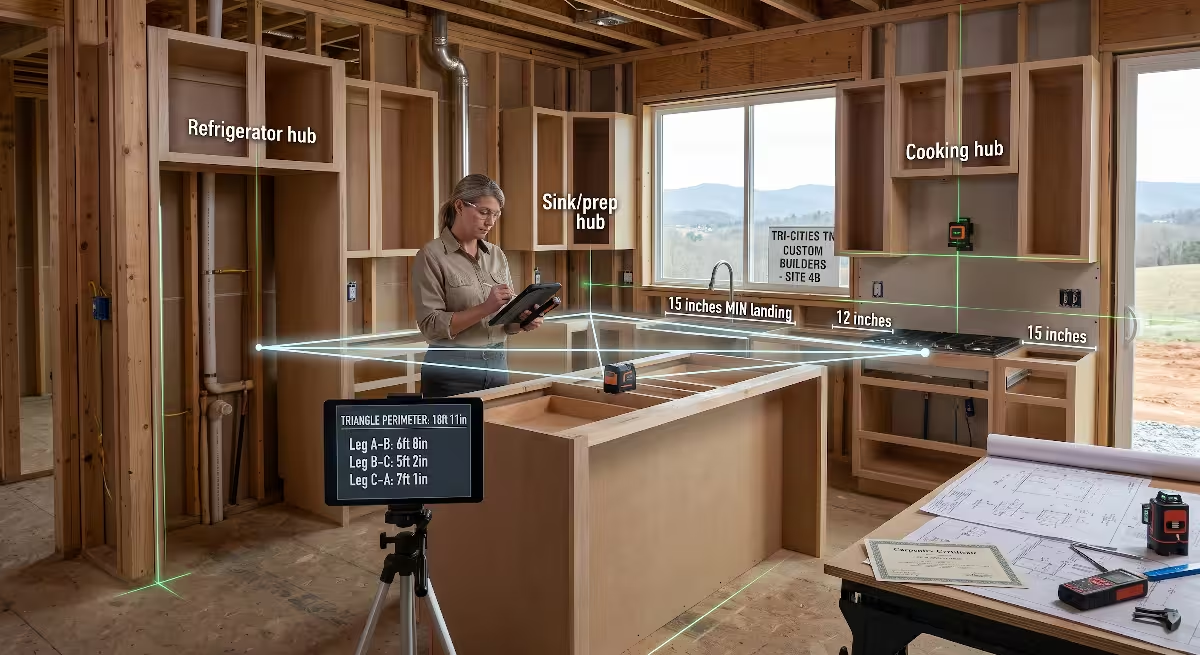
To build an efficient kitchen, we need to look at each point of the kitchen work triangle as its own dedicated work hub. Each point has specific storage, counter, and utility needs that must work together seamlessly.
Point A: Food Storage and Cold Preparation (The Refrigerator)
The refrigerator marks the starting point for meal preparation. Groceries enter the home, get sorted into cold storage, and are later pulled out to begin cooking. Because food moves through this hub constantly, its location within your kitchen work triangle requires careful thought.
- Landing Zones: You should always include a counter landing zone right next to the refrigerator. NKBA standards call for at least 15 inches of continuous counter space on the handle side of a single-door refrigerator, or a landing counter within 48 inches directly across from a French door refrigerator. When unpacking groceries, you need a nearby flat surface to set bags down so you do not have to carry items across the room.
- Pantry Alignment: Dry food storage, such as a walk-in or cabinet pantry, should sit near your refrigerator. Grouping your cold storage and dry pantry together creates an efficient food collection hub. This keeps you from having to visit opposite sides of the room just to gather ingredients.
- Outer Perimeter Placement: Placing your refrigerator near the outer edge of the kitchen work triangle is often an ideal strategy. This allows children or guests to grab drinks or snacks without crossing into the active cooking and prep zones where sharp knives and hot pans are in use.
Point B: Cleaning and Water Management (The Sink and Dishwasher)
The sink is generally the most frequently used fixture in any home. Studies show that people spend over 40 percent of their total kitchen time at or near the sink basin. Because it sees so much use, the sink serves as the primary anchor for the kitchen work triangle.
+-------------------+--------------------+--------------------+
| TRASH / RECYCLING |   PRIMARY BASIN    |     DISHWASHER     |
|   18 in Pull-Out  |   30 to 36 in Base |   24 in Appliance  |
|  [Scrape & Prep]  |   [Rinse & Wash]   |    [Load & Run]    |
+-------------------+--------------------+--------------------+
- Sink Centering and Prep Flow: Your primary prep area needs plenty of continuous, uninterrupted counter space. We recommend placing at least 36 inches of continuous counter right beside the sink. This counter serves as your main staging area for chopping, peeling, and assembling ingredients before they move to the heat.
- The Scrape, Wash, Load Workflow: The clean-up zone should follow a natural, linear sequence. Place your waste and recycling pull-out drawer on one side of the sink, and your dishwasher on the opposite side. For a right-handed cook, arranging the flow from left to right (trash pull-out, then sink, then dishwasher) creates a simple, logical movement path. Plates are scraped over the bin, rinsed in the basin, and set directly into the dishwasher without dripping water across the floor.
- Dishwasher Positioning: Keep your dishwasher within easy reach of the sink basin, but make sure the open dishwasher door does not cut off the primary walking path of your kitchen work triangle. It should never block the route between the sink and the range when opened.
Point C: Thermal Execution (The Range, Cooktop, and Oven Stack)
The cooking zone introduces heat, oil, steam, and heavy cookware to the room. From a safety standpoint, this makes it the most critical hub in the entire kitchen work triangle.
- Flanking Counter Landings: A cooktop or range requires flat counter space on both sides. Never place a range directly against a tall pantry cabinet or an end wall. Doing so creates a fire risk, blocks pan handles from turning freely, and leaves you with no place to set hot pans down. You should have at least 15 inches of counter landing space on one side of the cooktop and at least 12 inches on the other side. Having 18 to 24 inches on both sides is even better.
- Ventilation and Exterior Ducting: Professional-grade ranges need high-powered exhaust hoods. When laying out the kitchen work triangle, keeping your range on an exterior wall simplifies your ductwork run. A short, straight exhaust duct leading outside operates more quietly, pulls grease and moisture more effectively, and costs less to install than a long, winding duct through an upper floor.
- Wall Ovens and Microwaves: If you are installing separate wall ovens rather than a traditional slide-in range, position them near your primary cooking hub. Provide a clear 15-inch counter landing zone right beside or directly across from the wall oven so you have a safe, stable place to set heavy roasting pans as soon as they leave the oven.
Custom Builds Versus Stock Floor Plans: Avoiding Common Architectural Traps
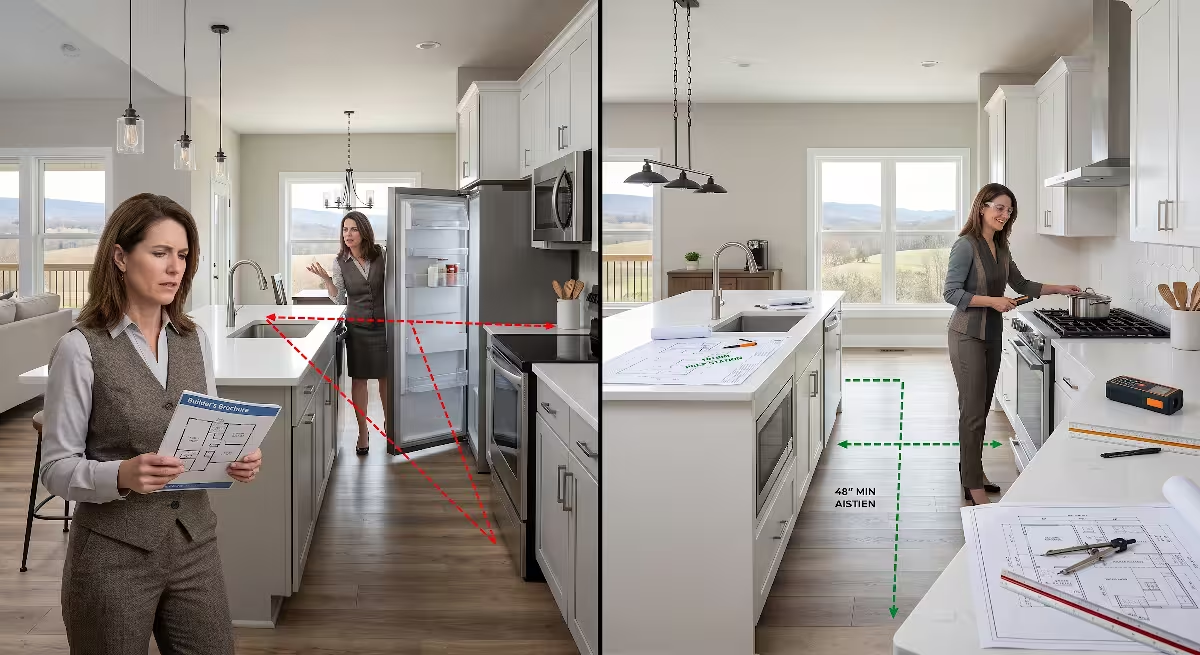
Stock floor plans found on online clearinghouses are drawn to appeal to as many buyers as possible on paper. Unfortunately, they frequently sacrifice daily functionality for flashy visual marketing. When you design a custom home, you have the opportunity to avoid these classic layout mistakes.
POOR LAYOUT: The Barrier Island Trap
+-------------------------------------------------------------+
| [ Refrigerator ]                                            |
|        \                                                    |
|         \  <--- Long walk around the obstacle!              |
|   +-----------------------+                                 |
|   |    BARRIER ISLAND     |                                 |
|   +-----------------------+                                 |
|               /                                             |
|        [ Sink ] ---------------------------- [ Cooktop ]    |
+-------------------------------------------------------------+

PROPER LAYOUT: Clear, Unobstructed Vectors
+-------------------------------------------------------------+
|                  [ Refrigerator ]                           |
|                       /      \                              |
|                      /        \                             |
|    +-------------------+    [ Cooktop ]                     |
|    |   CLEAN ISLAND    |         |                          |
|    |    WITH SINK      |         |                          |
|    +-------------------+         |                          |
|              \                   /                          |
|               -------------------                           |
+-------------------------------------------------------------+
The Island Barrier Dilemma
The single most common mistake in modern open-concept kitchens is what builders call the “barrier island.”
Homeowners often want a massive, furniture-style island that seats four or five people. However, if the island is dropped into the middle of the room without careful planning, it can cut directly through the paths connecting the sink, refrigerator, and range.
When an island breaks the path of your kitchen work triangle, you end up having to walk around a massive block of cabinetry and stone every time you need an egg from the refrigerator or water for a pot. That constant backtracking ruins the natural flow of the room. According to NKBA guidelines, an island or peninsula should never push more than 12 inches into any line of your kitchen work triangle. If your island interrupts that path, you should adjust the footprint. You can shift the refrigerator, move the range, or add a dedicated prep sink directly onto the island surface.
Multi-Cook Family Dynamics
Stock floor plans usually assume that a single person does all the cooking from start to finish. In real families, kitchen routines are shared. One partner might chop vegetables while the other sautés meat, or a teenager might unpack groceries while a parent cleans dinner plates.
When multiple people work together within an uncalibrated layout, they constantly get in each other’s way.
To prevent bottlenecks, design your kitchen work triangle with dual-purpose zones. Keep the clean-up zone slightly separated from the primary food prep zone. If your primary sink sits along the back wall, you can place a secondary prep sink on the island. This simple addition creates two overlapping, functional workspaces. Each person has their own access to running water, cutting boards, and garbage bins without bumping hips or stepping on toes.
+--------------------------------------------------------------+
|                    MAIN PERIMETER WALL                       |
|  [Pantry]   [Fridge]   [Landing Counter]   [Main Clean Sink] |
+--------------------------------------------------------------+
                         ^                  |
            Zone 1 Aisle | 48 inches        |
                         v                  v
                 +-------------------------------+
                 |  ISLAND: Prep Sink & Counter  |
                 +-------------------------------+
                         ^
            Zone 2 Aisle | 48 inches
                         v
+--------------------------------------------------------------+
| [Range / Cooktop]      [Spice Pullouts]     [Baking Center]  |
|                      COOKING WALL                            |
+--------------------------------------------------------------+
Sightlines and Social Entertaining
Open-concept living remains popular for good reason. It lets natural light stream through the house and allows the cook to stay connected with family in the great room. However, total visibility can have downsides if it is not handled carefully.
When you entertain guests, the cleaning zone can collect dirty pots, pans, and mixing bowls. If your main sink sits directly in the center of an island facing your living room, those dirty dishes remain on full display throughout your gathering.
You can solve this with thoughtful layout adjustments:
- The Offset Clean-Up Station: Keep the primary cleaning sink and dishwasher on an outside perimeter wall, tucked slightly out of direct sight from the living room couch.
- The Entertainment and Prep Island: Reserve your central island for food presentation, bar seating, and light prep work. This lets you talk with guests across an open, uncluttered counter, while meal prep and cleanup stay neatly arranged around the perimeter.
- Raised Seating Buffers: Incorporating a subtle bi-level island design or a decorative ledge can screen the working surface from the main room. This hides prep clutter from view while keeping the open, airy feel of the home.
Modern Adaptations: From Simple Triangles to Zoned Triangles
As custom kitchens have grown in square footage, the traditional kitchen work triangle has evolved. In larger homes, stretching a single triangle to span the entire room leads to excessive walking and poor efficiency. The answer is not to abandon geometric planning, but rather to adapt it into functional work zones.
       [ Cold Storage Zone ]
             /        \
            /          \
   [ Prep Zone ] === [ Cooking Zone ]
        ||                 ||
   [ Clean Zone ]    [ Beverage Bar ]
Secondary Prep Nodes and Sculleries
A modern trend in custom building is the inclusion of a scullery, sometimes called a back kitchen or working pantry. This separate room keeps heavy food prep and dirty dishes out of the main kitchen area.
When designing a home with a scullery, you actually create two connected work areas:
- The Display Kitchen: In the main living area, the primary kitchen work triangle links the central refrigerator, an island prep sink, and the main cooking range. This setup handles quick family breakfasts, casual dinners, and social entertaining.
- The Working Scullery: Behind a pocket door, a secondary work area houses a second dishwasher, a deep undermount wash basin, recycling sorting bins, and countertop appliances like blenders and toasters.
This multi-zone layout protects the aesthetic beauty of your main living space. Messy cooking tasks, lingering food smells, and dish washing stay tucked neatly away in the scullery, keeping your open kitchen clean and presentable.
+--------------------------------------------------------------+
|                     BACK SCULLERY                            |
|  [Second Dishwasher]   [Deep Sink]   [Countertop Small Apps] |
+-----------------------------------[Pocket Door]--------------+
                                          |
+-----------------------------------------v--------------------+
|                      MAIN KITCHEN                            |
|   [Primary Refrigerator] <---------> [Island Prep Basin]     |
|             \                                /               |
|              \                              /                |
|               -----> [Display Cooktop] <----                 |
+--------------------------------------------------------------+
Beverage Bars and Coffee Stations
Early morning routines can create traffic jams in an otherwise well-planned home. If everyone heads for the refrigerator and sink at the same time to make coffee, fill water bottles, or pack lunches, a standard kitchen work triangle quickly gets overwhelmed.
Creating an independent beverage center outside the main cooking area solves this problem cleanly.
By adding a small under-counter drawer refrigerator, an espresso machine or coffee brewer, and a compact bar sink along an outer counter run, you pull casual family members away from the primary cook’s path. Kids can pour milk, and guests can grab cold drinks without stepping into the active work zones of the kitchen.
Engineering During the Rough-In Phase: What to Catch Before Drywall
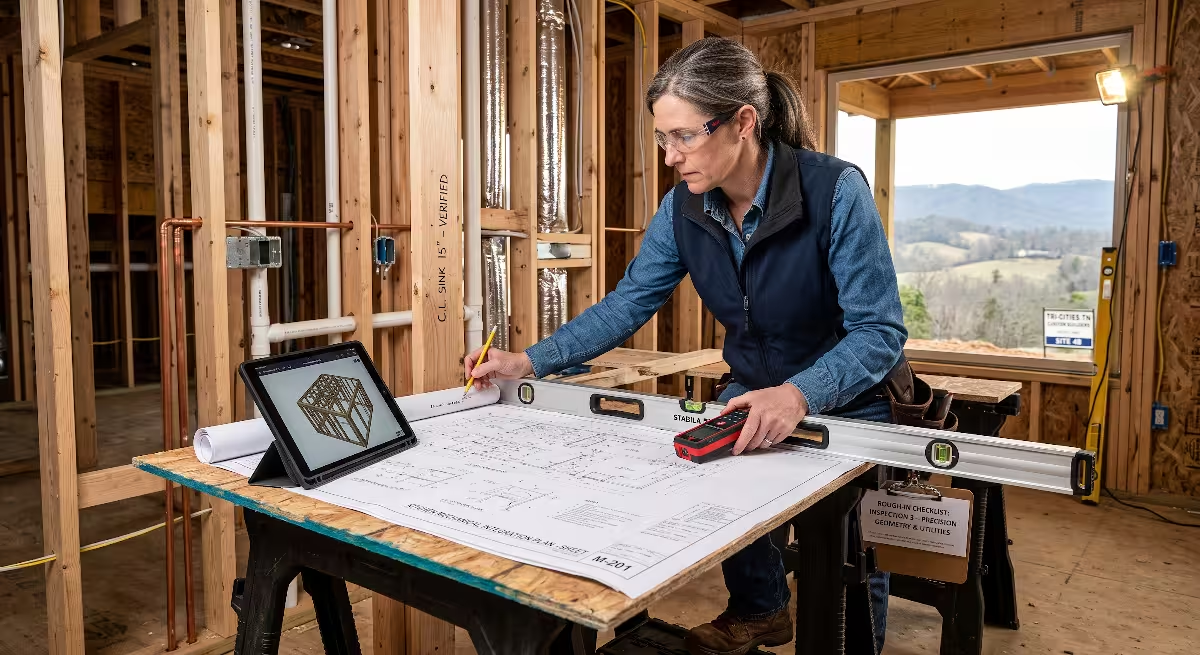
The most critical moment for your kitchen layout happens during the rough-in stage of construction. This is the window of time after the home is framed, but before drywall covers the wall studs and subfloors. Once insulation and drywall boards are hung, taped, and painted, making changes to your plumbing, wiring, and ductwork becomes significantly more difficult and expensive.
ROUGH-IN VERIFICATION CHECKLIST
[ ] Confirm sink drain centerlines match cabinet shop drawings.
[ ] Ensure island plumbing vents do not conflict with trash pull-out hardware.
[ ] Measure exact rough-in locations for 240V range outlets and gas stub-outs.
[ ] Check that dedicated 20A appliance circuits sit clear of drawer glide tracks.
[ ] Measure framing rough openings to verify finished aisle widths match plans.
Plumbing and Electrical Coordination
Never assume tradespeople will position wall stub-outs in the exact center of your future cabinets without clear guidance. Field crews work quickly from general floor plans, which may lack the fine details of your final cabinet shop drawings.
Before drywall goes up, walk through the framing with your builder, cabinet specialist, and a tape measure to verify every single rough-in location:
- Plumbing Drains and Supplies: Confirm that the sink drain pipe exits the wall or subfloor directly on the centerline of the planned sink cabinet base. If the drain pipe is plumbed just 4 inches off-center, it can hit a garbage disposal, bump into an under-sink filtration system, or block an adjacent pull-out trash drawer.
- Island Utilities: If your kitchen work triangle includes a sink or cooktop on an island, plumbing lines must run up through the subfloor. Plumbing codes require an island fixture vent, such as an air admittance valve or a loop vent, hidden inside the cabinet. Make sure your plumber and cabinet designer coordinate early so this vent pipe does not crowd your sink plumbing or take away valuable drawer space.
- Appliance Electrical Junctions: High-end appliances have very specific requirements for where their electrical plugs and gas connections must sit. A luxury refrigerator or wall oven often features a shallow recessed pocket on the back of the unit designed for utility plugs. If the electrician places a heavy 240-volt outlet box two inches too high or too low, the appliance will hit the plug and will not slide flush against the wall. That pushes the appliance out past the counter edge, cutting into your work aisle.
Foundation Types and Utility Flexibility
The foundation of your home plays a major role in how easily plumbing lines can be adjusted or serviced over time. In East Tennessee, home builders encounter a wide range of topography, leading to different foundation choices.
- Slab-on-Grade Foundations: On flat home lots, concrete slabs are common. However, with a slab foundation, all your under-floor plumbing pipes must be set in gravel and poured into solid concrete during the early weeks of construction. If your kitchen layout changes later on, moving a drain line requires cutting through the concrete slab with diamond-blade saws. This creates dust, adds expense, and can affect the slab’s integrity. When building on a slab, your kitchen work triangle must be planned and verified with absolute precision before the concrete trucks arrive.
- Crawlspace Foundations: In the rolling hills of Johnson City, Kingsport, and Bristol, many custom homes sit over conditioned crawlspaces. A crawlspace provides open access beneath your kitchen subfloor. This gives you far more flexibility during construction. If you want to expand an island by six inches or nudge a prep sink down the counter during framing, a plumber can easily adjust pipes from beneath the floor joists without major headaches.
- Full Basement Foundations: Homes built on sloped sites often feature full walk-out basements. If your kitchen sits directly above an unfinished basement utility room, you have the easiest access possible for routing electrical lines, moving plumbing runs, and running straight exhaust ductwork to the outside of the home.
FOUNDATION COMPARISON FOR KITCHEN UTILITY PLACEMENT
+-------------------------------------------------------------------------+
| SLAB-ON-GRADE:                                                          |
| Must be 100% locked in before pouring concrete. Zero room for error.    |
+-------------------------------------------------------------------------+
| CONDITIONED CRAWLSPACE:                                                 |
| Excellent flexibility. Pipes and wiring easily reached under subfloor.   |
+-------------------------------------------------------------------------+
| UNFINISHED BASEMENT:                                                    |
| Maximum flexibility. Easy installation and maintenance for home life.   |
+-------------------------------------------------------------------------+
Framing Adjustments
Stud walls are never completely flat or plumb. Wood framing lumber can crown, twist, or cup as it dries on the job site. A room that measures 15 feet wide during early framing might lose an inch or more once drywall, corner beads, and baseboards are installed.
- Checking Rough Openings: Walk the kitchen footprint with your builder while the framing is still exposed. Measure the clear distance between framed walls and island chalk lines on the floor. If a wall is slightly bowed, your framer can plane down or shim studs now in a matter of minutes. Correcting these minor framing flaws ensures your finished cabinets install flat, plumb, and tight against the walls.
- Corner Squareness: A successful kitchen work triangle often relies on L-shaped or U-shaped corner cabinet layouts. If the framed corner of the room is out of square by even half an inch, long runs of factory-built cabinets will not fit properly without large trim fillers. Catching out-of-square corners during framing ensures your custom cabinetry installs smoothly and looks beautiful.
Commonly Asked Questions about Kitchen Work Triangles
Prospective custom home buyers often research how to set up their layouts. Below are detailed answers to the most common questions, answered through an engineering and architectural lens.
What is the ideal distance for a kitchen work triangle?
The ideal distance for any single leg of the kitchen work triangle is between 4 and 9 feet. The total combined perimeter of all three legs should measure between 13 and 26 feet.
If any leg measures less than 4 feet, the stations will feel cramped. You will lack enough counter space to set down hot pans, chop ingredients, or stage dirty dishes.
If any single leg stretches beyond 9 feet, you will waste energy walking back and forth between stations.
For the overall perimeter, aiming for a total walking distance of 18 to 22 feet hits the sweet spot for most custom homes. This leaves plenty of generous prep room while keeping everything comfortably within reach.
LEG LENGTH BENCHMARKS
Too Tight:      < 4 Feet        (Causes crowding and lacks counter space)
Target Sweet Spot: 5 to 7 Feet  (Comfortable stride, efficient food prep)
Too Far:        > 9 Feet        (Causes unnecessary walking fatigue)
Can a kitchen island be in the middle of a work triangle?
As a general rule, an island should never sit directly in the middle of the primary walking paths of your kitchen work triangle. An island that cuts through those walking lines creates a physical barrier that forces you to walk around it every time you move between your refrigerator, sink, and cooktop.
NKBA guidelines state that an island should not intrude more than 12 inches into any direct line of travel between the three primary stations.
If your floor plan naturally places an island between your perimeter counters, you can fix the layout by:
- Installing a prep sink directly on the island surface to complete a functional, unobstructed triangle on one side of the room.
- Shifting the refrigerator to an outside corner so the line of travel to the sink runs parallel to the island rather than cutting across it.
- Changing the island’s dimensions to create wide, open walking aisles around its perimeter.
Is the kitchen work triangle outdated?
No, the kitchen work triangle is not outdated, but it has evolved over time. The core principle—minimizing the walking distance between food storage, water, and heat—remains the foundation of smart kitchen design. What has changed is how modern families use their homes.
In today’s custom kitchens, the classic concept has expanded into “zoned design.” Instead of a single triangle serving one isolated cook, a modern layout often features multiple, overlapping work zones.
You might have a dedicated primary prep triangle, an independent cleanup station, a separate baking center, and an outside beverage bar. The fundamental geometry of the kitchen work triangle still drives each of these individual zones. It ensures every station operates smoothly without getting in the way of others.
TRADITIONAL VS. MODERN WORK TRIANGLES
Traditional 1940s Concept:
[One Cook] ---> [Small Closed Room] ---> [Single 3-Point Triangle]

Modern Custom Application:
[Multiple Cooks] ---> [Open Floor Plan] ---> [Zoned Work Hubs]
                                             ├── Primary Prep Triangle
                                             ├── Dedicated Clean-Up Hub
                                             └── Secondary Beverage Zone
How do you calculate a work triangle in an open-concept custom home?
To calculate the kitchen work triangle in an open-concept layout, measure the direct walking paths between the center faces of the three primary appliances:
- Measure from the center of the cooktop or range to the center of the primary food prep sink.
- Measure from the center of that sink to the center of the refrigerator face.
- Measure from the center of the refrigerator face back to the cooktop.
       [Center of Refrigerator]
               /       \
      Leg B   /         \   Leg A
             /           \
   [Center of Sink] ---- [Center of Cooktop]
                   Leg C

   Total Perimeter = Leg A + Leg B + Leg C
   Target: Greater than 13 feet and less than 26 feet
Add these three measurements together to find your total perimeter. The sum should fall cleanly between 13 and 26 feet.
In an open-concept home, make sure you also evaluate the edges of your layout. The walking path of your kitchen work triangle should stay separate from the main hallways and pathways that lead into the great room, dining space, or outdoor patio. That keeps casual household traffic from cutting through your active cooking space.
Building It Right from the Framing Stage
A truly exceptional kitchen comes from thoughtful planning, not coincidence. Beautiful cabinet doors, quartz slabs, and designer light fixtures can create a striking first impression. However, the lasting joy of living in your home depends entirely on how well the space functions during everyday routines.
A carefully engineered kitchen work triangle provides real, lasting value. By locking in proper dimensions, planning generous aisle clearances, accounting for open appliance doors, and verifying utility rough-ins before drywall goes up, you protect your custom home from daily frustrations. You create a calm, welcoming environment where cooking, cleaning, and gathering feel natural and enjoyable.
As you finalize your home plans, sit down with your builder and study your kitchen blueprints with a workflow-first mindset:
- Trace your actual walking paths from the pantry to the refrigerator, sink, and cooktop.
- Draw out your appliance doors in their fully opened positions on the floor plan.
- Double-check your aisle widths between counter overhangs, not just the cabinet boxes.
- Take time to walk the framed rooms with a tape measure before the drywall crew begins their work.
When you prioritize spatial geometry from the very beginning of the design process, your finished kitchen will do more than just look stunning in photographs. It will serve as an effortless, functional backdrop for all of life’s daily moments for years to come.