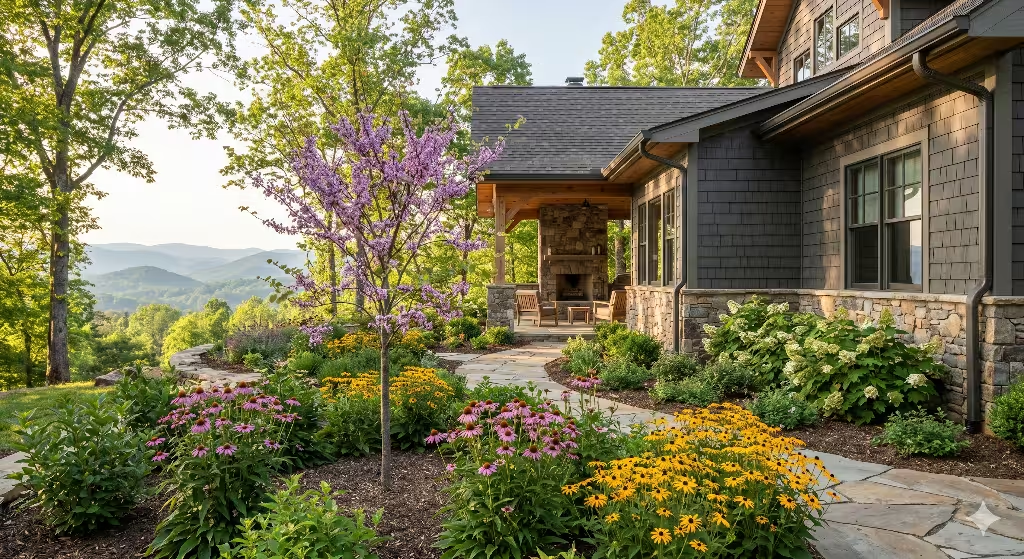
When you are building a custom home it is often helpful to look at how spaces and systems work together to create the best results. Whether you are building a website or building a physical room to paint in, the way you plan things matters for your success. In the beautiful Appalachian Highlands of the Tri-Cities TN area, artists are finding new ways to mix old traditions with new ideas. Setting up a modern workspace is not just about having a place to put your easel. It is about building a system that keeps you healthy and helps you do your best work.
If you live in Johnson City, Kingsport, or Bristol, you know that our local art scene is growing fast. To keep up with that growth, your own creative space needs to be professional and smart. A great studio design helps you focus on your art instead of looking for your brushes or breathing in bad fumes.
Lighting Your Art Workspace

The way you handle light is the most critical part of a professional studio design. Light as a variable that must be controlled to ensure the output, your painting, is accurate. In the Tri-Cities TN area, our weather changes frequently. We have bright, sunny days and very gray, overcast days. If your studio design does not account for these changes, your colors will look different every time you sit down to work. This makes it very hard to finish a piece of art that looks consistent.
The Power of North Light in Your Studio Design
For hundreds of years, the best painters in the world have sought out a northern light exposure. This is because light coming from the North is indirect. The sun never actually passes through a North-facing window. Instead, the light bounces off the sky and into your room. This creates a very soft, even glow. When you use North light in your studio design, you do not have to deal with “hot spots” of bright sun moving across your canvas.
In places like Johnson City or Bristol, the rolling hills and trees can sometimes block your windows. When planning your studio design, look for the highest window in the house. The higher the window, the more sky it sees, and the better the light will be. If you have a choice, place your easel about five to eight feet away from the window. This allows the light to wrap around your subject and your canvas without being too intense.
Color Temperature and Data Accuracy
When the sun goes down or the Tennessee clouds roll in, you need artificial light. This is where many people make a mistake in their studio design. Standard light bulbs in most homes are “warm” or yellow. If you paint under yellow light, you will naturally add more blue or purple to your painting to balance it out. Then, when you take that painting outside into the daylight, it will look way too blue.
To fix this, your studio design should use bulbs that are rated at $5000K$ to $5500K$. In the world of physics and statistics, this is known as the Kelvin scale. This specific range is the closest match to natural noon-day sunlight. By using these bulbs, you are making sure the data, the color on your palette, is true. This is a key step in a modern studio design because it removes the guesswork. You can paint at midnight and know exactly what your colors will look like the next morning.
Understanding the Color Rendering Index (CRI)
Not all “daylight” bulbs are created equal. Another number you must look at for a smart studio design is the CRI, or Color Rendering Index. This is a scale from 0 to 100 that tells you how accurately a light source shows colors. Most cheap shop lights have a low CRI, which makes colors look muddy or gray.
A professional studio design requires bulbs with a CRI of 95 or higher. This ensures that the red you are using looks like true red, and your greens do not look washed out. Many artists in the Tri-Cities TN area are now using LED panels. These panels are great for a studio because they are thin, stay cool, and provide a very wide, even spread of high-quality light. They don’t take up much room, which is perfect if your workspace is in a spare bedroom or a small attic.
Managing Glare and Shadows
Even with the best lights, how you position them in your studio design matters. You want to avoid glare. Glare happens when light bounces off wet oil paint directly into your eyes. It makes it impossible to see the actual color you are moving around. To prevent this, your studio design should place lights at a 45-degree angle to your easel.
You should also think about shadows. If you are right-handed, the light in your studio design should come from your left side. This stops your own hand and brush from casting a shadow over the spot where you are trying to paint. It seems like a small detail, but in a long-term studio design, it reduces eye strain and helps you work longer without getting tired.
Total Light Control
Finally, a truly modern studio design gives you total control. This means using “blackout” curtains or blinds. During the day, you might have too much light coming in, or the light might be changing too fast as clouds move over the Appalachian mountains. By closing the curtains and turning on your calibrated LED lights, you create a “controlled environment.”
This is the same thing we do in data science, we remove the “noise” so we can focus on the important information. In your studio design, the “noise” is the changing sun, and the “information” is your paint. When you control your lighting, you are setting yourself up for a successful and professional artistic career right here in East Tennessee.
Organizing Your Space with Zones
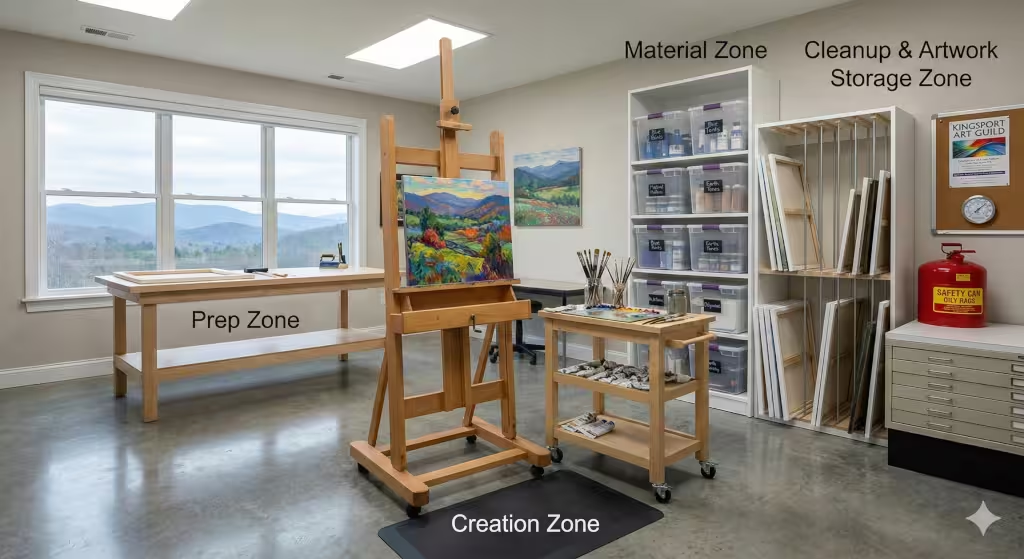
How you arrange your information changes how fast you can find the answers. The same is true for your art space in the Tri-Cities TN area. If you want to be a productive painter, you must think about your studio design as a series of zones. Each zone has a special job to do. When you group things by what they do, your brain can stay in “creative mode” longer. You won’t have to stop and hunt for a clean rag or a specific tube of red paint.
In the Appalachian Highlands, we often have to make the most of the rooms we have. Whether you are using a spare bedroom in Johnson City or a corner of a garage in Kingsport, these zones will make your studio design feel much bigger and more professional.
The Creation Zone: The Heart of Your Studio Design
The creation zone is where the actual painting happens. It is the most important part of your studio design. This is where you place your easel or your drafting table. Because this is where you spend the most time, it should have the best lighting and the most space to move.
In a smart studio design, you want to be able to step back from your work. Being able to see your painting from six or ten feet away helps you see the big shapes and colors. If you are squeezed into a tight corner, you might focus too much on tiny details and lose the “big picture.”
Your easel should be sturdy. Many artists in Bristol like H-frame easels because they do not wobble. Beside your easel, you should have a small table or a rolling cart. This is called a taboret. It holds your palette, your brushes, and your jars of water or solvent. In a modern studio design, keeping these tools within arm’s reach means you never have to break your focus to go find a tool.
The Material Zone: Managing Your Supplies
The material zone is where you keep all the things you are not using right this second. Think of it like a warehouse for your art. A common mistake in studio design is letting these supplies take over the whole room. If you have tubes of paint scattered everywhere, it creates visual “noise” that can be very distracting.
To keep this area neat, use open shelving with clear bins. Labeling every bin is a small step that makes a huge difference in your studio design. You should have a bin for “Blue Paints,” one for “Earth Tones,” and another for “New Brushes.”
For artists in the Tri-Cities area who use different types of media, like watercolors and oils, I suggest keeping them in separate bins. This stops you from accidentally using a water-based brush for oil painting. In a professional studio design, having a “Supply Shack” or a dedicated wall of shelves keeps the rest of your space open and ready for work.
The Prep Zone: Getting Ready to Create
Before you can paint, you have to get your surface ready. The prep zone is a dedicated spot for tasks like stretching canvas, priming boards with gesso, or cutting paper. This zone needs a large, flat table that is at a comfortable height. In a good studio design, you might use a table that can fold up when you are not using it.
This area can get a bit messy. You might be sanding a wooden panel or splashing gesso around. Because of this, the prep zone should be away from your finished art. Many painters in the Tennessee mountains like to put this zone near a door or in a garage. This makes it easier to clean up dust and keep the air in your main room clean. A well-planned studio design ensures that the “messy work” of prep does not ruin the “fine work” of painting.
The Cleanup Zone: Safety and Order
Cleanup is often the part of painting that people like the least. However, a smart studio design makes it fast and easy. Your cleanup zone should be near a sink if possible. If you don’t have a sink in your room, you can use a rolling cart with a large water jug and a bucket.
You need a spot for a trash can that is easy to reach. For oil painters, you also need a special metal can for oily rags. These rags can catch fire if they are just piled up in a corner. Safety is a major part of a professional studio design.
It is recommended have a “Return Element” in this zone. This could be a small tray where you put dirty brushes or used jars. Instead of leaving them on your palette table, you move them to the cleanup zone as soon as you are done with them. This keeps your creation zone clean and ready for the next time you want to paint.
The Artwork Zone: Storage for In-Progress and Finished Pieces
Once you finish a painting, where does it go? In a high-volume studio design, you need a plan for storage. Wet oil paintings need a safe place to dry where they won’t get bumped or covered in dust. You can build or buy a drying rack. This is a vertical shelf that holds canvases apart so they don’t touch.
For finished works or paper drawings, flat files are a dream for any studio design. They have long, shallow drawers that keep paper perfectly flat and safe from sunlight. If you live in a humid part of the Tri-Cities, make sure this zone is in a dry part of the house. You don’t want your beautiful work to get moldy while it is sitting in storage.
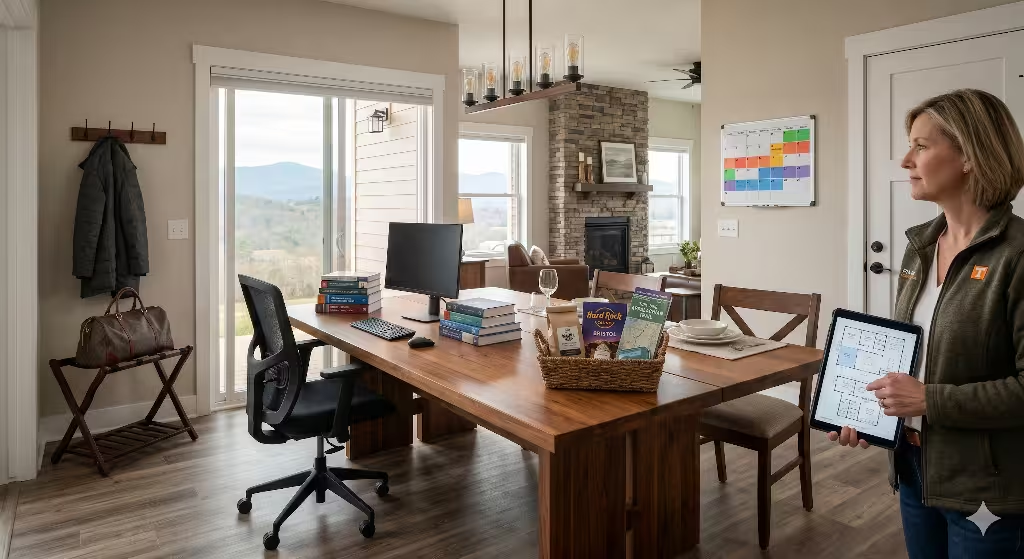
The Reflection and Digital Zone: The Business of Art
Modern art is not just about painting; it is also about sharing. Your studio design should include a small “office” spot. This is where you keep your computer, your reference books, and your sketches. This is also the best place to put a mirror. Why a mirror? Looking at your painting in a mirror “flips” the image. This helps your brain see mistakes in the drawing that you might have missed.
In the digital age, a professional studio design also needs a place to take photos. You need a clean, white wall or a backdrop and a tripod. Taking high-quality photos of your art is how you get into shows in places like the Kingsport Art Guild or galleries in Johnson City. Having this zone set up all the time means you won’t dread the “photo day” at the end of every project.
How Zones Help Your Flow
When you use zones in your studio design, you are creating a “path” for your art to follow. It starts in the Material Zone, moves to the Prep Zone, stays in the Creation Zone for a while, goes through the Cleanup Zone, and ends up in the Artwork Zone. This flow keeps your mind clear.
As a specialist in data and systems, I can tell you that an organized system always beats a messy one. Your studio design is the system that supports your talent. By setting up these zones in your Tri-Cities TN home, you are making sure that you spend less time frustrated and more time doing what you love.
Health and Safety in the Studio
In custom home building, it is helpful to focus on risk management and the health of the system. In a professional studio design, health and safety are not just boxes to check, they are the foundation that allows you to work for decades without getting sick. When you are painting in your Tri-Cities TN home, you are often working in a smaller, tighter space than a commercial gallery. This means you must be even more careful about how you handle chemicals and waste.
A smart studio design treats safety as a daily habit. If you ignore these rules, you might find yourself dealing with headaches, skin rashes, or even much worse. Let’s look at how to build a safe environment that protects both you and your home.
The Science of Air Quality: Managing VOCs
Many of the materials we use in a modern studio design for oil painting release something called Volatile Organic Compounds, or VOCs. These are chemicals that turn into gas at room temperature. Even if a solvent says it is “odorless,” it can still be releasing VOCs that you breathe into your lungs. In the mountain air of East Tennessee, we want to keep our indoor air as clean as the air outside.
A key part of your studio design should be an active ventilation system. A simple window is rarely enough. You should place a box fan in one window blowing out. This creates a “vacuum” that pulls the dirty air away from your easel. If you can, open a second window on the other side of the room to let fresh air in. In the world of data, we call this a “flow-through” system. In your studio design, it ensures that you are always breathing the cleanest air possible while you create.
Fire Prevention and Spontaneous Combustion
This is the part of studio design that many artists forget, but it is the most dangerous. Traditional oil paints use drying oils like linseed or walnut oil. These oils dry through a process called oxidation. As they dry, they actually create a tiny amount of heat. If you take a bunch of paper towels or rags soaked in oil and pile them up in a trash can, that heat gets trapped. It can get hot enough to start a fire all by itself, without any match or spark. This is called spontaneous combustion.
To make your studio design safe, you must treat oily rags with respect. Never, ever leave them in a pile. You have three safe choices:
Lay them flat: Spread them out on a concrete floor or hang them individually on a drying rack until they are hard and “plastic-like.”
Use a metal safety can: Buy a UL-approved red metal can with a foot pedal. These are designed to smother any fire that might start inside.
The water bucket: Drop your used rags into a bucket of water with a little dish soap. This stops the oxygen from getting to the oil so it cannot heat up.
Chemical Safety and Skin Protection
Your skin is the largest organ in your body, and it is very good at absorbing things. In a professional studio design, you should treat your paints and solvents like industrial chemicals, because that is what they are. Many pigments, like Cadmium Red or Cobalt Blue, contain heavy metals that can be toxic if they get into your bloodstream.
I recommend adding a “Barrier Station” to your studio design. This is a spot where you keep nitrile gloves or a high-quality barrier cream. Applying cream to your hands before you start creates a thin layer that stops the paint from soaking in. Never use solvents or paint thinners to clean paint off your skin. This actually opens your pores and pushes the chemicals deeper into your body. Instead, use baby oil or a specialized “painter’s soap” at your cleanup sink.
Ergonomics: Protecting Your Body Data
When you are painting, posture matters, especially when sitting for a long while. A common injury in any studio design is back and neck pain from leaning over an easel for too long. A modern studio design should focus on “neutral” positions.
Easel Height: Your painting should be at eye level so you aren’t looking down or craning your neck up.
Anti-Fatigue Mats: If you stand while you paint, put a thick rubber mat under your feet. This helps your knees and lower back stay healthy during long sessions.
Lighting Placement: As we discussed before, keep your light to the side. If you have to squint to see past a glare, you will naturally lean in and ruin your posture.
Organizing for Mental Health
A cluttered studio design can lead to a cluttered mind. From a psychological standpoint, seeing a giant mess every time you walk into your room can create stress. This is why the “Zones” we talked about are so important. When your safety gear is easy to find, like a fire extinguisher near the door or your gloves right next to your brushes, you are much more likely to use them.
By investing in the health and safety of your studio design, you are making sure that your art career in the Tri-Cities TN area is a long and happy one. You aren’t just protecting your house; you are protecting your most important tool: yourself.
Tri-Cities TN Local Considerations
In the Tri-Cities TN region, encompassing Johnson City, Kingsport, and Bristol, your studio design must adapt to a very specific set of environmental and cultural variables. From the high moisture levels of the Appalachian Highlands to the unique local art resources available in East Tennessee, the “where” of your studio is just as important as the “how.”
Managing the Appalachian Humidity
One of the most significant data points for an artist in our region is the relative humidity. In the Tri-Cities, humidity levels can frequently climb above 70%, especially during the humid summer months.
Oxidation and Curing: Oil paint does not dry like water-based paint; it cures through a chemical reaction with oxygen. High humidity introduces more water vapor into the air, which can interfere with this process. If your studio design doesn’t include humidity control, your paintings might stay “gummy” for days longer than expected.
Canvas Tension: Cotton and linen canvases are “hygroscopic,” meaning they breathe in moisture. In high humidity, the fibers swell and the canvas becomes loose or “saggy” on the stretcher bars. When the air dries out, it tightens again. This constant “push and pull” can eventually cause the paint layer to crack.
The Mold Risk: Any environment with humidity consistently above 65% is a breeding ground for mold. In your studio design, it is wise to use a dehumidifier set to maintain a stable 40% to 50% relative humidity. This protects your canvas from “foxing” (brown spots) and keeps your wood panels from warping.
Local Resources: From Big Box to Boutique
While many artists order supplies online, a smart studio design takes advantage of the immediate resources in the Tri-Cities.
Johnson City: You have access to specialized environments like the Tipton Gallery and Atelier 133, which are great for seeing how professional lighting and spacing are handled in a gallery setting.
Kingsport: The Kingsport Art Guild at the Renaissance Center is a treasure trove of information. Talking to local painters there can give you “boots-on-the-ground” advice about which HVAC companies in the area understand the needs of a climate-controlled art space.
Bristol: Being the “Birthplace of Country Music,” Bristol has a vibrant creative energy. Local hardware stores here are excellent places to source the heavy-duty shelving and sealed flooring needed for a rugged studio design.
HVAC and Air Quality in Tennessee Homes
Because our Tennessee winters can be cold and our summers are hot and damp, your studio design needs a dedicated approach to heating and cooling.
Zoned Systems: If your studio is in a finished basement or a separate outbuilding, I recommend a “mini-split” HVAC system. This allows you to control the temperature and humidity of your workspace independently from the rest of your house.
Filtration: Our region can have high pollen counts in the spring. A high-quality HEPA filter in your studio design will catch those particles before they land on your wet oil paintings. This keeps your “surface data,” the finish of your painting, clean and professional.
Tri-Cities TN Recommendation: If you are storing art in the Tri-Cities, never store it against an exterior wall. In our climate, the temperature difference between the warm inside air and the cold mountain air outside can cause condensation to form behind the canvas, leading to hidden mold growth.
By tailoring your studio design to the specific climate and community of the Tri-Cities TN area, you aren’t just making art, you are building a sustainable practice that respects the environment you live in.
Common Art Space Questions
Many people ask how to set up a studio in a very small room. The answer is mobility. Use rolling carts for your paints and palettes. A mobile studio design allows you to tuck everything into a corner when you are done. If you do not have any windows, do not worry. You can create a “virtual” window using a large LED panel with a high CRI. This can give you that bright, open feeling even in a basement.
Another common question is about flooring. The best floors for a painter are easy to clean. Sealed concrete or linoleum are great choices. You want a floor that will not be ruined if you drop a glob of cobalt blue. If you have carpet, you can use a plastic floor protector like the ones used under office chairs. This simple addition to your studio design can save you from a lot of stress and expensive cleaning bills later on.
Storage Systems for Success
Storage is the backbone of any good studio design. You need a place for everything from tiny tubes of paint to large rolls of canvas. Flat files are perfect for storing paper and finished drawings.12 For canvases, you can build or buy a vertical rack.13 This keeps them off the floor and stops them from leaning against each other, which can dent the surface.
In a modern world, your studio design should also include a digital spot. This is a small area with a tripod and good lights where you can take photos of your art. You need high-quality photos to show your work on social media or to apply for art shows in the Tri-Cities. Having this station ready to go means you will spend more time painting and less time setting up lights for a quick photo.
Building Your Perfect Creative Home
Creating the right studio design is a journey. It will change as your art changes. Maybe you start with a small desk and eventually grow into a full garage setup. The most important thing is that your space works for you. It should be a place where you feel safe, comfortable, and inspired. When your studio design is handled correctly, your brain can relax. You won’t be worried about bad light or messy floors. You will just be focused on the next brushstroke.
Whether you are in the heart of downtown Johnson City or out in the quiet hills near Bristol, your art deserves a great home. By following these ideas for your studio design, you are investing in your future as an artist. You are making sure that you can keep creating for many years to come. Take the time to plan your layout, fix your lighting, and organize your tools. Your art will show the results of a well-planned space.