
The Reality of Tennessee’s Underground Landscape
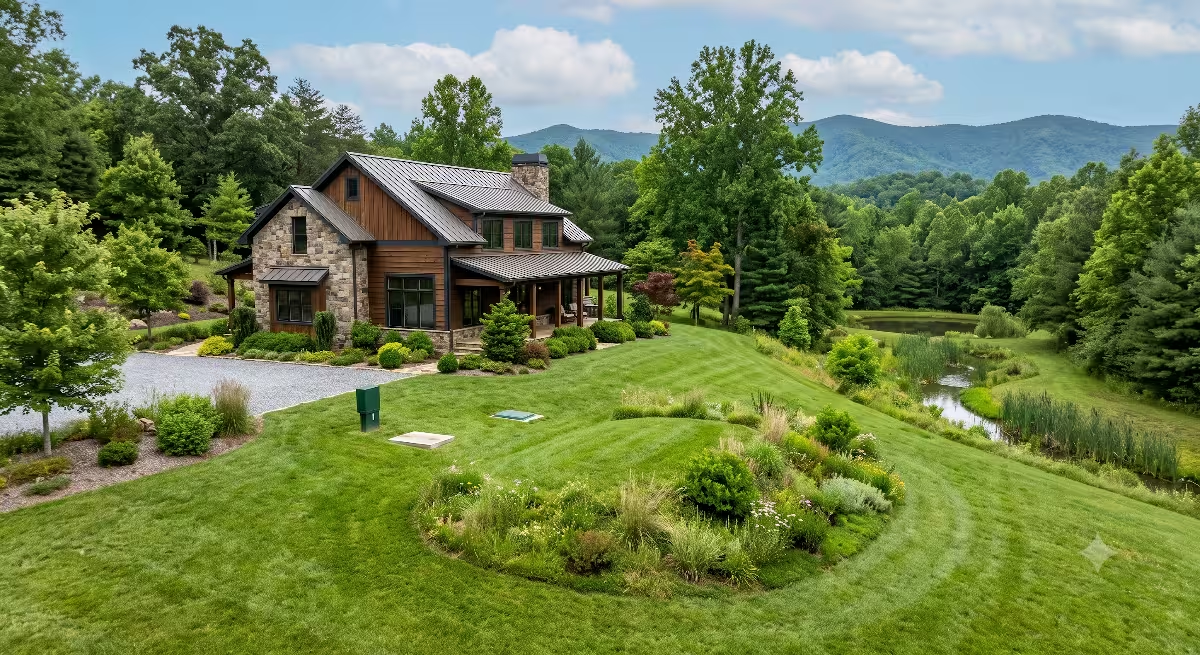
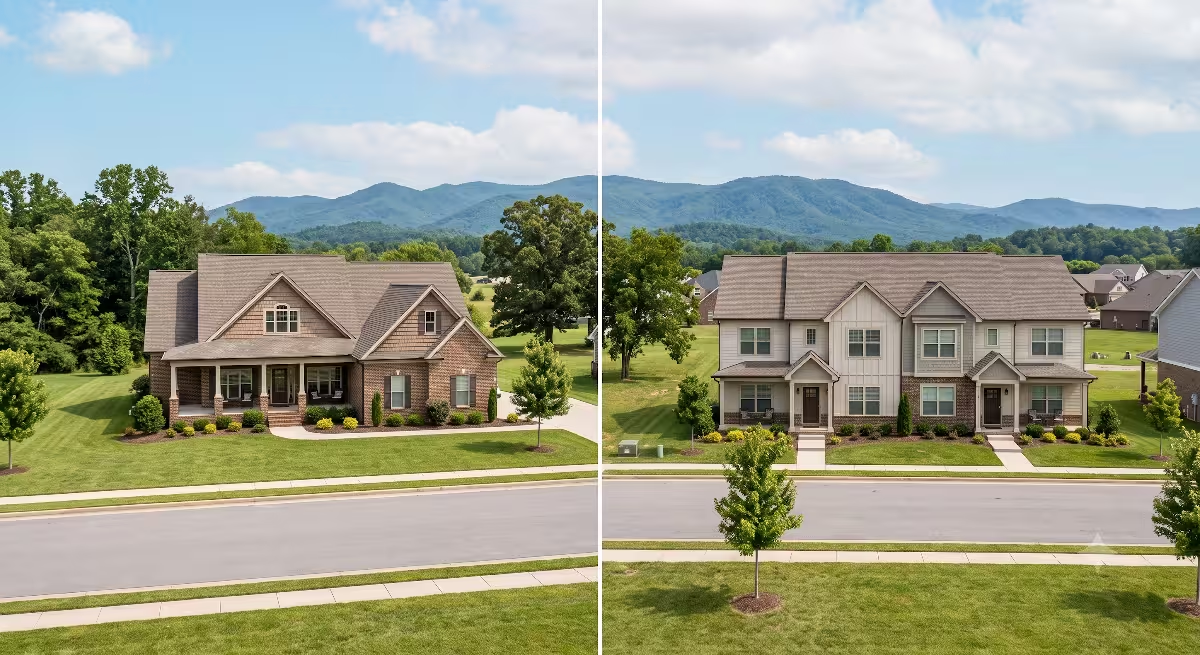
If you spend any time driving through East Tennessee, from Kingsport down through Johnson City, Greeneville, and into Knoxville, you know how beautiful our hills are. The rolling green pastures, the mountain backdrops, and the clean river valleys make our region one of the finest places in the country to build a custom home.
However, what lies beneath the grass is just as important as the view from your front porch. When you build in east Tennessee, you are often building on karst topography.
The Geology Beneath the Scenic Ridge
Tennessee features some of the most concentrated areas of karst topography in North America. State geological records show more than fifty thousand documented sinkholes across Middle and East Tennessee. Our region sits directly over thick sequences of ancient carbonate rocks. Over millions of years, natural water flow has shaped this bedrock into a complex labyrinth of underground channels.
When you walk a piece of property in Sullivan, Washington, or Greene County, the rolling ground might look solid and peaceful. Yet beneath that pasture, the ground could be hollowed out like a sponge. Understanding karst topography is not about being afraid to build. It is about understanding the land so you can design a foundation that keeps your home safe and level for generations.
The Carbonate Dilemma
The basic cause of karst topography comes down to simple chemistry. Much of our bedrock consists of limestone and dolostone. These carbonate rocks react easily with water. Rain absorbs carbon dioxide from the air and from decomposing leaves in the topsoil. That process turns plain rainwater into a weak, natural acid known as carbonic acid.
As this mildly acidic groundwater percolates down through the soil, it reaches the natural cracks and fractures in the bedrock. Over decades and centuries, the acid slowly eats away the stone. Microscopic fractures widen into open slots. Slots turn into underground channels, and channels open into caverns. Because this dissolving process happens deep out of sight, an area of karst topography can appear completely stable on the surface while voids develop directly underneath the topsoil.
The Builder’s Perspective
In custom home construction, surprises cost money. Surprises underneath your footings can cost a fortune. There have been job sites where an excavator bucket took one scoop of dirt and punched right through the ceiling of an uncharted cave. There have also been who builders pour standard footings over hidden voids, only to watch the brick veneer crack and the sheetrock split within two years.
Karst topography does not mean a piece of property is unusable. What it means is that standard, one size fits all building habits will not work. You cannot treat a lot shaped by karst topography the same way you treat a flat, sandy coastal parcel or a solid granite ridge. Building successfully on karst topography requires careful site investigation, disciplined civil engineering, and specialized foundation design.
What Is Karst Topography?
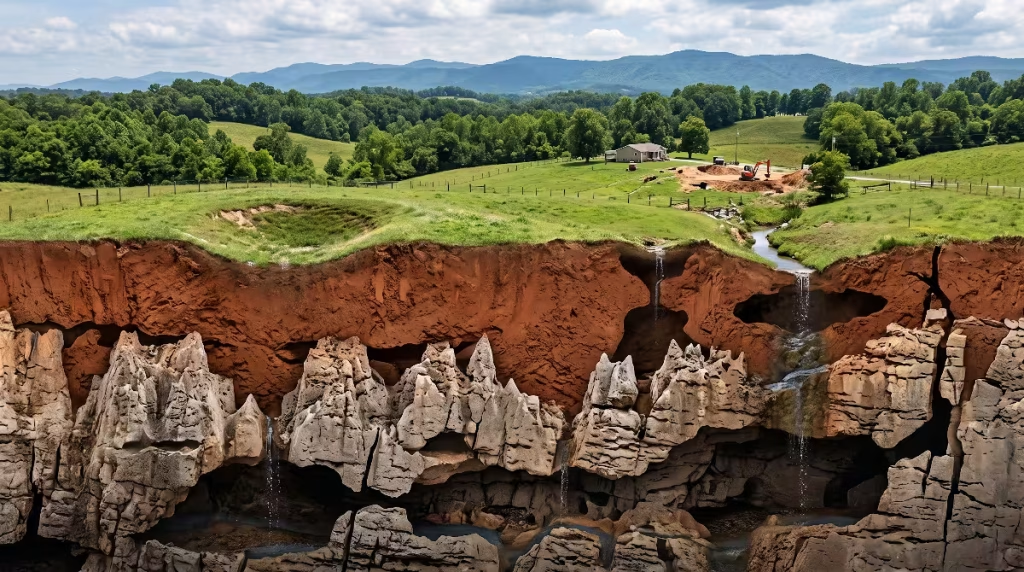
To make smart decisions about your land, you need a clear picture of what karst topography looks like below the surface. Many people assume sinkholes only occur in Florida. In truth, Tennessee has just as much active karst topography, but our thick blanket of mountain clay changes the way these features behave.
Mechanics of Karst Formations
The term
In East Tennessee, our rock layers were buckled and folded during the formation of the Appalachian Mountains. This geological history created the Ridge and Valley province. Long bands of limestone and shale run parallel from northeast to southwest. In these valley belts,
Surface Manifestations and Subsurface Traps
Can you build a house on karst topography? The answer is yes, but you must know what signs to watch for before setting stakes. On the surface, karst topography reveals itself in several distinct ways:
- Bowl-shaped depressions: Subtle dips in a pasture where rainwater pools and then vanishes without a surface outlet.
- Disappearing streams: Small creeks that flow across a field and suddenly sink straight into the ground.
- Natural springs: Water that shoots out of a rock face after a heavy rainstorm.
- Rocky outcrops: Irregular limestone ledges poking out of high spots in your yard.
Under the surface, karst topography sets two very different kinds of traps for homebuilders. The first is cover-subsidence. This happens when loose, sandy soil slowly sifts downward into rock cracks. The surface settles gradually over many years, creating a gentle swale.
The second type is cover-collapse. In Tennessee, our top layer of earth is often stiff, cohesive red clay. As a void opens in the rock, the clay above arches over the empty space like a bridge. You can drive a heavy tractor right over that clay bridge and never know a fifteen-foot cavern is sitting underneath. Over time, moisture weakens the clay dome from below. Eventually, the clay bridge can no longer support its own weight, and the ground suddenly drops open in a matter of hours.
The Pinnacle and Cutter Bedrock Challenge
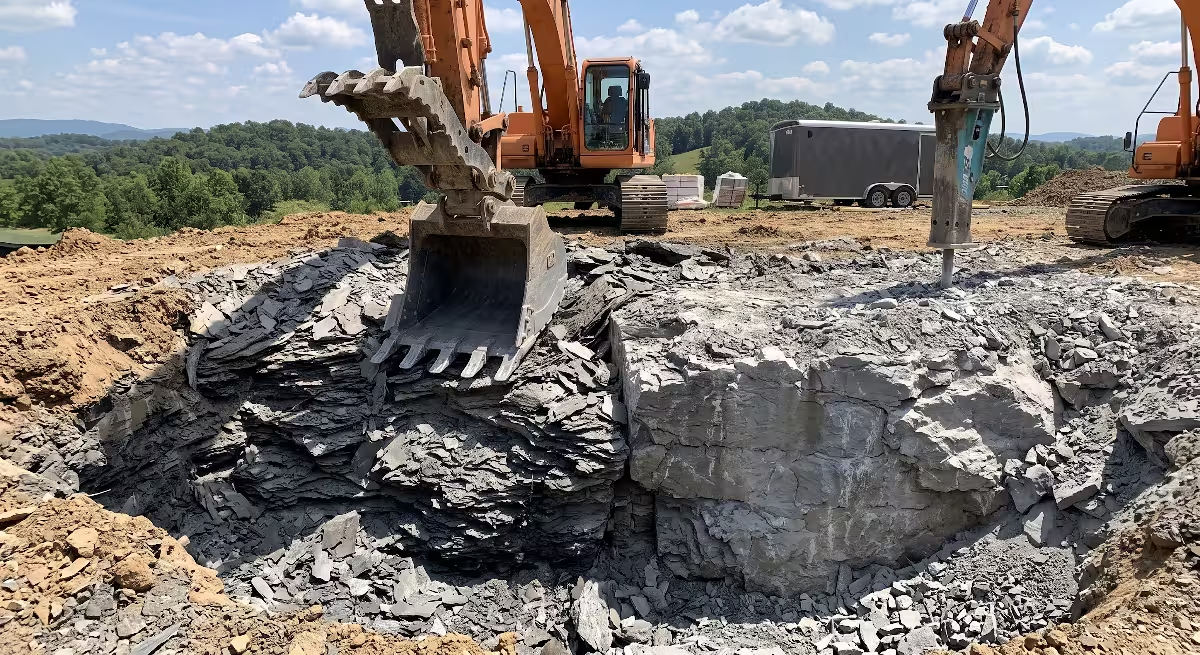
One of the hardest parts of dealing with karst topography during construction is the uneven surface of the bedrock. In textbooks, bedrock is drawn as a smooth, flat table of stone. In Tennessee karst topography, bedrock looks more like an egg carton or a row of jagged shark teeth.
Geologists call the high points of rock “pinnacles” and the deep soil-filled slots between them “cutters.” On a single home footprint measuring fifty by seventy feet, rock might sit just two feet below the grass at the front left corner, while dropping down twenty-five feet at the back right corner.
If a builder digs a trench and pours a standard continuous concrete footing across that profile, half of the house rests on solid stone, while the other half rests on soft, compressible red clay. That massive difference in bearing strength is a primary cause of severe structural failure in karst topography.
The True Risks of Building on Karst in Tennessee
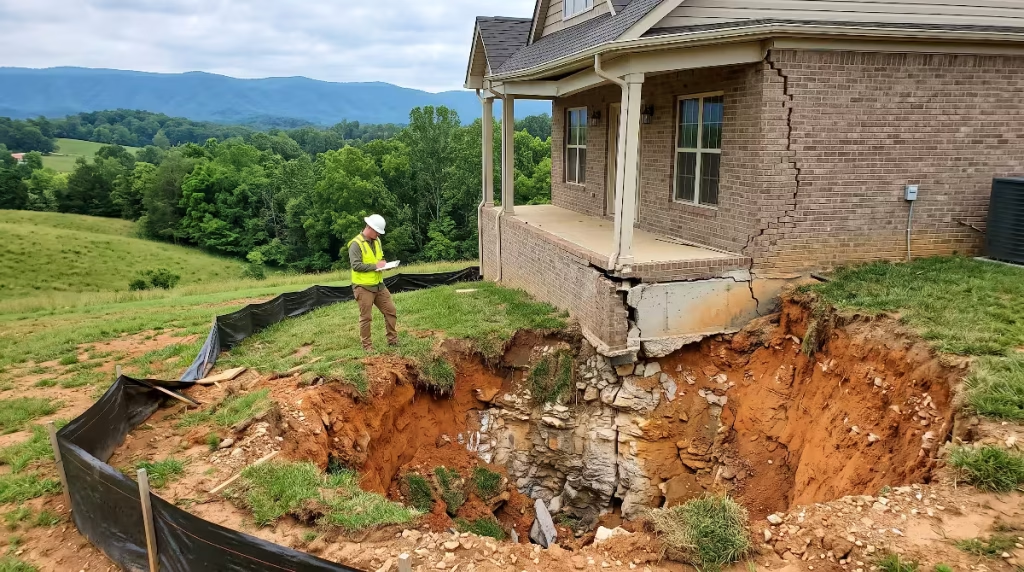
Building on karst topography presents real physical hazards that can destroy property value if left unaddressed. Understanding these risks lets you and your structural engineer design defenses long before framing begins.
Differential Foundation Settlement
When a house settles evenly, you rarely notice it. If the entire structure settles half an inch into the soil over five years, doors still swing true and drywall seams stay smooth. The danger in karst topography is differential settlement, where one part of the house drops while the rest stays firmly in place.
Imagine setting a dining table so that three legs sit on a solid oak floor, while the fourth leg sits on a soft foam sponge. The moment you place weight on the table, it twists and tilts. That is exactly what happens when part of a foundation spans a soft pocket in karst topography. As the unsupported section sinks, the rigid concrete footing bends and cracks. Above the foundation, brick veneer separates with diagonal, stair-step cracks, windows bind in their frames, and interior drywall tears along wall and ceiling joints.
Hydrostatic Pressure and Expansive Residual Clays
The soil sitting on top of our local bedrock adds another layer of complication to karst topography. East Tennessee red clay is an expansive residual soil. When our rainy winters set in, the clay absorbs water like a sponge and expands with immense force. In late summer droughts, that same clay dries out, shrinks, and forms deep surface cracks.
This seasonal expansion and contraction exerts strong lateral pressure against basement walls and foundation stem walls. Even worse, the drying cycles cause the clay to pull away from bedrock surfaces, creating easy pathways for surface water to shoot directly down into deep rock cavities. This rapid movement of water accelerates the internal erosion that triggers sinkhole development in karst topography.
Stormwater Mismanagement as a Trigger
Most people think sinkholes happen completely by natural chance. In my thirty years in the building trades, I have seen that human activity triggers the vast majority of sinkholes in developed karst topography.
When a parcel of land sits in its natural wooded state, tree canopies catch the rainfall. Deep roots drink up gallons of moisture every day, and a thick mat of organic leaf litter spreads rainwater out evenly. The underground drainage network in the karst topography stays balanced.
The moment site work starts, that natural balance changes:
- Heavy bulldozers strip off the protective forest canopy and topsoil.
- Heavy equipment compacts the subgrade, making it hard for water to soak in evenly.
- Roof lines, concrete driveways, and parking pads collect thousands of gallons of rainwater and channel it into small, concentrated areas.
- Standard downspouts dump torrents of water directly against foundation backfill.
When you inject thousands of gallons of concentrated roof runoff into one specific spot on karst topography, that water acts like a pressure washer underground. It quickly washes the clay mantle straight down into rock fissures, causing the soil above to collapse into a new sinkhole.
Permitting, Environmental, and Septic Complications
Building on karst topography introduces serious regulatory hurdles. In Tennessee, the Department of Environment and Conservation (TDEC) keeps close watch on activities around sinkholes and natural drainage depressions.
Because karst topography connects surface water directly to our underground aquifers, an open sinkhole throat is viewed by environmental regulators as a direct conduit to the drinking water supply. If your building plans call for modifying a sinkhole or routing parking lot water into a depression, state regulators may classify that drainage point as a Class V injection well. Securing permits for these features requires specialized engineering studies and strict environmental mitigation plans.
Septic systems pose an equally difficult challenge in karst topography. Local health department regulations require an adequate depth of suitable soil above bedrock to filter drain field effluent properly. If your lot features shallow rock pinnacles or underground voids, sewage effluent can travel rapidly through rock crevices without being cleaned by the soil. That can contaminate neighboring drinking water wells and make it impossible to get a standard septic permit.
Pre-Purchase and Pre-Construction Geotechnical Due Diligence
Never buy a piece of land or pour a foundation on karst topography without verifying what lies beneath the surface. Guessing is the most expensive mistake you can make. Thorough geotechnical due diligence gives you the facts needed to build safely or walk away from a risky lot.
Desk Study and Desktop Mapping
Before spending money on heavy drilling equipment, your investigation should start with a thorough desktop study. A skilled engineer or geologist can uncover valuable information about karst topography using public records and modern digital mapping tools.
The United States Geological Survey (USGS) publishes detailed 7.5-minute topographic quadrangle maps that show historical sinkholes and depressions marked with hachured contour lines. The Tennessee Division of Geology also provides detailed bedrock mapping that reveals which geological formations underlie your building envelope.
Today, airborne LiDAR (Light Detection and Ranging) mapping offers an exceptional tool for studying karst topography. LiDAR pierces through heavy tree canopies and brush to show the exact contours of the bare earth. On a LiDAR map, subtle sinkholes that look like flat clearings in person show up clearly as bowl-shaped depressions.
Historical aerial photographs are equally critical. In many growing Tri-Cities subdivisions, past developers used bulldozers to shove trees, stumps, and topsoil into existing sinkholes to flatten lots for sale. A careful review of older aerial photos can tell you if that flat backyard was actually an open sinkhole thirty years ago.
Subsurface Exploration Methods
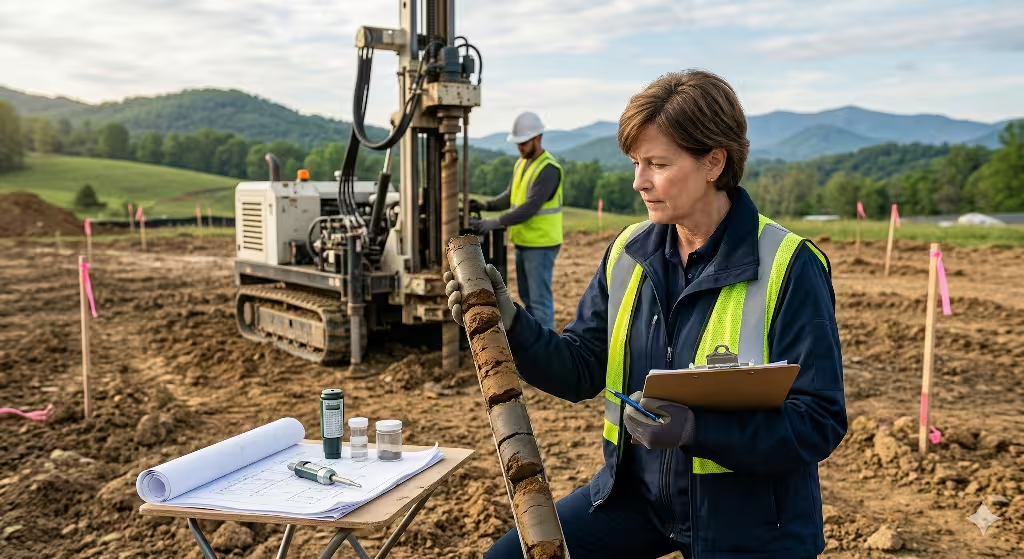
Once desktop research confirms that your property sits within active karst topography, you must test the actual soil and rock under your proposed home footprint. You cannot rely on a visual surface inspection alone.
Geotechnical engineers rely on several field testing methods to evaluate karst topography before construction begins.
Geophysical Testing and Electrical Resistivity
Geophysical testing provides a non-destructive way to look deep into the earth. The most effective tool for evaluating karst topography is Electrical Resistivity Tomography (ERT).
During an ERT survey, a technician drives a long line of steel stakes into the ground at regular intervals across your building site. An instrument sends an electrical current into the earth and measures how easily that current passes through the underlying materials:
- Solid limestone has high electrical resistivity.
- Moist, compact clay soils show low electrical resistivity.
- Air-filled or water-saturated underground voids stand out clearly because their resistivity values differ sharply from the surrounding rock.
The computer software compiles these readings into a colorful two-dimensional cross section of your property. This picture shows you the exact depth of the rock line, the locations of deep cutters, and the presence of any hidden voids long before you dig your foundation footings.
Geotechnical Soil Borings and Standard Penetration Testing
While geophysics gives you a broad picture, geotechnical soil borings provide hard physical evidence of the soil quality in karst topography. A drilling rig drives a hollow steel tube into the ground at specified locations across the building site.
Engineers use the Standard Penetration Test (SPT) during this process. The rig drops a 140-pound hammer from a height of thirty inches to drive the sampling tube into the earth. The number of hammer blows needed to drive the tube twelve inches is recorded as the soil blow count, or N-value.
In sound soil, blow counts rise predictably as the drill goes deeper. But in karst topography, a drill crew may encounter a situation where the hammer strikes the tube once, and the steel drops several feet through empty space or soupy, washed-out mud. These low blow counts alert the structural engineer that the upper soil cannot support the weight of a house.
The drill continues downward until it hits solid stone, which is known as refusal. It is critical that the drill crew cores several feet into that rock to confirm it is true, solid bedrock and not just a floating boulder resting over an open cavern in the karst topography.
Air-Track Drilling
When dealing with severe pinnacle and cutter rock formations, standard soil borings can leave big gaps in your information. Air-track percussion drilling fills those gaps quickly and affordably.
An air-track rig uses compressed air and a heavy percussive hammer to drive a steel bit rapidly through soil and rock. While it does not take soil samples like an SPT rig, it tells the operator exactly where rock is hit and how fast the bit advances. By running an air-track rig on a tight ten-foot grid across your proposed foundation footprint, a geotechnical team can map the jagged profile of the rock surface in karst topography in a single afternoon.
Engineered Foundation Solutions for Karst Soils
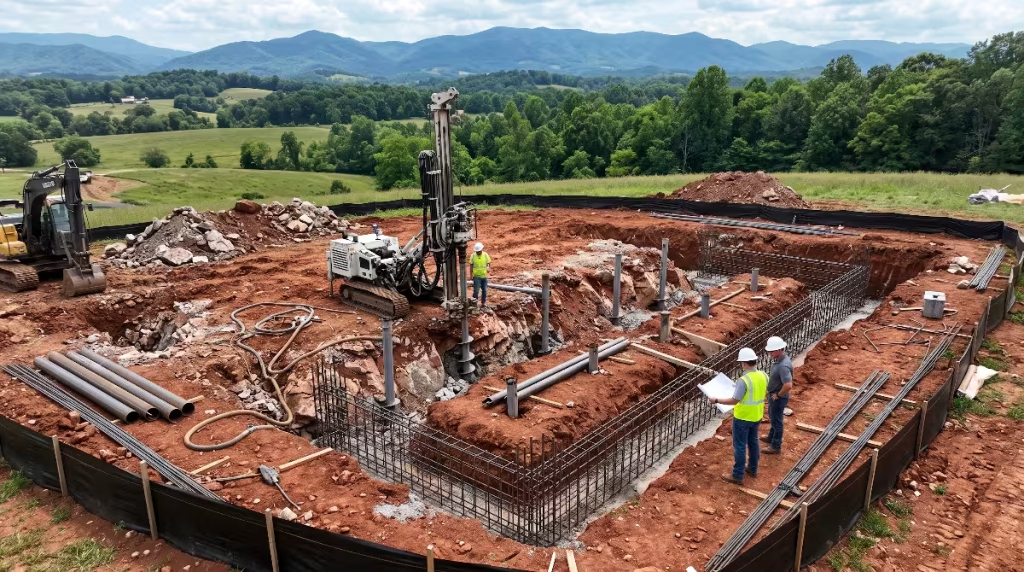
Once you know the exact conditions of the karst topography beneath your site, your structural engineer can design a foundation system tailored to those risks. The goal is simple: ensure the weight of your home is safely carried by competent material, regardless of what happens in the shallow soil layers.
Deep Foundation Systems
Deep foundation systems bypass unstable surface soils entirely. Instead of resting the home on the upper clay cap of karst topography, these systems transfer all structural loads directly down into solid, competent bedrock.
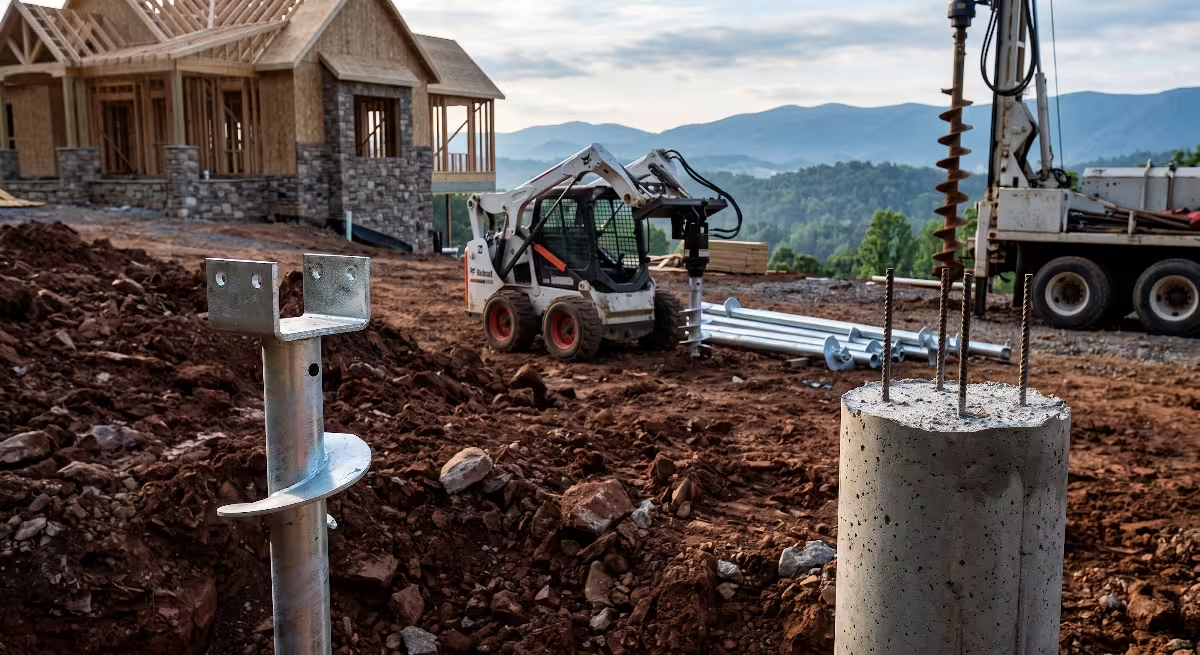
Helical Piers and Steel Push Piers
Steel push piers work on a similar principle, but they are pushed vertically into the ground using hydraulic rams anchored against a heavy concrete foundation bracket.
Piers offer several major benefits when building on karst topography:
- They install quickly with minimal site disturbance or vibration.
- The hydraulic equipment monitors drive torque in real time, verifying the exact load capacity of each pier during installation.
- If a localized sinkhole forms in the upper soil years later, the home remains securely suspended on the steel piers.
Helical piers are exceptionally useful for point-load locations under heavy chimneys, covered porch columns, and load-bearing garage posts built over karst topography.
Micropiles for Uneven Pinnacles
When the bedrock beneath a home site is extremely irregular, deeply fractured, or riddled with cavities, micropiles provide the ultimate engineering defense.
A micropile is a small-diameter pile, typically five to ten inches across, constructed using high-strength steel casing and threaded steel reinforcing bar. A specialized drill rig bores through the unstable clay and drills directly into the solid limestone bedrock, creating a rock socket.
Once the drill reaches the target depth, workers pump high-strength cement grout under pressure down through the casing. The grout fills the rock socket, bonds directly with the surrounding limestone, and encapsulates the steel bar.
Micropiles carry tremendous structural loads through rock friction. Because they can be drilled through boulders, voids, and deep cutters, micropiles are widely considered the gold standard for stabilizing homes on difficult karst topography.
Drilled Shafts and Caissons
For large custom homes with heavy masonry construction, structural engineers often specify drilled shafts, also known as cast-in-place concrete caissons.
A large truck-mounted auger drills an open circular hole, usually twenty-four to forty-eight inches in diameter, straight down through the soil until it rests on solid rock. Workers lower a cylindrical steel rebar cage into the open shaft and fill the entire hole with concrete up to the bottom of the foundation wall.
These massive concrete legs carry building loads down to deep bedrock. However, in active karst topography, drilled shafts must be inspected carefully before pouring. If groundwater is rushing through the bottom of the hole, or if the bottom rests on an unsupported rock shelf, the caisson can fail.
Shallow and Floating Foundation Systems
Deep piers are not always needed if testing shows the underlying rock is stable and voids are small or absent. In those settings, engineers often use shallow foundation systems designed to span across local soil dropouts in karst topography.
Stiffened Post-Tensioned Mat and Raft Slabs
A conventional concrete slab rests passively on the ground. If the soil settles beneath a standard four-inch slab, the concrete cracks and drops immediately. A stiffened post-tensioned mat slab behaves completely differently.
A post-tensioned mat slab features an interconnected grid of deep concrete grade beams running in both directions across the building footprint, capped with a structural concrete slab. High-strength steel cables encased in plastic sheathing are laid inside these forms before the pour.
After the concrete cures to a specific strength, technicians use hydraulic jacks to pull those steel cables to thousands of pounds of tension, locking them in place with steel anchors. This post-tensioning process squeezes the entire concrete foundation into a rigid, monolithic raft.
If an isolated sinkhole opens beneath a post-tensioned mat slab in karst topography, the foundation does not crack or sag. Instead, the rigid raft slab acts like a bridge, spanning the open void and keeping the home level until repairs can be made.
Grade Beams with Structural Slabs
Another reliable shallow approach is a network of heavily reinforced structural grade beams. These beams are designed to span long distances between reinforced concrete spread footings or deep piers.
Instead of pouring a slab directly on the ground, workers install corrugated cardboard void forms beneath the concrete beams. Over time, moisture breaks down the cardboard, leaving a physical air gap between the soil and the bottom of the concrete structure. This design prevents expansive clay soils from pushing up against the home and ensures that settling soils in karst topography do not drag the foundation downward.
Conventional Footing Modifications for Low-Risk Sites
On sites where geotechnical testing confirms a low risk of active sinkholes, a builder may still use standard continuous strip footings, provided specific engineering upgrades are made:
- Footing width: Widening the concrete footings from the standard sixteen or twenty inches out to thirty or thirty-six inches to lower the bearing pressure on the soil.
- Continuous steel reinforcement: Adding continuous grids of heavy grade-60 steel rebar through the top and bottom zones of the footing to give it beam strength.
- Poured concrete walls: Replacing hollow concrete masonry unit (CMU) block walls with solid poured concrete foundation walls tied directly into the footings with steel dowels.
A poured, steel-reinforced foundation wall creates a rigid structural box that can bridge small, localized settlement pockets in karst topography far better than brittle concrete block.
Soil Stabilization and Sinkhole Remediation
If geotechnical drilling uncovers a soft soil zone or a void near your proposed home site, you do not always have to abandon the location. Modern civil engineering offers proven techniques to stabilize the ground and seal sinkhole throats in karst topography before foundation work begins.
Compaction Grouting and Slurry Grouting Protocols
Grouting is the process of pumping engineered cement mixtures deep into the ground to strengthen loose soil and fill subsurface voids.
Compaction grouting uses a very stiff, low-slump mortar mixture made of cement, sand, water, and fly ash. A drill rig drives steel casing down to the top of the unstable rock zone. Workers then pump the thick grout mix into the ground under high pressure, often between two hundred and six hundred pounds per square inch.
Because the grout is thick like stiff clay, it does not travel far into tiny cracks. Instead, it expands outward from the bottom of the pipe like a solid bulb or balloon. As this grout bulb grows, it squeezes and densifies the surrounding soft clay, driving out trapped water and air. The crew slowly withdraws the pipe upward in stages, creating a solid column of compacted earth and stone.
Slurry grouting, on the other hand, uses a very fluid, watery cement mixture. This method is used when engineers want to fill and seal open rock fractures deep within karst topography. The fluid slurry flows freely through bedrock channels, hardening into solid rock that blocks water from washing more soil down into the deep drainage system.
The Inverted Rock Filter Method for Safe Sinkhole Repair
One of the most common mistakes made in rural Tennessee is trying to fix a sinkhole by dumping old tires, tree stumps, broken concrete, or random field dirt into the hole.
Doing that is guaranteed to fail. Organic materials rot, creating new voids. Loose dirt simply washes straight down through the open rock throat during the next heavy storm, reopening the sinkhole bigger than before.
The correct, engineered way to repair an open sinkhole in karst topography is the inverted rock filter method:
[ Surface Soil / Lawn Area ]
================================================== <- Impervious Clay Cap (1-2 ft)
-------------------------------------------------- <- Non-Woven Geotextile Fabric
oooooooooooooooooooooooooooooooooooooooooooooooooo <- Clean Pea Gravel (#57 Stone)
OOOOOOOOOOOOOOOOOOOOOOOOOOOOOOOOOOOOOOOOOOOOOOOOOO <- Medium Ballast Rock (3-6 inch)
################################################## <- Heavy Riprap Boulders (1-3 ft)
               \                  /
                \  Rock Throat   /
                 \              /
- Excavation: An excavator digs out all loose, washed-out soil until the solid limestone bedrock and the open throat of the sinkhole are fully exposed.
- Base rock placement: Heavy, interlocking riprap boulders, often one to three feet across, are packed tightly into the bottom of the throat. These large rocks lock together and cannot be pushed down into the narrow rock fissure.
- Graded layering: Workers place layers of progressively smaller stone over the heavy boulders. A layer of four to six-inch ballast stone goes on top of the riprap, followed by a layer of clean crushed gravel, such as standard number 57 stone.
- Geotextile separation: A layer of heavy, non-woven geotextile filter fabric is laid across the top of the gravel bed. This fabric lets water pass through easily while preventing fine topsoil particles from washing down into the rock layers.
- Compacted clay cap: Finally, workers backfill the top several feet with clean, low-permeability red clay, compacting it in thin layers with a vibrating roller. The clay cap is mounded slightly above the surrounding grade so rainwater runs away from the repaired sinkhole.
This inverted filter allows deep groundwater to drain naturally without carrying surface soil away, permanently stabilizing that area of the karst topography.
Civil and Stormwater Engineering: The Best Defense
You can spend tens of thousands of dollars on deep micropiles and heavy concrete grade beams, but if you do not manage water on your building site, you are fighting a losing battle. Water is the primary fuel that drives sinkhole activity in karst topography. Keeping surface water under control is your best long-term defense.
The Ten-Foot Positive Drainage Rule
Every good foundation design starts with basic site grading. Building codes require positive drainage away from foundation walls, but in karst topography, standard slope minimums should be doubled.
Make sure your site contractor establishes a minimum drop of six to eight inches across the first ten feet away from your foundation. The ground should slope smoothly away from the house on all four sides.
Never allow landscape beds with heavy organic mulch or sunken decorative edging to trap water directly against your foundation walls. If water is allowed to pool in foundation backfill, it will soak straight down along the basement wall, soften the bearing soil, and trigger sinkhole collapse in the karst topography below.
Hard-Piped Roof Runoff and Downspout Management
A standard two-thousand-square-foot roof sheds roughly twelve hundred gallons of water during a one-inch rainstorm. In East Tennessee, where we frequently receive four or five inches of rain from a single weather system, your roof collects massive volumes of water.
Dumping that water out through standard splash blocks onto the grass adjacent to your foundation is an open invitation for sinkhole trouble in karst topography:
- All gutter downspouts should connect directly to solid, smooth-walled PVC drainage pipes. Never use cheap, corrugated black plastic pipe, because it crushes easily during backfilling and clogs with tree roots.
- These solid discharge pipes should carry roof water at least fifteen to twenty-five feet away from the home.
- The water should discharge onto a stable, daylight slope or into an engineered swale lined with turf reinforcement matting or riprap.
- Ensure that discharge points do not direct water toward known depressions or nearby sinkholes.
Driveway and Swale Grading Across Slopes
Driveways, parking pads, and large outbuilding roofs dramatically increase the amount of impervious surface on your land. When rainwater hits asphalt or concrete, it sheets off rapidly instead of soaking into the soil naturally.
When designing driveways on rolling karst topography, work with the natural contour of the land. Use broad, shallow grass swales to catch runoff and guide it slowly across the property. The goal is to keep water moving at low speeds across wide surface areas, preventing it from pooling in low spots where it could dissolve underlying rock.
If your driveway must cross a natural swale, install properly sized culverts with flared concrete end sections and stone riprap aprons to prevent water from eroding the soil around the pipe.
Financial, Legal, and Insurance Realities in Tennessee
Building on karst topography involves important financial and legal considerations. Protecting your investment requires understanding how state insurance statutes work, how to budget for unexpected site conditions, and what sellers must disclose.
Homeowners Insurance and Tennessee Law
Many buyers assume their standard homeowners insurance policy protects them if a sinkhole damages their house. Under standard property insurance policies in Tennessee, that is almost never true.
Tennessee state law (TCA § 56-7-130) requires all property insurance companies operating in the state to make sinkhole collapse coverage available to homeowners. However, there is a major difference between basic sinkhole coverage and comprehensive land movement protection:
- Standard policy coverage: Most base policies only cover catastrophic ground collapse. By state definition, catastrophic collapse requires four specific events: the immediate collapse of the ground, a visible depression in the earth, structural damage to the building, and the home being condemned and ordered vacated by a local government agency.
- What is excluded: Standard coverage will not pay a single dollar for gradual settlement, cracked basement walls, sloping floors, or sinkholes that open in your yard without causing structural condemnation of the house.
- Optional sinkhole loss endorsements: Homeowners in karst topography should ask their insurance agent for a specific Sinkhole Loss Endorsement. This optional rider covers structural damage caused by sinkhole activity even if the house is not completely condemned.
Before issuing a sinkhole endorsement, insurance companies often require a professional geotechnical inspection of the property to confirm there is no pre-existing settlement damage.
Budgeting the Karst Contingency Fund
When building on karst topography, your construction budget must include a dedicated contingency line item for subsurface work. In typical flatland building, a five percent overall contingency is standard. When building on terrain shaped by karst topography, your site and foundation contingency should be ten to fifteen percent of your overall build budget.
Here is a realistic look at potential engineering and foundation costs you may encounter:
| Professional Service or Foundation Upgrade | Typical Cost Range | Purpose on Karst Topography |
| Desktop Geological Review & Site Walk | $600 to $1,500 | Initial screening of maps, LiDAR, and surface features. |
| Geotechnical Soil Borings (3 to 5 Borings) | $2,500 to $5,000 | Measuring soil strength, rock depth, and void presence. |
| Electrical Resistivity Imaging (ERT) | $3,500 to $7,000 | 2D mapping of bedrock profile and hidden underground voids. |
| Helical Pier Installation (Residential) | $12,000 to $30,000 | Transferring footing loads directly to competent load-bearing layers. |
| Micropile Deep Foundation System | $25,000 to $60,000+ | Drilling high-capacity steel piles into irregular bedrock pinnacles. |
| Engineered Inverted Rock Filter Repair | $5,000 to $15,000 | Excavating and stabilizing an open sinkhole throat near the home. |
If you conduct your geotechnical testing during your property purchase inspection period, you can often negotiate the purchase price or request seller credits to offset these foundation engineering costs.
Seller Disclosure Rules and Resale Value
Tennessee property law requires sellers of residential real estate to complete a standard property condition disclosure form. This document asks specific questions about whether the owner is aware of any sinkholes, settling, soil problems, or drainage issues on the land.
If an owner knows a sinkhole exists on the property and intentionally fills it with dirt to hide it from buyers, that owner faces serious legal liability for fraud and structural damages under state law.
When you build on karst topography, keep every piece of paper:
- Save your initial geotechnical soil reports and geophysical survey maps.
- Retain stamped engineering drawings showing pier layouts or mat slab designs.
- Keep daily installation logs from the piering contractor showing drive depths and torque values.
- Secure a final letter of structural completion stamped by your licensed professional engineer.
When the time comes to sell your home down the road, having this complete engineering file transforms a potential buyer concern into a major selling point. You can prove to prospective buyers and their home inspectors that your home was engineered specifically to handle the local karst topography.
Builder Field Checklist: From Lot Walk to Pour Day
A clear, step-by-step process ensures you do not miss critical warning signs when planning a home build. Use this field checklist to guide your project from your initial walk across the property to the day the concrete trucks arrive.
Phase One: Raw Land Visual Inspection
- [ ] Check property maps against USGS geological quadrangle maps and state karst databases.
- [ ] Review county LiDAR elevation maps to identify subtle surface depressions.
- [ ] Walk the land after a heavy rainstorm to see where water collects and drains.
- [ ] Look for bent or leaning trees (often called “drunken trees”), which indicate creeping soil movement.
- [ ] Check for circular cracking in the topsoil or localized slumping of the grass.
- [ ] Inspect nearby road cuts and stream banks to examine the local limestone bedding layers.
- [ ] Talk with long-time neighboring property owners about historical sinkhole repairs in the area.
Phase Two: Geotechnical Scope of Work
- [ ] Hire an independent geotechnical engineering firm familiar with local karst topography.
- [ ] Stake your exact proposed house footprint before drilling equipment arrives.
- [ ] Complete at least three to four soil test borings within the home footprint.
- [ ] Verify that all borings continue into solid bedrock to confirm refusal is not a floating boulder.
- [ ] Conduct electrical resistivity imaging if the building footprint spans known surface dips.
- [ ] Review the final geotechnical report with your general contractor and structural engineer.
Phase Three: Structural Engineering Review
- [ ] Confirm your foundation plans are designed and stamped by a licensed Tennessee structural engineer.
- [ ] Determine whether the site requires a deep foundation (piers/micropiles) or a stiffened shallow system (post-tensioned mat).
- [ ] Specify continuous steel rebar reinforcement throughout all footings and foundation stem walls.
- [ ] Replace hollow concrete block walls with solid poured concrete walls in high-risk zones.
- [ ] Plan the exact routing of all underground plumbing lines so utility trenches do not weaken the foundation support.
Phase Four: Excavation and Pour Day Verification
- [ ] Have your geotechnical engineer inspect the open footing trenches before any concrete is poured.
- [ ] Probe the bottom of all excavated trenches with a steel t-handle soil probe to check for soft spots.
- [ ] If a soft cutter or pocket is found, excavate the soft material down to sound rock and backfill with lean concrete.
- [ ] Verify that all steel reinforcement cages are lifted up on concrete chairs and not resting in the dirt.
- [ ] Check that all downspout collector pipes and perimeter footing drains are installed and sloped away from the house.
- [ ] Verify positive six-inch grading away from all foundation walls across the first ten feet.
Building with Permanence in the Volunteer State
Building a custom home in Tennessee is an exciting milestone. Our landscapes offer incredible natural beauty, but building with permanence requires respecting the geology beneath our feet.
Karst topography is a natural part of our regional environment. It has shaped our valleys, carved our caves, and provided clean water to our mountain springs for thousands of years. While building on karst topography brings real structural challenges, it is not an obstacle you need to fear.
By identifying the presence of karst topography early, investing in professional soil testing, and selecting an engineered foundation system tailored to your specific lot, you take complete control of the building process. When you protect your subgrade from concentrated water and anchor your home to competent stone, you can build with confidence, knowing your home will stand rock-solid for decades to come.