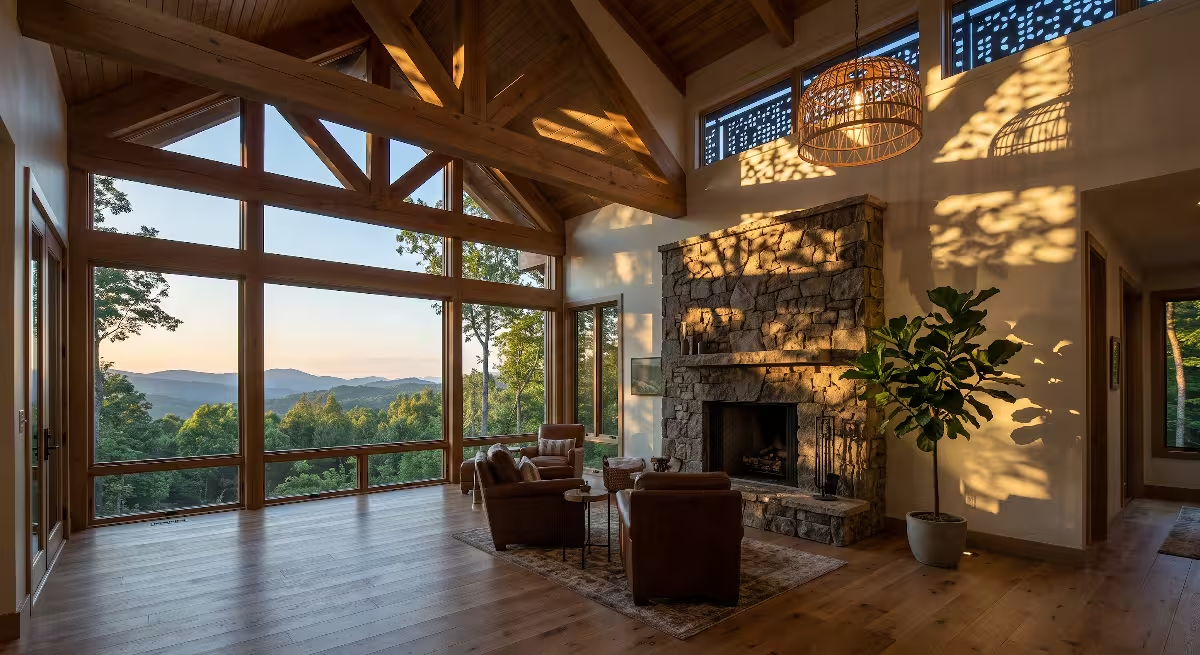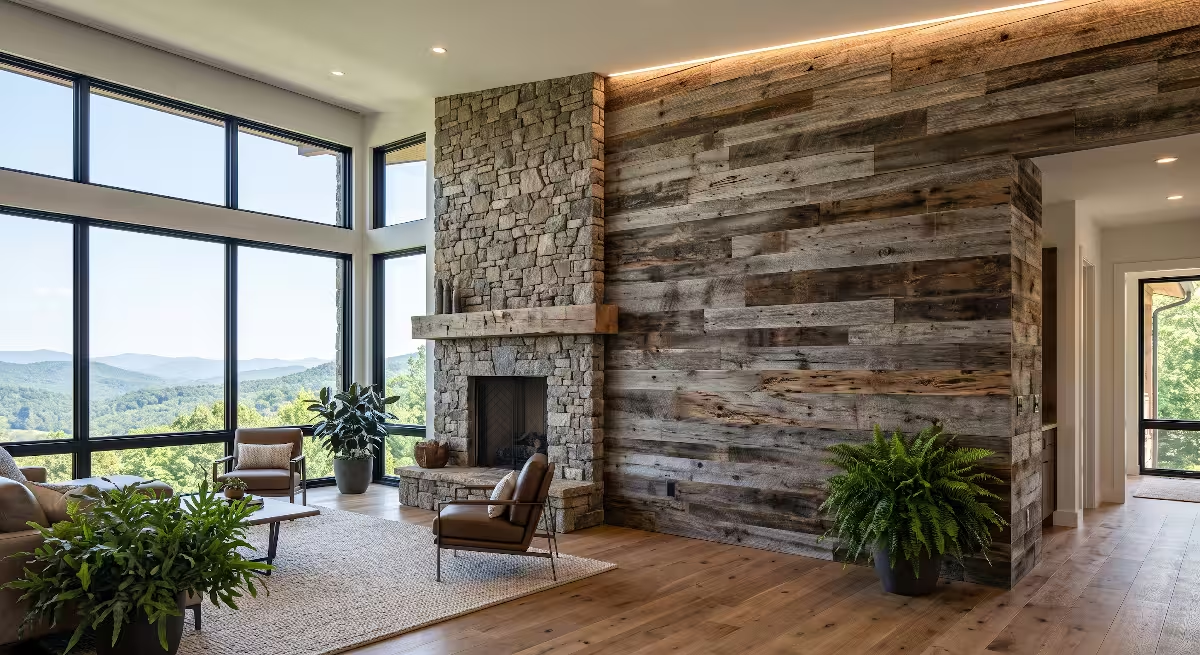


Building a custom house is one of the most exciting projects you will ever take on. When you walk through a home with soaring rooflines, timber trusses, and tall windows looking out toward the mountains, the open feeling can take your breath away. High spaces bring natural light and a clean sense of calm into our daily lives.
However, open volume also creates tricky design challenges. The most common pitfall seen in custom home building involves lighting these tall spaces. Homeowners spend months picking out floors, tile, and cabinets. Then, when it comes time to choose a light fixture for a two-story great room or an entry foyer, they buy a fixture that looks huge in a showroom but ends up looking like a tiny toy hanging in their room.
To keep your room balanced, you must understand how to size your light fixtures correctly. That is where a proven chandelier sizing formula becomes your best friend on the job site. In this guide, we will walk through the exact steps, field math, framing requirements, and electrical rules you need to know. By using the right chandelier sizing formula, you can ensure your home feels warm, balanced, and built to last.
The Scale Trap
When you walk into a typical lighting retail showroom, the ceilings are rarely twenty feet high. Most showrooms have ten-foot or twelve-foot ceilings. In that setting, a thirty-inch light fixture looks massive. Your eyes compare the fixture to the low ceiling and the surrounding displays. You buy the light, bring it to your new build, and have the electricians hang it from the center of a tall room.
As soon as the scaffolding comes down, your heart sinks. The light fixture looks like a tiny earring hanging in a massive church cathedral.
In custom home building, we call this the scale trap. The human eye reads space in three dimensions: length, width, and height. When a ceiling doubles in height from ten feet to twenty feet, the total volume of air does not just double. It expands rapidly. If your light fixture only accounts for the floor space and ignores that massive volume of overhead air, it will disappear into the ceiling.
An undersized fixture does more than just look silly. It creates visual clutter. Instead of drawing the eye upward and anchoring the center of the room, a tiny light looks like a lost speck on a long metal stem. It leaves the upper half of your living area feeling empty, cold, and hollow. The right fixture ties the floor, furniture, and roofline together into one cohesive design.
Architecture Meets Mathematics
Achieving great design is rarely a matter of guesswork. It is a matter of clear math and geometry. Every strong house starts with engineering, and interior proportions work on the exact same principles.
When you deal with tall rooms, you are balancing three distinct structural planes:
- The horizontal floor plane where your furniture sits.
- The vertical wall plane where your windows and art hang.
- The angled ceiling plane created by your roof trusses or rafters.
If you have a flat, standard eight-foot ceiling, simple rules of thumb work just fine. But when you step into vaulted spaces, cathedral pitches, or heavy timber great rooms, the rules change. A cathedral ceiling follows the pitch of the roof all the way up to a sharp peak. A vaulted ceiling may have asymmetrical slopes or barrel curves.
Each of these roof shapes alters how our eyes measure the room. A steep ceiling draws the eye straight up toward the ridge. Because your eyes are pulled upward, the vertical mass of the light fixture must be substantial enough to hold your attention.
Applying a reliable chandelier sizing formula gives you the exact dimensions you need to balance these planes. It removes emotion and uncertainty from the buying process, letting you shop with total confidence.
The Direct Rule
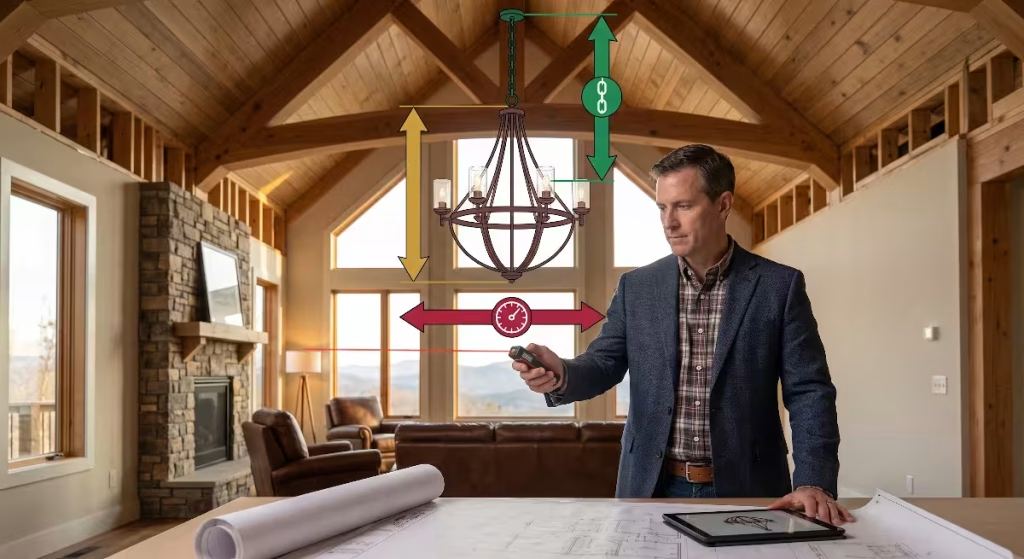
Before we dig into the deeper formulas, let us look at the big picture. Sizing a large hanging light requires balancing three separate measurements:
- Fixture Diameter (Width): How wide the light spreads across the room footprint.
- Fixture Body Height (Vertical Mass): The height of the actual light fixture itself, excluding the hanging chain or rod.
- Suspension Drop: The length of the chain, wire, or pipe that connects the canopy on the ceiling to the top of the fixture.
Many people make the mistake of looking at overall hanging length when shopping online. A fixture might be listed as having an eighty-inch hanging length, but seventy inches of that might be a skinny metal rod, with only a ten-inch light fixture at the bottom. That will not work in a high room.
The body of the light must have enough physical volume to act as a visual centerpiece. At the same time, the suspension drop must place that body in the correct visual zone so it does not block sightlines from second-story lofts or bonk tall guests on the head. Every chandelier sizing formula we will discuss treats these three measurements as connected parts of a single equation.
Diameter Formula: Floor Plane Footprint
Let us start with the first step of our layout: finding the correct diameter.
The traditional rule of thumb used by interior decorators for decades is simple:
- Measure the length of the room in feet.
- Measure the width of the room in feet.
- Add those two numbers together.
- Convert that total sum into inches.
For example, if you have a bedroom that is twelve feet wide and fourteen feet long, you add twelve and fourteen together to get twenty-six. That means a twenty-six-inch wide fixture will fit that room nicely under a standard ceiling.
However, in a high-volume space, that traditional rule falls flat. If you have a great room that is twenty feet wide by twenty-four feet long, the standard formula gives you forty-four inches ($20 + 24 = 44$). While forty-four inches sounds substantial, under a tall ceiling that fixture will look narrow and weak.
To fix this, we apply a modified chandelier sizing formula designed specifically for high spaces. Take your base measurement and add ten to fifteen percent to the diameter. Alternatively, you can add two inches of fixture width for every foot of ceiling height above eight feet.
Let us run the numbers for that same twenty-foot by twenty-four-foot room:
- Base calculation: 20 + 24 = 44 inches.
- Extra height adjustment: A twenty-foot ceiling is twelve feet taller than a standard eight-foot ceiling.
- Add two inches per extra foot: 12 X 2 = 24 extra inches.
- Total target diameter: 44 + 24 = 68 inches.
By using an updated chandelier sizing formula, you discover that your room actually needs a fixture with a diameter between fifty-five and sixty-eight inches. That wider footprint allows the light to command the floor plane without getting swallowed up by the open air above it.
Fixture Body Height Formula: Vertical Mass
Now that we know how wide our light should be, we must figure out how tall the actual body of the fixture needs to be. This is where most homeowners make their biggest mistake. They purchase a wide wagon-wheel light that is sixty inches across, but only twelve inches tall. While the width is correct, the fixture looks like a flat pancake floating in midair.
In high rooms, vertical height is vital. You need visual presence from top to bottom.
The standard calculation for fixture body height is known as the vertical mass rule. For every foot of total ceiling height, you should plan for two and a half to three inches of fixture body height:
- Low end: Ceiling Height in Feet X 2.5 inches
- High end: Ceiling Height in Feet X 3.0 inches
Let us run this calculation for a tall twenty-foot ceiling:
- 20 X 2.5 = 50 inches of fixture body height.
- 20 X 3.0 = 60 inches of fixture body height.
This chandelier sizing formula shows that your fixture body should stand between fifty and sixty inches tall on its own. Remember, this measurement covers only the light fixture itself, from the bottom decorative finial up to the top loop where the chain connects. It does not include the chain hanging down from the ceiling.
When you hang a light fixture that is five feet tall and five feet wide in a twenty-foot room, the proportions lock into place. The light fixture commands the middle third of the vertical volume, creating an anchor that makes the entire room feel properly scaled, intentional, and comfortable.
Suspension Drop and Bottom Clearance
Once you know the width and height of the fixture body, you need to calculate how far down to hang it. The suspension drop determines where the light sits between the floor and the ceiling.
Here is the general rule for open living rooms, great rooms, and main entry foyers:
- The bottom of the fixture should hang no lower than eight to nine feet above the finished floor.
Why eight to nine feet? First, it ensures safe clearance. Even if someone carries a tall ladder, a tall Christmas tree, or large furniture into the room, they will not bump the light. Second, it keeps the light well above the normal line of sight when people are walking around the room, preserving clear views across the entire space.
Let us calculate the required chain or downrod length using our known dimensions:
- Total ceiling height: 20 feet = 240 inches.
- Desired floor clearance: 9 feet = 108 inches.
- Fixture body height: 60 inches.
Now, subtract the clearance and the fixture height from the total ceiling height:
240 – 108 – 60 = 72 inches
You need seventy-two inches, or six full feet, of suspension chain or downrod. When planning your purchase, always verify that the manufacturer provides enough wire, chain, or pipe stems in the box. Many standard fixtures only ship with six feet of chain. If your ceiling is twenty feet tall, six feet of chain is your absolute minimum. If your fixture body is shorter, you might need eight to ten feet of suspension hardware.
What if your tall ceiling sits above a formal dining table? In that case, the rule changes:
- When hanging a light over a dining table under a tall ceiling, hang the bottom of the fixture thirty-six to forty inches above the tabletop.
- A standard table is thirty inches tall, which puts the bottom of your fixture around sixty-six to seventy inches off the floor.
Because the ceiling is so tall, hanging the light thirty-six to forty inches above the table keeps the fixture from feeling too close to diners while still firmly defining the dining space.
Sizing and Proportion Matrix
To make your planning easy, I have put together a quick reference guide based on standard custom home room dimensions. Use this table as a starting point when applying your chandelier sizing formula:
| Room Dimensions | Square Footage | Recommended Fixture Diameter | Recommended Fixture Body Height | Recommended Suspension Drop |
| 16 feet by 18 feet | 288 sq ft | 38 to 42 inches | 48 to 54 inches | 7.5 to 8.5 feet of chain or rod |
| 20 feet by 20 feet | 400 sq ft | 44 to 48 inches | 50 to 60 inches | 7.0 to 8.0 feet of chain or rod |
| 22 feet by 26 feet | 572 sq ft | 52 to 60 inches | 55 to 66 inches | 6.5 to 7.5 feet of chain or rod |
| 24 feet by 30 feet or more | 720+ sq ft | 60+ inches (or multi-tier) | 60 to 72+ inches | 6.0 to 7.0 feet of chain or rod |
Take a close look at that table. Notice how the fixture dimensions scale up naturally alongside both floor area and vertical space. Using a structured chandelier sizing formula prevents you from under-sizing your fixture, saving you from expensive replacement costs or re-hanging fees later on.
Slopes, Peaks, and Measuring Points
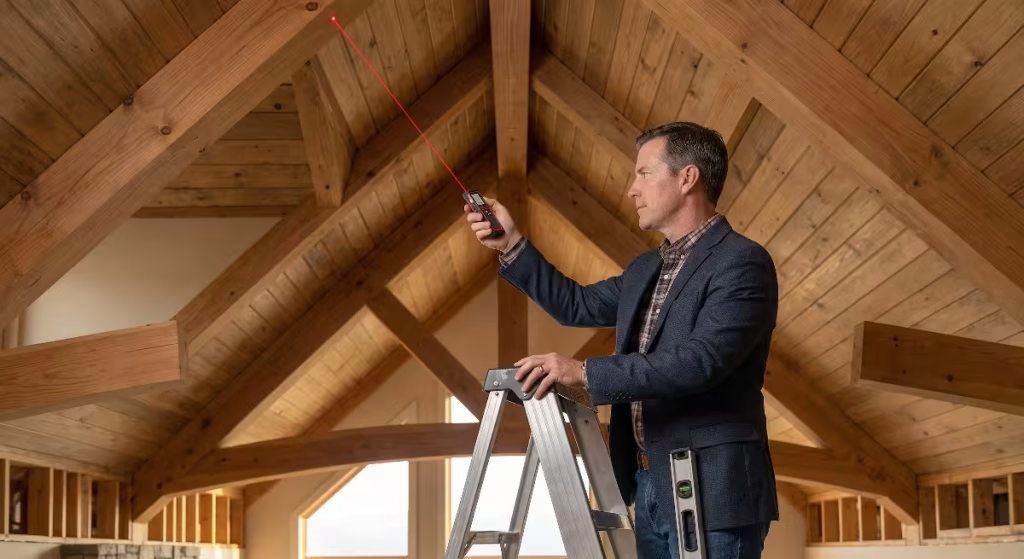
Not all twenty-foot ceilings are flat drywall planes. In custom construction, we build open gable peaks, shed roofs, and scissor-truss vaults. Before you can use any chandelier sizing formula, you have to know where you are actually measuring from.
Here are the three primary vaulted ceiling types you will encounter:
- Cathedral Ceilings: These feature two equal sloping sides that meet at a sharp central ridge beam. The peak is the highest point in the room, with walls sloping down evenly on both sides.
- Shed Ceilings (Mono-pitch): The ceiling starts low on one wall and slopes upward in a single straight line to a tall wall on the opposite side.
- Barrel Vaults: A rounded, curved arch that runs the length of the room.
When measuring the height of a cathedral ceiling, identify where the junction box will sit. If the light hangs directly from the center ridge beam, measure from the floor straight up to that peak. That peak is your total height.
However, if your floor plan places the light off-center, such as over a seating area on one side of the room, you cannot use the peak measurement. You must measure the ceiling height directly above the exact spot where the light will hang.
Always use a modern laser measure for this job. Trying to run a floppy twenty-five-foot tape measure up to a dark cathedral peak is frustrating and inaccurate. Place a laser measure flat on the floor where the fixture will center, point the beam straight up at the ceiling, and record the exact number.
Sloped Ceiling Adapters and Swivel Canopies
Hanging a heavy fixture from an angled surface requires specialized mechanical hardware. Gravity always pulls a hanging object straight down toward the center of the earth. If your ceiling slopes at a forty-five-degree angle and your junction box sits flat against that slope, a rigid metal pipe cannot screw straight into it without snapping the threads or bending the metal.
You have two practical solutions:
- A Sloped Ceiling Canopy (Swivel Adapter): This is a specialized ceiling canopy equipped with a ball-and-socket joint or a heavy-duty mechanical swivel hinge. The canopy mounts flush against the angled drywall, while the internal swivel allows the downrod to hang plumb and level. Always check the slope rating on the adapter. Many basic swivels only handle angles up to thirty degrees. If your roof pitch is steep, like an 8/12 or 12/12 pitch, you may need an adapter rated for forty-five or even sixty degrees.
- A Plumb Mounting Block: In heavy timber or craftsman homes, we often frame a solid wood block directly onto the ridge or rafter. The top of the wood block is cut to match the roof angle, while the bottom face is cut completely flat and level. The electrical box mounts to this flat bottom face, allowing you to use standard hanging canopies without any visible swivels.
If your home includes rough-sawn timber beams or tongue-and-groove wood ceilings, a custom mounting block looks clean, intentional, and period-accurate.
Chain vs. Rigid Downrods
When buying a large light fixture, you will have to choose between hanging it from a metal chain or a rigid metal downrod. In tall, vaulted spaces, this choice impacts both looks and maintenance.
The Case for Chain Suspension
Metal chains are made of individual interlocking links. This design offers distinct mechanical benefits in tall rooms:
- Natural Plumb Hanging: A chain uses gravity to hang straight without fighting against slight structural twists or vibrations.
- Easy Adjustments: If you miscalculate your drop by four inches, your electrician simply unhooks two links to lift the light.
- Sway Dampening: If a strong door slams or an air conditioning vent kicks on, a chain absorbs the motion smoothly without placing high bending stress on the ceiling bracket.
The main drawback to a chain is visual appearance. In ultra-modern, minimalist homes, exposed chains can look messy or industrial.
The Case for Rigid Downrods
A rigid downrod consists of solid metal pipe sections that thread together to hide the electrical wiring completely inside.
- Clean Lines: A solid stem provides a sleek, modern, architectural look that pairs nicely with minimalist designs.
- Stable Alignment: In breezy rooms with large ceiling fans, a rigid stem keeps the fixture from swaying or twisting.
However, rigid stems require exact math. Downrods typically come in fixed twelve-inch or eighteen-inch threaded segments. You cannot adjust them by half an inch. If your calculation from your chandelier sizing formula calls for sixty-five inches, you have to decide whether to round down to sixty inches or up to seventy-two inches.
Furthermore, rigid stems require an articulated swivel at the ceiling canopy to ensure they hang plumb. If the canopy is off-level by even one degree, a seven-foot rigid pipe will visibly lean sideways across the room.
Visual Weight and Fixture Density
Two fixtures can share the exact same fifty-inch diameter and sixty-inch height, yet feel completely different once installed. This comes down to visual weight.
Visual weight refers to how dense, solid, or open a fixture appears to the human eye.
- Light Visual Weight: Think of a modern sputnik fixture, a thin brass geometric cage, or an open ring with thin spokes and bare bulbs. You can see straight through the fixture to the walls and windows behind it.
- Heavy Visual Weight: Think of an iron wagon wheel holding solid glass hurricane shades, an enclosed fabric drum shade, a solid wood chandelier, or an ornate multi-tier crystal fixture.
When you apply your chandelier sizing formula, factor in visual weight:
- If you pick an open, airy, wireframe fixture, choose a size toward the larger end of your formula range. An open fixture lets light and sightlines pass through it, meaning a sixty-inch wire fixture will not overwhelm the room.
- If you pick a solid, heavy, dark iron or wood fixture, choose a size toward the lower or middle end of your range. A dense fifty-inch fixture commands substantial visual real estate and can easily dominate a room if it gets too large.
Lumen Output and Layered Lighting

A huge room with a tall ceiling needs plenty of actual light, not just a decorative fixture. A common mistake is expecting a single chandelier to illuminate the entire great room.
A fixture hanging fifteen feet in the air cannot push enough light down to your sofa for comfortable reading without blinding everyone who looks up at it. Lighting tall rooms requires a layered lighting plan:
- Ambient Lighting: This is your general wash of room light. In high spaces, pair your central chandelier with recessed can lights tucked into the ceiling rafters. For twenty-foot ceilings, use high-output LED recessed fixtures with narrow beam spreads (twenty-five to forty degrees) so the light travels all the way to the floor instead of scattering uselessly into the ceiling.
- Task Lighting: Add table lamps, reading lights, and floor lamps beside chairs and couches. This places clean light right where your hands and books need it.
- Accent Lighting: Use wall sconces along large open walls, or install directional art lights to wash stone fireplaces and paintings with warm light.
When calculating the light output of your main fixture, look at lumens rather than watts. Watts measure electrical power draw; lumens measure visible brightness.
For a tall great room, you should aim for twenty to thirty lumens per square foot of floor space across all light sources combined. If your room is four hundred square feet ($20 \times 20$), you need between eight thousand and twelve thousand total lumens.
Your chandelier should supply roughly half of that light output (four thousand to six thousand lumens). Look for a fixture that holds multiple bulbs or features integrated LED engines, and make sure to put it on a dedicated dimmer switch. A high-lumen chandelier without a dimmer switch will feel like a harsh car headlight during relaxing evenings.
Junction Box Load Capacity and Safety Codes
Now, let us talk about structural safety. Large fixtures designed for twenty-foot ceilings are heavy. A sixty-inch multi-tiered chandelier made of steel, brass, or thick glass rarely weighs less than fifty pounds, and often weighs between seventy-five and one hundred and fifty pounds.
The National Electrical Code (NEC) lays out clear rules for hanging heavy lighting fixtures:
- Standard round plastic or lightweight metal electrical boxes are only rated to hold fixtures weighing up to fifty pounds.
- If a fixture weighs more than fifty pounds, the electrical box must be clearly marked and listed for heavy-duty fixture support.
- Modern heavy-duty fan-rated ceiling boxes can support fixtures up to seventy-five pounds.
- If your fixture weighs more than seventy-five pounds, the electrical code requires the fixture to be supported directly by the building frame, independently of the electrical outlet box, unless the box is specifically listed for higher weights.
Never let a builder or electrician mount an eighty-pound iron chandelier to a standard plastic box with two small drywall screws. Over time, house settling, wind vibration, and thermal expansion will work those fasteners loose, creating a serious hazard.
Rough-in Framing and Cross-Blocking
Long before your drywall goes up, you must prepare the framing to support your fixture.
When your house is down to bare wood studs and rafters, walk the job site with your project manager. Mark the exact spot on the floor where your chandelier will center. Use a plumb bob or a vertical laser cross-level to project that point straight up onto the ceiling framing.
At that location, have the framing crew install solid horizontal cross-blocking. This means cutting thick $2\times6$ or $2\times8$ dimensional lumber and nailing it tightly between the ceiling joists or rafters using heavy framing nails or structural wood screws.
If your fixture weighs more than one hundred pounds, do not rely on standard box brackets. Have the carpenters frame a double-thick wood bridge directly over the box location. Install a heavy-duty threaded steel rod that passes directly through the center of the wood framing and drops into the junction box. When that chandelier hangs, its weight pulls straight against the primary roof framing, keeping it secure for decades to come.
Maintenance, Bulb Changes, and Motorized Lifts
Once your dream chandelier is hanging twenty feet above the living room rug, consider a practical question: How are you going to change the light bulbs?
Standard LED bulbs last a long time, but they do burn out eventually. Fixtures also collect dust, cobwebs, and fireplace residue over time. Dusting a light fixture twenty feet in the air requires bringing a giant twenty-four-foot A-frame ladder into your finished home, moving furniture, and risking damage to your hardwood floors.
In custom home building, we solve this problem during the rough-in stage by installing a motorized chandelier lift system.
A motorized lift is a motorized winch unit installed in the attic directly above the fixture location. The heavy-duty suspension cable passes down through the ceiling to hold the chandelier.
- Under normal use, the lift holds the light firmly in place against the ceiling, feeding electrical power through a specialized contact plate.
- When a bulb burns out, or when holiday decorating begins, you plug a key into a discreet wall switch or use a secure remote control.
- The motor lowers the chandelier smoothly down to waist level in about two minutes.
- You stand safely on your floor, change the bulbs, polish the glass, hit the switch, and send the fixture right back up to its locked operational height.
Installing a motorized lift costs a bit more upfront during rough framing and electrical, but it pays for itself the very first time you avoid renting commercial scaffolding or hiring an expensive ladder crew.
Sightlines from Upper Lofts and Staircases
Many homes with twenty-foot ceilings also feature a second-story overlook, open catwalk, or grand staircase. If your living room has an open loft, you have to consider how the light looks from above as well as from below.
Most basic light fixtures are designed to be viewed only from underneath. When you look down into them from an upper balcony, you might see ugly exposed wiring, dust-covered bulb sockets, metal brackets, and messy manufacturer stickers.
Before purchasing a fixture for a two-story space:
- Look at pictures of the fixture from the top down.
- Choose designs that feature enclosed glass shades, decorative metal screening, or artistic multi-tiered arms that look beautiful from every angle.
- Pay close attention to glare. Bare Edison-style bulbs look charming from below, but if an upper loft looks directly into clear glass bulbs at eye level, the bright glare can be blinding. Frosted glass, diffusers, or shaded candelabras work much better in spaces with upper sightlines.
Position the vertical body of the fixture so it floats evenly between the floor plane and the top handrail of the upper loft. This balances the open well between levels, tying the first and second floors together seamlessly.
Energy Efficiency and Thermal Load
In a room with twenty-foot ceilings, you are dealing with a large volume of air that requires careful heating and cooling. The lighting you choose plays an active role in the thermal comfort and energy efficiency of that room.
Older incandescent or halogen chandelier bulbs were notoriously inefficient. A twelve-light chandelier holding sixty-watt incandescent bulbs pulled seven hundred and twenty watts of continuous electricity. More importantly, roughly ninety percent of that electrical energy was given off as pure heat.
Pumping seven hundred watts of heat straight into the upper ceiling zone right where warm air already pools makes your air conditioning system work much harder than necessary.
Modern homes should always use high-efficiency LED lighting:
- An equivalent LED bulb draws only seven to eight watts while producing the same lumen output as a sixty-watt incandescent bulb.
- That twelve-light chandelier will pull less than one hundred total watts, saving substantial money on your monthly utility bill.
- Quality LED bulbs generate very little heat, keeping the upper thermal envelope of your great room balanced and comfortable.
Look for LED bulbs with a high Color Rendering Index (CRI) of ninety or greater, and stick with a warm color temperature between 2700K and 3000K. This provides the cozy, flattering glow of traditional lighting without the high power bills and heat build-up.
Frequently Asked Questions About Chandelier Sizing Formulas
How high should a chandelier hang in a two-story foyer or open 20-foot room?
In an open foyer or two-story room, the bottom of the fixture should hang between eight and nine feet above the finished floor. If your front entry features a tall transom window above the door, adjust the suspension height so the body of the chandelier is centered in that window when viewed from the outside street or driveway. This gives your home a warm, welcoming presence at night.
Can a chandelier be too big for a 20-foot ceiling?
Yes. While under-sizing is far more common, you can overdo it. A fixture is too large if its outer edges come within three to four feet of an adjacent wall, balcony railing, or fireplace mantel. A proper layout requires breathing room around the perimeter. Run your chandelier sizing formula carefully to ensure your light fixture leaves sufficient open space around its perimeter.
How do you hang a chandelier on a steep vaulted ceiling?
To hang a fixture on a steep slope, use a ceiling canopy equipped with a heavy-duty swivel joint rated for the specific pitch of your roof, or mount a plumb wooden leveling block to the rafters before hanging. If using rigid downrods, confirm that the swivel joint swings freely in the exact direction of the roof slope so the downrod hangs plumb without binding.
Should you use one large chandelier or two smaller fixtures?
If your tall room is square (such as twenty feet by twenty feet), a single central chandelier is the best choice. However, if your room is long and narrow (such as eighteen feet wide by thirty-two feet long), a single round fixture will leave the ends of the room feeling empty and dim. In rectangular rooms, consider hanging two matched chandeliers spaced evenly along the center ceiling axis. To size twin fixtures, divide the room length in half, treat each half as an independent square zone, and apply your chandelier sizing formula to each half separately.
Professional Walkthrough Checklist
Before your drywall crew seals up your ceilings, walk the job site with your general contractor and review this punch list:
- [ ] Verify Room Dimensions: Measure the true length, width, and clear peak height with a laser measure.
- [ ] Run the Sizing Formulas: Confirm your target diameter and vertical body height using the sizing steps outlined above.
- [ ] Inspect Rough Framing: Ensure solid $2\times6$ or $2\times8$ cross-blocking is installed between rafters at the junction box location.
- [ ] Check Electrical Box Rating: Confirm the installed junction box is metal, listed for heavy fixtures, and properly rated for the weight of your chosen light.
- [ ] Order Extra Hanging Hardware: If your room needs more than six feet of drop, verify that you have ordered extra matching chain, wire, or downrod segments from the manufacturer.
- [ ] Confirm Roof Pitch Compatibility: If your ceiling slopes, confirm your canopy swivel or mounting block accommodates your roof pitch angle.
- [ ] Plan for Maintenance: Decide if your budget allows for a motorized chandelier lift to make bulb replacement simple and safe.
- [ ] Review Upper Sightlines: Check the fixture location from any second-story loft or staircase to confirm bulbs and internal wiring will look clean from above.
- [ ] Install Compatible Dimmers: Ensure your wall switch uses a high-quality dimmer compatible with the LED driver in your light fixture.
Taking the time to do this math and framing prep during the rough-in stage ensures your lighting will look stunning on move-in day. In high spaces, good planning makes all the difference. When your fixtures are properly scaled to the room, your home will look beautifully balanced, comfortable, and inviting for years to come.