
The Trigonometry of Biophilic Prospect
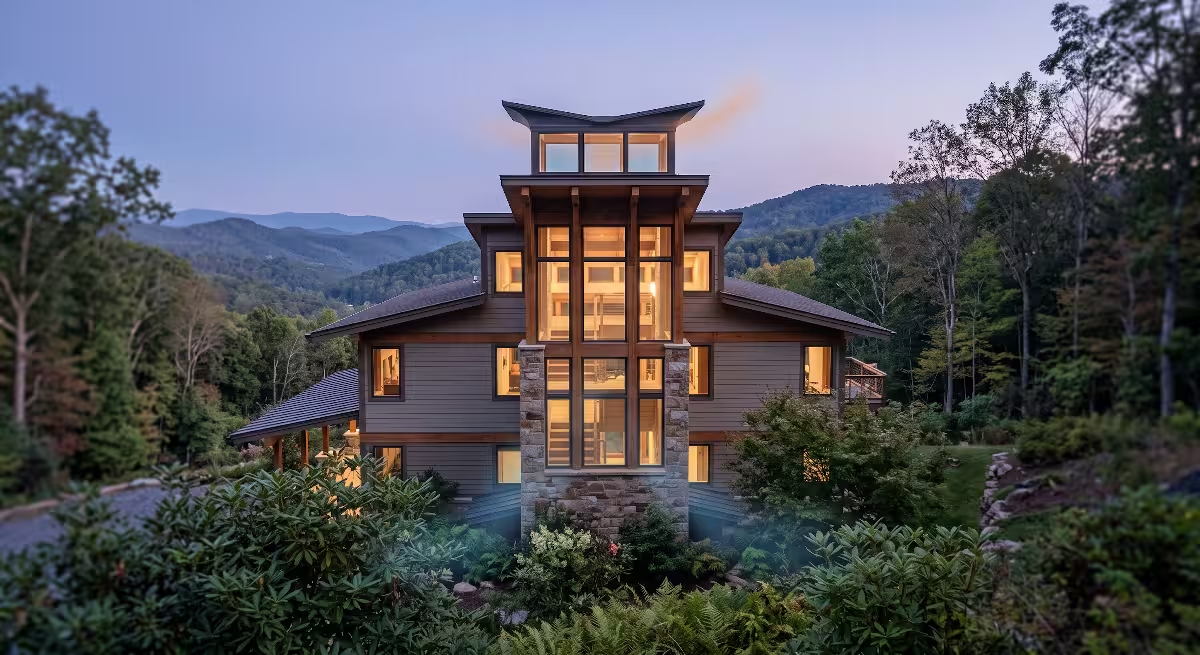
When you build a home on a mountain slope in East Tennessee, the land offers a breathtaking reward. Every morning, you can look out across rolling ridgelines, morning mist rising from the valleys, and deep green forests that stretch to the horizon. Yet, all too often, new homeowners walk into their newly completed living rooms, sit down on their favorite couch, and realize something went terribly wrong. The top of the mountain peak is cut off by the upper drywall header. Or, when they stand up at the kitchen island, a thick wooden window divider sits directly across their field of vision, slicing the beautiful horizon in two.
Capturing a scenic vista, for a mountain viewshed, is not something you leave to guesswork. It requires understanding geometry, human eye levels, and the exact slopes of your surrounding terrain.
In this comprehensive guide, we will explore the precise science of window layout, using clear calculations to bring the outdoors into your home.
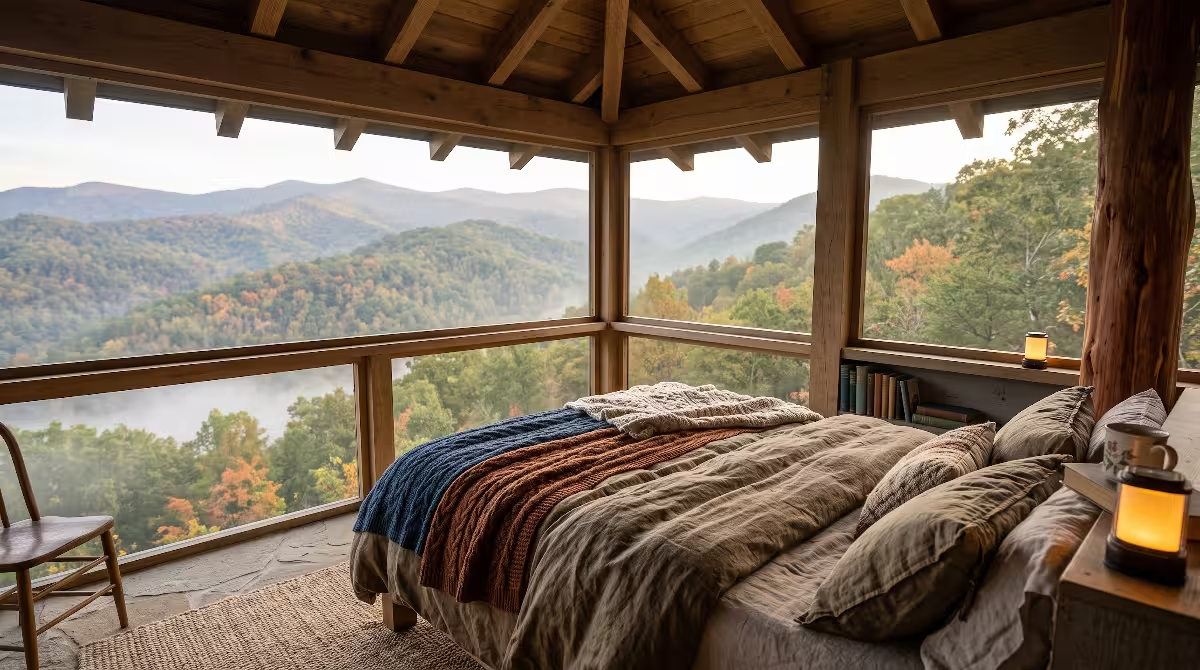
Designing a home that connects you to nature is known as biophilic design. It is not just about decorating with house plants or using natural wood trim. Real biophilic architecture shapes the physical shell of a building so your senses stay in constant touch with natural light, weather patterns, and the living world outside. When we build in the Appalachian foothills around Johnson City, Kingsport, and Bristol, our most powerful connection to nature is often the wide mountain viewshed that surrounds the building site.
The Failure of Intuitive Fenestration
Fenestration is simply the term architects use for the arrangement of windows and doors across a building. Most residential homebuilders use standard window heights. They order six-foot-eight-inch or seven-foot window units and set every rough opening at the exact same height from the floor, usually about thirty-six inches above the subfloor.
On a flat suburban lot, standard heights work reasonably well because you are mostly looking straight out at a street or a fenced backyard. But on a mountain ridge, standard window heights fail almost every single time.
When you build on a slope, your focal point is rarely at eye level. The target of your view might be an elevated peak climbing hundreds of feet above your house, or it might be a river valley dropping steeply below your deck. If a builder installs a window using standard heights without calculating the actual angle of the land, the window frame acts like a pair of bad blinders. The top window frame cuts off the top of your favorite ridge, or the bottom sill cuts off the creek running through the hollow.
To capture an authentic mountain viewshed, you cannot rely on gut feeling. You must calculate the actual angles between the human eye and the distant geological features before the first wall stud is nailed into place.
Prospect-Refuge Theory in the Appalachian Context
In environmental psychology, there is a famous concept known as prospect-refuge theory. Developed by geographer Jay Appleton, this theory shows that human beings feel the most relaxed, secure, and mentally restored when they are in an environment where they have two things at once:
- Prospect: An open, clear, unobstructed view of the surrounding landscape, allowing you to observe weather, light, and distant terrain.
- Refuge: A safe, sheltered place behind you where you feel protected, warm, and enclosed.
Our ancestors relied on this combination to survive. A cave or forest edge that overlooked an open valley gave early humans a place to sleep safely while keeping an eye on game animals or approaching storms.
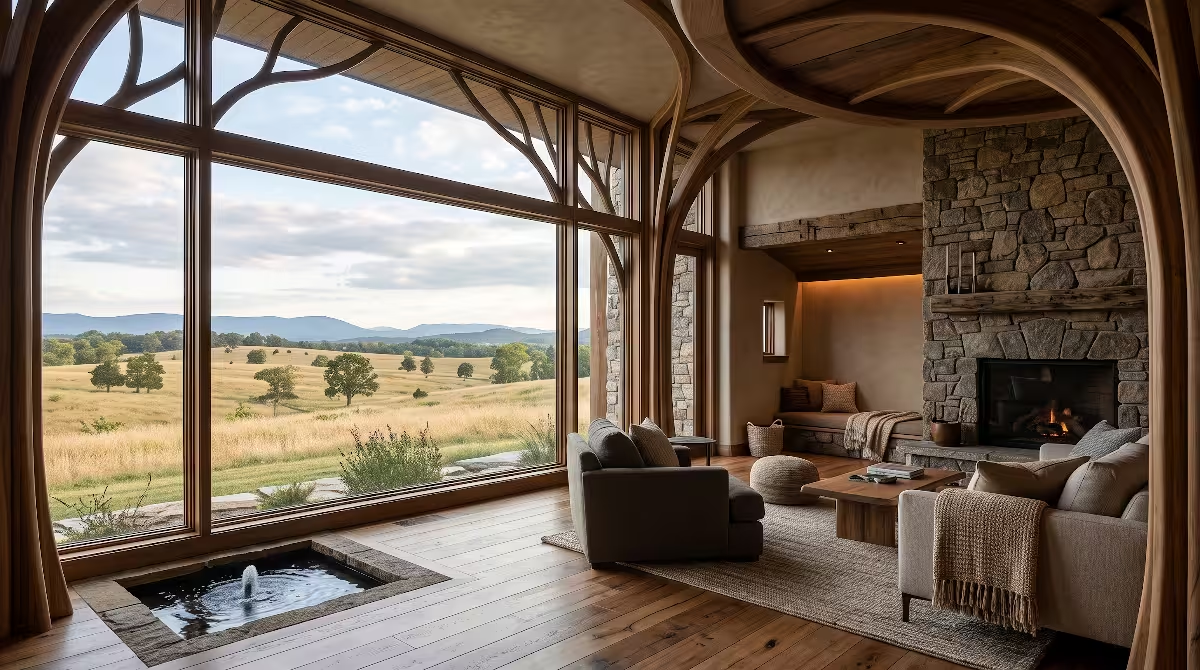
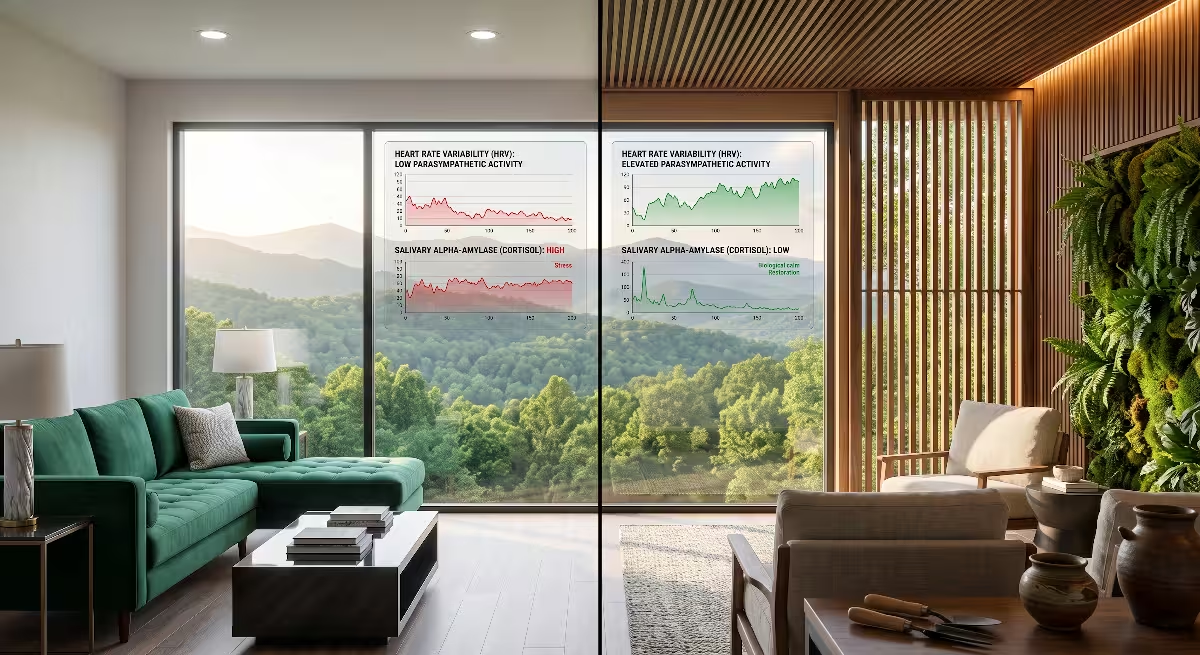
Today, living inside a home that provides both prospect and refuge lowers your heart rate and reduces daily stress. In Northeast Tennessee, where our weather shifts rapidly across the ridges of Roan Mountain and the Unaka Range, watching the light change across your mountain viewshed from the comfort of an armchair brings profound psychological calm. But that mental benefit disappears if you have to stretch your neck, stoop down, or lean sideways just to see over a poorly placed window sill. An improper window layout destroys both prospect and refuge.
The Goal: Exact Coordinates for Window Placement
The goal of this guide is to turn the beauty of a mountain viewshed into hard numbers that your framing contractor can build with total confidence. By measuring the elevation of the land, the height of the observer, and the distance to the ridge, we can calculate the exact height for window sills and window headers.
Whether you are sitting down with a morning coffee or standing up while cooking dinner, your windows should frame the land seamlessly. When you treat the mountain viewshed as a geometric problem to solve during the drafting stage, you ensure that every dollar you invest in large glass openings pays off in flawless views for decades to come.
The Mathematical Framework: Sightline Trigonometry
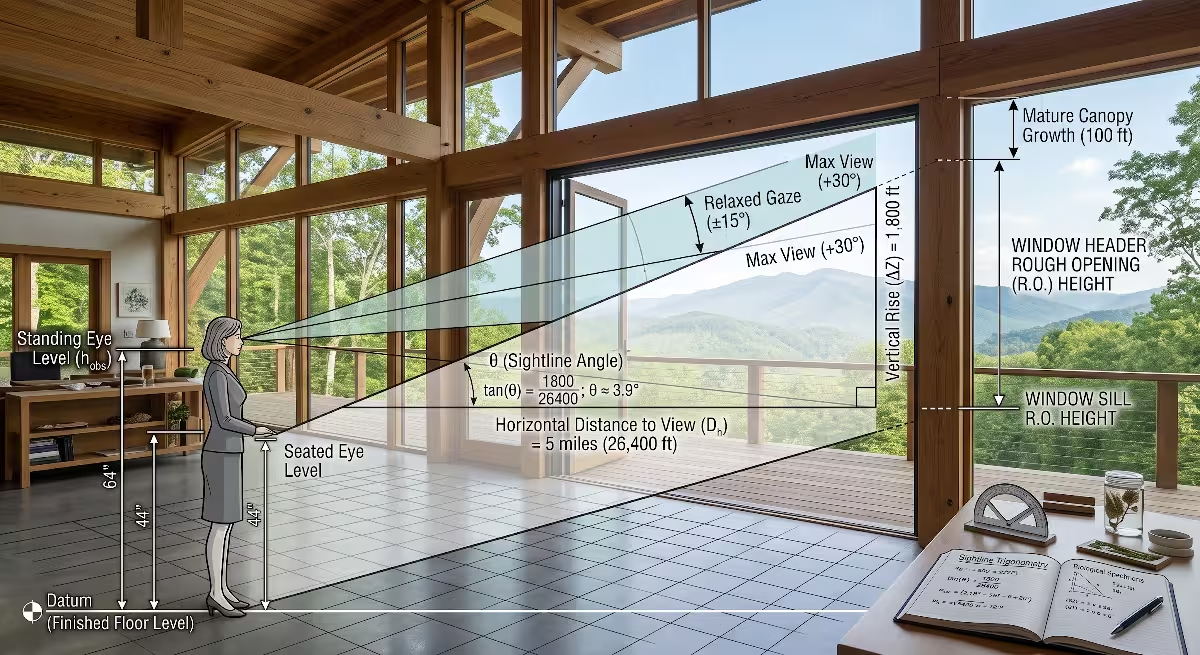
You do not need an advanced engineering degree to calculate window heights, but you do need a solid grasp of basic trigonometry. Specifically, we will use the right-triangle relationships between horizontal distance, vertical height, and the angle of your sightline.
                  [Target Mountain Peak]
                         /|
                        / |
                       /  |
        Sightline (c) /   | Vertical Rise (b)
                     /    |
                    /     |
  [Observer Eye]   /______|
                   Horizontal Run (a)
In any right triangle, the tangent of an angle equals the opposite side divided by the adjacent side. In our real-world site analysis, the opposite side is the difference in elevation between your eye and the mountain peak. The adjacent side is the horizontal distance from your house to that peak.
Coordinate and Variable Definitions
To make these formulas easy to use on your building plans, let us establish standard definitions for every variable:
- FFL (Finished Floor Level): The absolute height of your finished interior floor above sea level, measured in feet.
- h_eye (Eye Height): The distance from the finished floor to the viewer’s eyes. In residential architecture, we use two standard heights:
- Standing eye height: 64 inches (5.33 feet) for the average adult.
- Seated eye height: 44 inches (3.67 feet) for a person sitting comfortably on a dining chair or sofa.
- d_setback (Observer Setback): The horizontal distance from where the person is standing or sitting inside the room to the interior surface of the window glass, measured in feet.
- D_target (Distance to Target): The true horizontal distance from your home to the ridge or mountain peak, measured in feet or miles (5,280 feet per mile).
- Z_target (Target Elevation): The height of the mountain peak or ridgeline above sea level, measured in feet.
- Delta_Z (Vertical Rise): The net difference in height between the observer’s eye level and the target mountain peak.
- Angle Theta (Sightline Angle): The angle of inclination (looking up) or declination (looking down) from the viewer’s eye to the geological feature.
Calculating the Sightline Angle of Inclination
Before you can decide where a window frame belongs on an exterior wall, you must determine the sightline angle required to view your mountain viewshed.
First, calculate the absolute height of the observer’s eye above sea level. If your home’s finished floor level is at 1,800 feet above sea level, and you are standing up with an eye height of 5.33 feet, your eye elevation is:
Observer Eye Elevation = FFL + h_eye
Observer Eye Elevation = 1,800 feet + 5.33 feet = 1,805.33 feet
Next, find the difference in elevation between your eye and the peak you want to frame. If the peak sits at an elevation of 3,500 feet, the vertical rise is:
Delta_Z = Z_target - Observer Eye Elevation
Delta_Z = 3,500 feet - 1,805.33 feet = 1,694.67 feet
Now, determine the horizontal distance to that peak using a map or survey data. Let us assume the peak is 2 miles away. Convert that distance into feet:
D_target = 2 miles * 5,280 feet per mile = 10,560 feet
Now use the tangent formula to find the sightline angle:
tan(Theta) = Delta_Z / D_target
tan(Theta) = 1,694.67 / 10,560 = 0.1605
Using the inverse tangent function (arctan) on a scientific calculator, we find:
Theta = arctan(0.1605) = 9.12 degrees
This means your eye must look upward at an angle of 9.12 degrees above completely flat, horizontal level to see the crest of that peak. That 9.12-degree line of sight forms the upper boundary of your mountain viewshed.
For distant vistas that sit five miles or more away, the curvature of the Earth and the bending of light through the atmosphere begin to matter. You can adjust the vertical rise using a standard geological correction formula:
Delta_Z_adjusted = Delta_Z - (0.574 * Distance_in_miles^2)
For a mountain peak ten miles away, the Earth’s curve drops the apparent height of the peak by about 57 feet. Accounting for this ensures that your window layout remains accurate even across massive regional vistas.
Calculating Window Head and Sill Heights
Once you know the sightline angle, you can determine where the top edge of the window glass (the head) and the bottom edge of the window glass (the sill) must sit on your wall.
A human being does not look at the world through a tiny straw. The human eye has a natural cone of vision. When you look at an object, your comfortable field of view extends about 15 degrees upward and 15 degrees downward without moving your neck. If you move your eyes slightly, that comfortable visual cone expands to about 30 degrees upward.
To frame the mountain peak comfortably, the top of the glass must clear the sightline angle from the farthest point inside the room where someone will stand or sit.
Let us calculate the minimum window head height for someone standing 10 feet back from the glass wall:
Window Head Height = h_eye + (d_setback * tan(Theta_upper))
If the sightline angle to the peak is 9.12 degrees, and we add 5 degrees of sky buffer above the peak so the mountain does not feel cramped against the frame, our upper angle is 14.12 degrees.
tan(14.12 degrees) = 0.2516
Window Head Height = 64 inches + (120 inches * 0.2516)
Window Head Height = 64 inches + 30.19 inches = 94.19 inches
This simple calculation reveals a critical fact: if you install a standard 80-inch or 84-inch window header, anyone standing ten feet back inside the room will have the mountain peak completely hidden by the upper wall! To preserve that mountain viewshed, the clear glass must extend to at least 94.2 inches above the finished floor, which means specifying an eight-foot (96-inch) or nine-foot (108-inch) window opening.
Now let us calculate the sill height. Suppose your home looks out not just at the peak, but down into a wooded valley where deer feed in the morning. If the lower boundary of your mountain viewshed drops 12 degrees below horizontal, and you want a seated viewer (eye height at 44 inches) sitting 8 feet (96 inches) away to see the valley floor:
tan(-12 degrees) = -0.2126
Window Sill Height = 44 inches + (96 inches * -0.2126)
Window Sill Height = 44 inches - 20.41 inches = 23.59 inches
If the builder uses a traditional 36-inch sill height, a person sitting on the sofa will see nothing but a blank wall and the tops of distant trees. By dropping the sill to 24 inches or lower, the entire downward slope of the mountain viewshed opens up to view.
Observer Setback and Room Depth
Notice how the distance from the window changes everything. The closer you walk to a window, the wider your field of view becomes. When your face is two inches from the glass, you can see almost everything from straight up to straight down.
However, people do not live with their noses pressed against glass panes. We live in the middle of our rooms. We sit at dining tables placed eight feet from an exterior wall. We cook at kitchen islands twelve feet from the sliding doors. We rest in beds ten feet away from bedroom picture windows.
When calculating the framing for your mountain viewshed, always base your math on the primary stationary furniture locations in your floor plan:
- The center of the sectional sofa in the living room.
- The chef’s standing station behind the kitchen island.
- The headboard position in the primary bedroom suite.
- The desk position in a home office.
By calculating your sightlines from these specific living coordinates, your mountain viewshed stays framed exactly where you actually spend your daily life.
Topographic and GIS Pre-Planning: From LiDAR to Framing
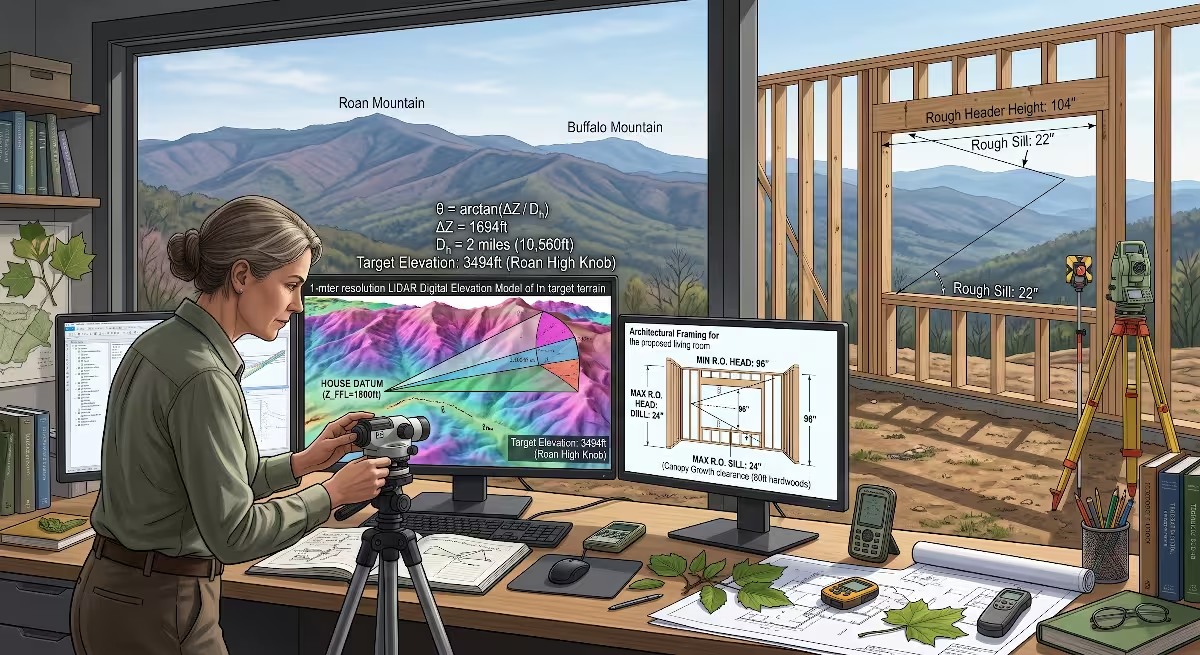
Before you dig a foundation or pour concrete footings, you can map your views with incredible accuracy using modern digital mapping tools. Decades ago, builders had to climb tall ladders with hand levels to guess what a second-story view might look like. Today, we have free access to satellite and laser elevation data that reveals every contour of the land.
Harvesting USGS 3DEP LiDAR Elevation Data
The United States Geological Survey runs the 3D Elevation Program, commonly known as 3DEP. This program uses aircraft equipped with LiDAR (Light Detection and Ranging) lasers to scan the Earth’s surface. These lasers fire hundreds of thousands of light pulses per second down toward the ground, measuring the exact elevation of the terrain down to a resolution of one meter or less.
When you download a Digital Elevation Model (DEM) for your building site in East Tennessee, you get a bare-earth grid. The LiDAR software strips away the trees and houses, giving you the pure geological shape of the ground.
Using free Geographic Information System software such as QGIS, you can place a virtual marker on your exact house coordinates. You can assign that marker an elevation equal to your proposed finished floor level. Then, you can run a computerized line-of-sight analysis toward any compass bearing.
This digital workflow lets you evaluate your mountain viewshed long before your architect draws final construction documents. You can test different room orientations, rotate the building footprint by five or ten degrees, and see instantly how that rotation changes the visible ridgeline through your windows.
Identifying False Horizons and Intervening Ridges
One of the most common mistakes in mountain home design is falling in love with a distant mountain on a map, only to discover during construction that a nearby hill completely blocks it. This is known as a false horizon.
[House]                [Intervening Foothill]          [Target Peak]
   o                         /\                             /\
  /|                        /  \                           /  \
  / \                      /    \                         /    \
___|______________________/______\_______________________/______\___
Sightline: -------------> [BLOCKED BY FOOTHILL]
In rugged Appalachian terrain, ridges fold behind one another in complex layers. A foothill half a mile away with an elevation of 2,100 feet might look small from the road, but because it is so close to your building pad, its sightline angle might be 15 degrees upward. If your target mountain peak is five miles away at an elevation of 3,200 feet, its sightline angle might only be 8 degrees.
In that scenario, the close foothill completely swallows the higher mountain behind it. By plotting a continuous cross-sectional elevation profile along your viewing angle in GIS software, you can spot these optical conflicts instantly.
Evaluating your mountain viewshed on a topographic cross section ensures that you aim your primary living room windows at the true open gaps between ridges. It allows you to align your largest glass openings with natural saddles, notches, and valleys where the distant vista shines through unobstructed.
Accounting for Dynamic Obstructions: The Vegetative Envelope
The geological ground is permanent, but the plants growing on top of it are constantly changing. A sightline calculation that only looks at bare dirt will run into severe problems once spring arrives. In the Southern Appalachian forest, trees grow quickly, drop leaves seasonally, and form a dense vegetative envelope that must be managed as part of your overall design.
Appalachian Hardwood Canopy Dynamics
The mountains of East Tennessee are home to one of the most biodiverse temperate hardwood forests on the planet. Our hillsides are covered with magnificent species, including:
- Tulip Poplar (Liriodendron tulipifera)
- Chestnut Oak (Quercus montana)
- Red Maple (Acer rubrum)
- Sugar Maple (Acer saccharum)
- White Pine (Pinus strobus)
- Eastern Hemlock (Tsuga canadensis)
Many of these hardwood species grow to heights between 80 and 120 feet tall. If your building site sits on a bench or gentle slope with tall woods directly downhill, the tops of those trees can easily rise straight through your field of view.
When you analyze a mountain viewshed, you must draw two distinct sightline lines on your elevation drawings: one for the bare ground, and one for the top of the tree canopy.
Leaf-On Versus Leaf-Off Viewshed Angles
Living in a deciduous forest means your mountain viewshed changes completely twice every year:
- Leaf-On Season (May through October): The dense green canopy creates a solid visual wall. Distant peaks disappear behind thick foliage, turning your view inward toward the rich texture of the immediate forest.
- Leaf-Off Season (November through April): The leaves fall, opening up deep, layered vistas across ridgelines that were completely invisible all summer long.
A well-designed biophilic home celebrates both seasons. You do not want to cut down an entire hillside of native forest just to see a distant peak in July. Clear-cutting a steep slope destabilizes fragile mountain soils, invites severe rainwater erosion, and creates an uncomfortably hot microclimate around your home during the summer months.
Instead, calculate your window placement so that your upper glass captures the high ridgelines that stay visible above the tree canopy all year long, while your mid-level and lower glass frames the immediate forest structure. During the winter, your mountain viewshed expands across the entire glass surface. During the summer, your home enjoys natural shade and the calming green canopy of the forest, while still maintaining a visual anchor to the high peaks above.
The Twenty-Year Tree Growth Model
When positioning windows, never design for the trees as they look today. Design for how those trees will look twenty years from now.
A young Tulip Poplar sapling growing thirty feet downhill from your foundation might only be fifteen feet tall when you pour your concrete slab. It looks harmless on move-in day. But Tulip Poplars are exceptionally fast-growing trees, often adding two to three feet of height every single year in rich Appalachian soils. Within a single decade, that sapling will grow thirty feet taller, directly invading your calculated sightline.
Use a simple clearance angle formula to account for tree growth:
Theta_clearance = arctan((Z_tree_mature - Observer Eye Elevation) / D_tree)
By inputting the mature height of the specific tree species growing along your view corridor (typically 80 to 100 feet for hardwoods), you can calculate the exact angle your windows need to look safely over the canopy. This allows you to plan selective pruning or establish a healthy forest management plan that protects your mountain viewshed without damaging the ecological health of your hillside.
Preserving the Midground Forest Floor
A flat, two-dimensional picture of a mountain can look cold and distant. What makes a real view feel magical and deeply satisfying is visual depth. In landscape painting and ecological design, visual depth is created by balancing three distinct layers:
- Foreground: The immediate patio, native fern garden, or natural rock outcroppings right outside your glass.
- Midground: The trunks, branches, and filtering canopy of mature hardwood trees fifty to two hundred feet down the slope.
- Background: The grand, majestic mountain viewshed stretching across distant blue ridges.
When you carefully calculate your window sills and headers, you can capture all three layers in a single, balanced view. The lower window glass brings the rich texture of the forest floor right up to your feet, the center glass reveals the graceful architecture of tree trunks, and the upper glass frames the sweeping geological horizon. This layered composition provides the ultimate biophilic experience, keeping you deeply connected to both the shelter of the immediate woods and the freedom of the open sky.
Architectural Execution: Glazing, Mullions, and Solar Balancing
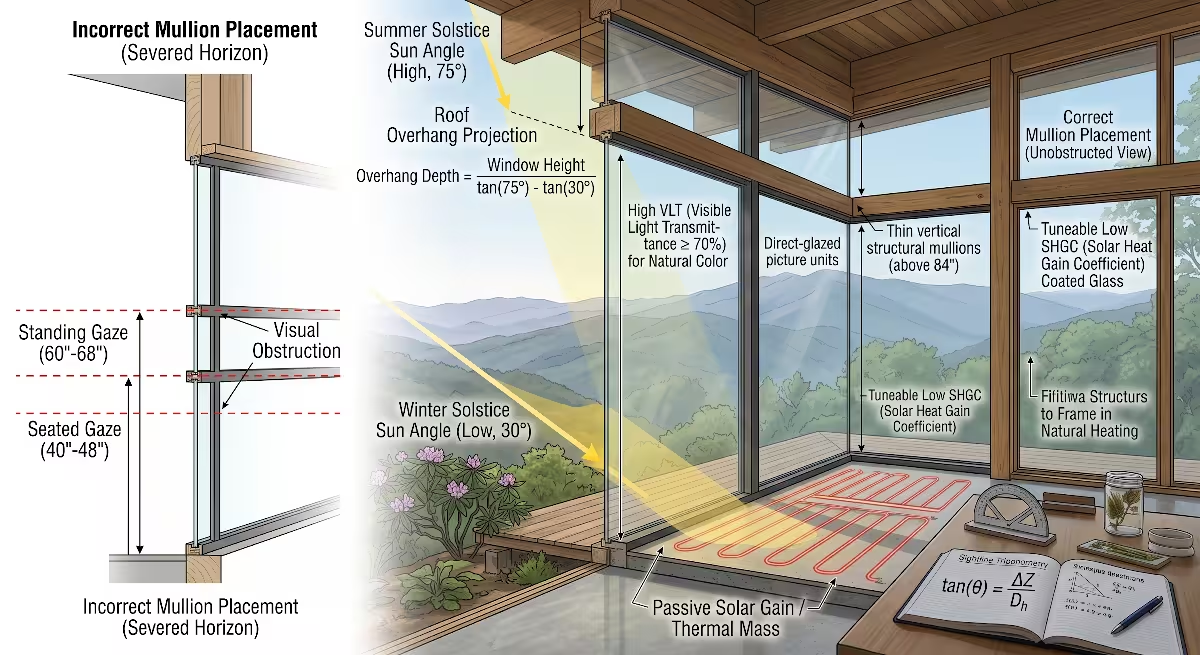
Once your sightline math is complete and you know where your view corridors lie, you must translate those numbers into physical windows, glass coatings, and roof structures. Even the most precise trigonometric calculations will fail if the physical components of the window interfere with how your eyes process the view.
Eliminating the Severed Horizon
Have you ever sat in a restaurant with a spectacular view, only to find that the thick black frame between two stacked windows sits directly across the horizon line? No matter where you move your head, that horizontal line cuts through the scenery. Your eyes are forced to constantly refocus between the nearby wooden frame and the distant mountain ridge, causing subtle eye strain and mental fatigue.
We call this common design failure the severed horizon.
+-----------------------------+
|                             |  <- Sky
|       /\             /\     |
|======/==\===========/==\====|  <- HORIZONTAL MULLION SLICING PEAKS
|     /    \         /    \   |
|    /      \_______/      \  |  <- Mountain Ridge
+-----------------------------+
To eliminate the severed horizon, you must carefully control the location of all horizontal mullions (the structural dividers between panes of glass). In spaces where people primarily sit down, such as living rooms, dining rooms, and breakfast nooks, never allow a horizontal mullion to fall between 40 inches and 48 inches above the finished floor.
In spaces where people primarily stand, such as kitchens, entry halls, and open gallery corridors, keep horizontal mullions out of the critical band between 60 inches and 68 inches above the floor.
If your window opening is very tall and requires structural horizontal transoms, push those transoms high up on the wall, preferably at 84 inches or higher. That keeps the structural framing well above normal eye levels, leaving an uninterrupted, crystal-clear opening for your mountain viewshed.
Structural Mullion and Transom Placement
Large expanses of glass face immense pressure from high-elevation winds. In the ridges of Sullivan, Carter, and Washington counties, winter storms can produce heavy wind loads that require thick structural supports between window units.
To keep these vertical supports from ruining your view, follow these three rules:
- Prioritize Vertical Over Horizontal: The human field of view is much wider horizontally than it is vertically. Our eyes are naturally adapted to scan side-to-side along a horizon. Because of this, vertical mullions are far less distracting to the human brain than horizontal ones. A vertical mullion simply divides the view into natural panels, much like looking past tree trunks, whereas a horizontal mullion cuts directly across the focal plane.
- Align with the Peaks: When looking at your building site, identify the most dramatic geological focal points of your mountain viewshed. Position your largest, undivided picture window directly on center with the primary peak. Place your vertical structural posts off to the sides where they frame minor valleys or secondary ridges.
- Use Direct-Glazed Picture Windows: Operable windows, such as double-hung or casement units, have thick nested sashes that consume valuable glass area. In your primary view rooms, use direct-glazed picture units, where the insulated glass is glazed directly into the structural wooden frame. This maximizes the clear glass opening and creates an almost invisible boundary between inside and outside.
Thermal and Optical Specifications
Not all window glass is created equal. When framing a wide mountain viewshed, the chemical coatings applied to the glass have a huge impact on what the landscape looks like.
Modern building energy codes require Low-Emissivity (Low-E) coatings on window glass to prevent heat from escaping during the winter and entering during the summer. These coatings consist of microscopic, invisible layers of silver and metal oxides applied to the glass surfaces.
However, some Low-E coatings have an ugly, heavy green or purple tint that dulls the natural colors of the outdoors. In East Tennessee, the mountains are famous for their soft blue haze, deep evergreen rhododendron thickets, and vibrant autumn foliage. A cheap, heavily tinted window will turn those rich natural colors into a flat, dreary gray.
When specifying glass for a home with an expansive mountain viewshed, pay close attention to these two optical ratings on the window sticker:
- VLT (Visible Light Transmittance): This measures the percentage of natural visible light that passes through the glass. VLT is rated on a scale from 0 to 1. For prime view walls, always look for a VLT of 0.70 (70%) or higher. High VLT glass allows the full spectrum of sunlight to enter your home, keeping the colors of the mountains bright, vibrant, and true to life.
- Color Rendering Index (CRI): Some high-end architectural glass manufacturers now publish a color rendering score for their glazing. Look for glass with a CRI of 95 or higher to ensure that the delicate morning pinks and evening golds across your mountain viewshed look exactly the same from inside as they do from your outdoor deck.
Solar Heat Gain and Overhang Engineering
Large walls of clear glass can turn a home into an unbearable greenhouse if they are not engineered correctly. If your primary mountain viewshed faces south or southwest, afternoon sun will pour through the glass, baking your furniture, fading hardwood floors, and driving your summer air-conditioning bills through the roof.
The solution is not to reduce your window size or install dark, tinted glass. The solution is smart architectural shading through calculated roof overhangs.
Because the Earth tilts on its axis, the sun travels along completely different paths across the sky depending on the time of year:
- In the summer, the sun sits very high in the sky at midday (reaching angles of 75 degrees or more in Northeast Tennessee).
- In the winter, the sun travels along a much lower arc, rising only about 30 degrees above the southern horizon at noon.
       Summer Sun (High Angle)
             \
              \   [Roof Overhang]
               \  +---------+
                \ |         |
                 \|         |
                  +=========+ <- Window Top (Shaded in Summer)
                  |         |
                  |  Glass  |
                  |         |
                  |         |
  Winter Sun ---> +=========+ <- Sunlight Enters in Winter (Low Angle)
(Low Angle)
You can use this seasonal change to your advantage. By calculating the depth of your roof overhang, you can block 100 percent of the harsh, high-angle summer sun while letting the warm, low-angle winter sun shine deep into your living space.
The formula for calculating the required roof overhang depth is:
Overhang Depth = Window Height / (tan(Summer Sun Angle) - tan(Winter Sun Angle))
By engineering your eaves and porch roofs with this formula, you protect your home from summer overheating without placing a single obstruction across your beloved mountain viewshed.
Field Protocol: Step-by-Step Layout on Sloping Ground
Math on paper is essential, but the real world is made of mud, gravel, and uneven slopes. Before you finalize your window order, you must take your calculations out into the field and physically verify them on your building site. Here is the step-by-step protocol we use to verify sightlines before framing begins.
Step 1: Setting the Absolute Floor Datum
Never measure sightlines from the existing dirt grade. On a sloping mountain lot, the dirt where your back wall sits might be ten feet higher or lower than where your front porch will rest.
The first step is to establish your Finished Floor Level (FFL) using a commercial rotary laser transit:
- Have your surveyor or foundation contractor set a permanent wooden or metal benchmark stake in an undisturbed corner of the site.
- Set up the laser transit over this benchmark and calibrate it to dead level.
- Drive a tall, rigid two-by-four wooden stake into the ground directly where the center of your primary living room will be.
- Using the laser receiver, find the exact height of your proposed finished subfloor and mark it on the stake with a bright red pencil line.
This red line is your absolute floor datum. Every single vertical measurement you make from this point forward must be measured upward or downward from this line, never from the raw dirt beneath your boots.
Step 2: Taking Azimuth and Clinometer Readings
Now that your floor datum is locked in place, you can measure the real-world angles toward your mountain viewshed:
- Stand at the living room stake and measure up from the red floor datum line. If you are verifying standing views, measure up 64 inches. If you are verifying seated views, measure up 44 inches. Mark these eye levels clearly on the stake.
- Place a handheld optical clinometer (or a precision digital sightline app on a leveled tripod) directly at that eye-level mark.
- Sight through the clinometer lens toward the crest of the mountain peak you want to frame. Read the angle of inclination on the internal optical scale.
- Turn your compass to record the exact magnetic azimuth (the compass bearing, such as 142 degrees southeast) of that peak.
- Repeat this process for the lowest visible valley, the tops of the downhill tree canopy, and any prominent rock outcroppings.
Record these angles in a field notebook. If your measured field angle differs from your paper calculations by more than a degree or two, double-check your map elevations. Local topographic features or tall distant trees can sometimes alter the visible horizon slightly.
Step 3: Building Story Poles and Sight Stakes
The most reliable way to visualize how a window frames a mountain viewshed is to build a physical mockup called a story pole.
       +-----------------------+ <- Upper Crossbar (Calculated Header: 96")
       |                       |
       |     SIGHTLINE         |
       |     WINDOW MOCKUP     |
       |                       |
       +-----------------------+ <- Lower Crossbar (Calculated Sill: 24")
       |                       |
       |                       |
[======+=======================+======] <- Red Line: Finished Floor Datum (0")
       |                       |
      / \                     / \
     /   \                   /   \  <- Staked firmly into ground
- Erect two tall two-by-four uprights along the line of your future exterior wall, spacing them apart to match the proposed rough opening width of your window.
- Measure upward from your red floor datum line on both uprights.
- Fasten a horizontal scrap board across the uprights at your calculated sill height (for example, 24 inches above the floor datum).
- Fasten a second horizontal scrap board across the uprights at your calculated header height (for example, 96 inches above the floor datum).
- Step back into the room to your planned seating or standing positions. Rest your eye at the proper height (44 inches for seated, 64 inches for standing).
- Look through the wooden frame you just built.
Does the upper crossbar cut into the mountain peak? Does the lower sill hide the valley? Does the frame feel comfortable and natural, or do you feel boxed in?
Adjusting a wooden two-by-four in the field costs nothing and takes five minutes. Tearing out a framed and sheathed wall after the windows arrive costs thousands of dollars and delays your project by weeks. The story pole is the ultimate tool for verifying your mountain viewshed with complete peace of mind.
Step 4: Creating the Final Rough Opening Schedule
Once you are completely satisfied with the view through your story poles, translate those field measurements into a formal rough opening (R.O.) schedule for your framing carpenter.
A rough opening schedule should clearly list:
- Window Tag: (e.g., W-101, Great Room Center Picture Window).
- Manufacturer Unit Dimensions: The exact width and height of the window frame.
- Rough Opening Dimensions: Typically one-half inch wider and taller than the window frame to allow for squaring, shimming, and insulation.
- Sill Height Above FFL: The exact measurement from the top of the subfloor plywood to the top of the rough sill framing plate.
- Header Height Above FFL: The exact measurement from the top of the subfloor plywood to the bottom of the structural header beam.
Give this schedule directly to your framing lead and job site superintendent. Walk the site with them, show them the red floor datum line, and make sure everyone on the construction crew understands that these heights are precision-calculated to capture the mountain viewshed.
Frequent Asked Questions about Mountain Viewshed Angles
When homeowners begin planning a custom home in the mountains, they search for answers to very specific questions about window placement and view design. Here are the most common questions answered through the lens of architectural geometry and sightline planning.
What is a viewshed analysis in residential architecture?
A viewshed analysis is a systematic, geospatial evaluation of everything that can be seen from a specific location on a property. In custom home architecture, a designer uses digital elevation data, topographic maps, and 3D modeling tools to map every point on the surrounding landscape that has an unobstructed line of sight to the home’s windows.
Instead of guessing where the best views might be, a viewshed analysis calculates exactly which mountain peaks, valleys, forests, and ridgelines are visible from different rooms and different finished floor elevations. This analysis helps architects orient the building footprint, position primary outdoor living decks, and calculate window sizes to frame the best vistas while screening out undesirable views like neighboring driveways or utility corridors.
What is the ideal window height to capture a mountain view?
There is no single ideal window height for every home, because the correct height depends entirely on the angle of the slope outside. However, for a home looking upward at an elevated mountain viewshed, standard 80-inch or 84-inch window header heights are almost always too low.
For upward-sloping mountain vistas where the peak rises between 5 degrees and 15 degrees above eye level, the ideal window head height typically sits between 96 inches (8 feet) and 108 inches (9 feet) above the finished floor. This extra height ensures that someone standing in the middle of the room can see the top of the peak without the drywall ceiling or window frame cutting off the summit.
Similarly, the ideal window sill height for viewing downward slopes and valleys should sit between 18 inches and 24 inches above the floor. This allows a seated person to look down across the landscape without their view being blocked by a high wall.
How do you calculate sightlines on a steep slope?
To calculate sightlines on a steep slope, you use right-triangle trigonometry based on three measurements:
- Find the horizontal distance from your window to the focal point of your view.
- Find the elevation difference between the viewer’s eye level (inside the house) and the target object outside.
- Calculate the angle by dividing the elevation difference by the horizontal distance, and then finding the arctangent of that number.
Once you have the sightline angle, you use the distance between the viewer and the window glass to determine the exact vertical cutoff points on the exterior wall. This tells you precisely where the window glass must begin and end so the slope remains fully visible.
How does mullion placement impact sightlines?
Mullions are the structural bars and dividers that separate individual panes of glass within a window assembly. If a horizontal mullion is placed at the exact same height as the human eye, it cuts directly across the focal plane of your view. This is called a severed horizon.
When a mullion slices across a mountain viewshed, your brain constantly struggles to focus on two different depths at once: the nearby window bar and the distant mountain ridge. This causes subtle eye strain and disrupts the feeling of being connected to the outdoors.
To prevent this, horizontal mullions should never be placed between 40 and 48 inches above the floor (seated eye level) or between 60 and 68 inches above the floor (standing eye level). Keeping horizontal dividers out of these critical visual bands ensures that your line of sight remains completely unobstructed.
How far away can a mountain view be framed effectively?
A home can effectively frame a mountain viewshed across incredible distances, ranging from a nearby ridge just two hundred yards away to massive mountain ranges forty or fifty miles in the distance.
The key difference lies in the visual scale. Close ridges provide rich, immediate detail, such as individual tree branches, rocky cliffs, and moving wildlife. Distant mountains provide broad, atmospheric scale, shifting in color from deep blues to purples as light filters through the atmosphere throughout the day.
When framing distant mountains ten miles or more away, windows should be grouped together into wide, panoramic horizontal ribbons. When framing close, steep ridges, windows should be taller and more vertical to capture the towering scale of the hillside above you.
Biophilic Integration Checklist and Summary
To help you put these principles into practice, use this quick-reference guide when reviewing your building plans with your architect, builder, or interior designer.
Reference Table for View Angles and Window Heights
The following table provides recommended window head and sill heights based on common sightline angles, assuming an observer standing or sitting eight feet back from the window glass:
| Sightline Scenario | Typical Angle | Recommended Sill Height (Seated View) | Recommended Head Height (Standing View) | Framing Recommendation |
| High Mountain Peak (Steep upward angle) | +10° to +18° | 24 inches to 30 inches | 100 inches to 112 inches | Tall picture window with extended header; use high transoms if needed. |
| Rolling Ridgeline (Moderate upward angle) | +4° to +9° | 24 inches to 32 inches | 92 inches to 98 inches | Standard 8-foot (96-inch) header with dropped sill for expansive sky view. |
| Level Forest Vista (Nearly horizontal horizon) | -3° to +3° | 20 inches to 28 inches | 84 inches to 90 inches | Wide panoramic horizontal picture units; keep mullions vertical. |
| Deep River Valley (Steep downward angle) | -8° to -16° | 12 inches to 18 inches | 80 inches to 84 inches | Low-sill picture window or floor-to-ceiling glass wall; protect with tempered glass. |
Note: Any window glass installed within 18 inches of the finished floor must be tempered safety glass under standard residential building codes to protect occupants from accidental glass breakage.
Daily Living with Framed Vistas
Designing a home around a calculated mountain viewshed changes how you experience every single day. When your windows are placed with geometric precision, the boundary between the interior living room and the exterior landscape seems to dissolve entirely.
You wake up in the morning and immediately see where the low cloud inversion sits across the valley floor. You stand at the kitchen counter chopping vegetables and watch the golden afternoon sun strike the high rocky face of a distant ridge. You sit down in your reading chair by the fireplace and feel completely cradled by the warmth of your home, while your gaze drifts effortlessly out across miles of open, rolling hills.
This is the ultimate promise of biophilic architecture: it does not treat nature as a luxury painting hung on a drywall wall. It treats nature as an essential, living part of your home.
Final Summary Protocol
To ensure your new home captures its mountain viewshed with total success, follow this proven roadmap:
- Do not trust standard rough openings: Never let a builder install default 80-inch or 84-inch headers on a mountain slope without checking sightline angles first.
- Define your observer coordinates: Pick the exact spots on your floor plan where you will sit, cook, sleep, and relax. Calculate sightlines from those specific coordinates.
- Use topographic data: Pull USGS 3DEP LiDAR data to verify that intervening hills or false horizons do not block your target peak.
- Plan for mature trees: Calculate clearance angles that account for twenty years of hardwood canopy growth along your view corridor.
- Protect your eye lines: Keep horizontal mullions far away from the critical seated (40 to 48 inch) and standing (60 to 68 inch) visual bands.
- Balance light and heat: Specify high-clarity glass with a VLT of 70 percent or higher, and engineer deep roof overhangs to block harsh summer heat while inviting gentle winter sun.
- Verify with story poles: Always erect wooden framing mockups on site, calibrate them to your finished floor datum, and confirm the view with your own eyes before ordering windows.
By combining the precision of trigonometry with the human-centered principles of biophilic design, you turn your home into a natural sanctuary. You honor the magnificent topography of East Tennessee, and you ensure that every time you look outside, your mountain viewshed inspires wonder, peace, and a lifelong connection to the land.