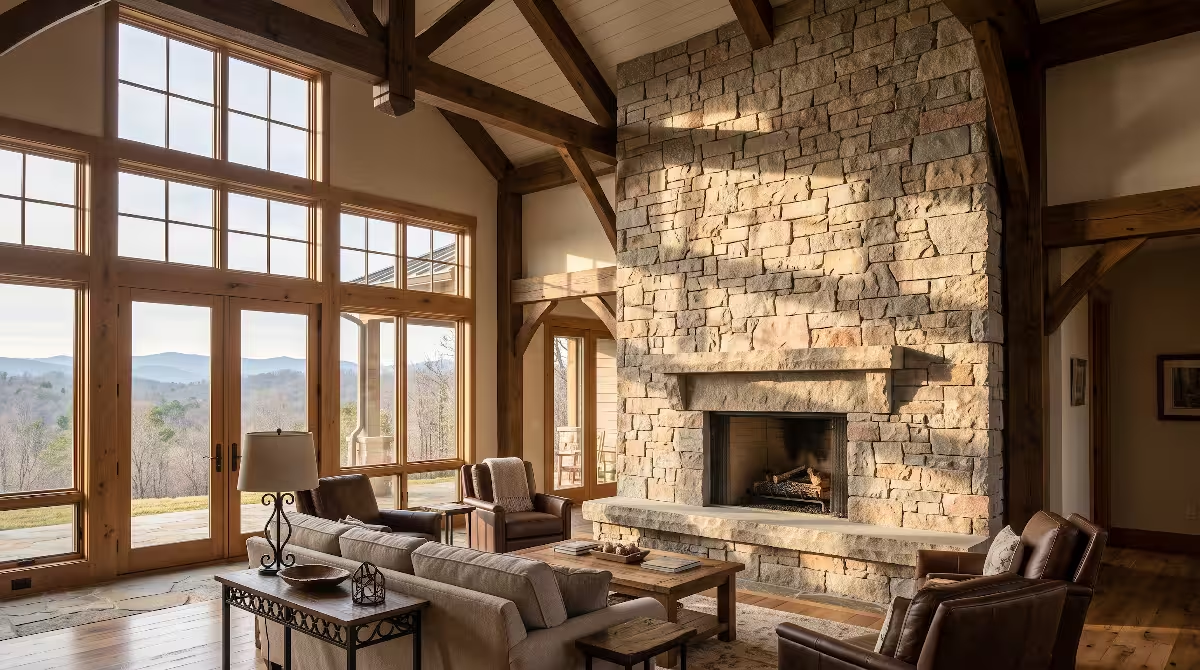


When you walk into a beautifully designed home, your eyes instantly recognize when a room feels calm, balanced, and complete. A grand living room or cozy study with custom shelving can take your breath away, but only when every detail looks like it was planned from day one. In high-end custom home building, we often see built-in shelving that misses the mark. You have likely seen it yourself: a set of shelves that looks like store-bought furniture pushed against a wall, with awkward gaps, mismatched wood, and disjointed trim.
True luxury in home design comes down to visual continuity. When you invest in
To create this harmony, you must master the three critical contact zones where your shelving meets the structure of your room: the ceiling above, the floor below, and the sidewalls flanking the unit. When your architectural millwork trim flows effortlessly through these three zones, the entire room feels grounded and restful. Let us explore the complete process of designing, cutting, and installing architectural millwork trim to give your custom shelving an enduring, timeless presence.
The Anatomy of Native Architecture: Why Millwork Trim Matching Matters
Moving Beyond “Furniture Placed in a Room”: The Psychology of Cohesive Design
There is a profound psychological difference between living with furniture and living with native architecture.
Native architecture creates a feeling of sanctuary. When shelving uses the exact same architectural millwork trim found along the rest of the room, your brain registers the room as stable and ordered. The lines of the room do not stop abruptly at the cabinet edge. Instead, the eye travels smoothly across the walls and over the bookcase face without catching on broken corners. Using matching architectural millwork trim creates an uninterrupted rhythm. This visual rhythm makes small rooms feel taller and large great rooms feel intimate and anchored.
       Ceiling Level: Continuous Crown & Frieze Board
  ========================================================
  |  [Bookcase Bay 1]  |  [Bookcase Bay 2]  |  [Bay 3]   |  <-- Vertical Stiles
  |                    |                    |            |      with Reveals
  |--------------------|--------------------|------------|  <-- Shelf Nosing
  |                    |                    |            |
  |====================|====================|============|  <-- Countertop Apron
  |    Lower Base      |    Lower Base      | Lower Base |
  ========================================================
       Floor Level: Wrapped Baseboard & Plinth Block
The Three Contact Zones: Ceilings, Floors, and Sidewalls
To make custom bookcases appear truly built-in, you must master three distinct boundary zones. Each zone presents its own physical and visual challenges:
- The Ceiling Contact Zone: This is where the top of your bookcase meets the overhead drywall. If your room already has crown moulding, the crown on the bookcase cannot simply butt into it with an open seam. The architectural millwork trim along the ceiling must either wrap around the cabinet header or integrate into a continuous frieze board.
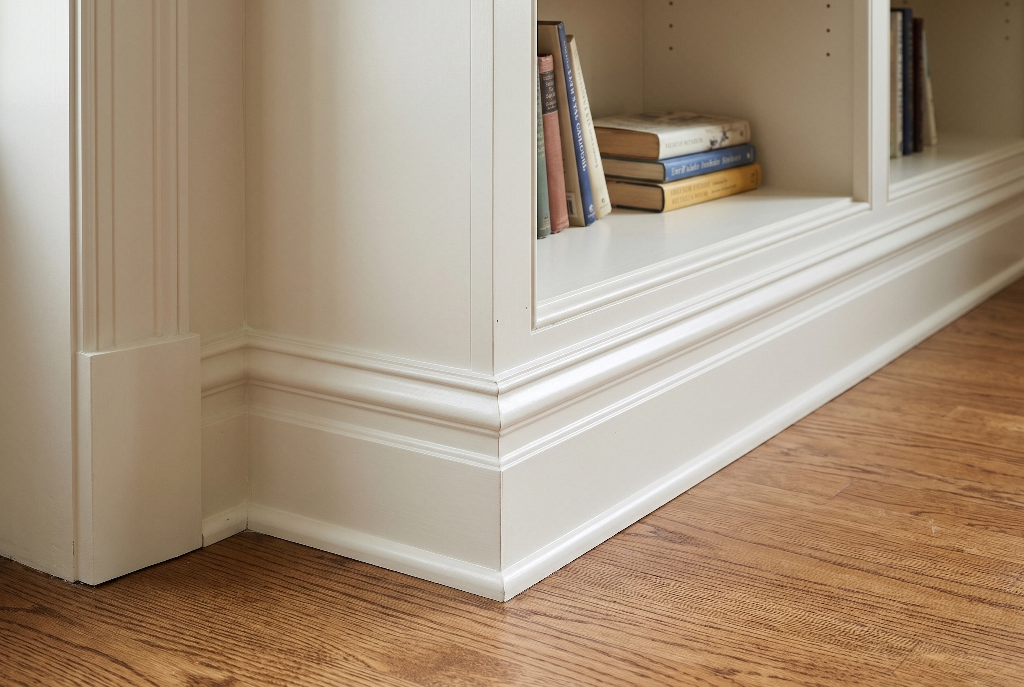
- The Floor Contact Zone: This is the foundation of your installation. Running standard cabinet toe-kicks often looks commercial and cheap. Instead, you need the room’s baseboard architectural millwork trim to wrap cleanly around the bottom of the bookcase, carrying the room’s grounding line all the way across.
- The Sidewall Contact Zone: Walls in both new construction and historic homes are never perfectly plumb or flat. When the outer vertical stiles of your bookcase meet the drywall, you cannot rely on caulk alone to fill uneven gaps. You must scribe the architectural millwork trim directly to the contours of your plaster or drywall for a tight, custom fit.
When all three contact zones are treated with matching architectural millwork trim, the bookcase becomes a permanent part of the home’s framing.
Decoding Your Existing Profiles: Sourcing and Profile Duplication
Using a Profile Contour Gauge to Map Historic and Stock Moulding
Before you order lumber or pick up a saw, you must accurately identify the shapes of your existing trim. Trying to guess a curve or angle with a standard tape measure will lead to frustrating gaps during installation. The most reliable tool for this step is a simple mechanical profile contour gauge.
To use the gauge, press its rows of metal or plastic pins firmly against the face of your current casing, baseboard, or crown. The pins slide back to trace the exact shape of your architectural millwork trim. Once you lock the gauge, you can trace the profile directly onto a piece of cardstock. This gives you a portable template that you can take to local lumber suppliers or custom millwork shops.
Pay close attention to subtle details in the profile:
- The depth and radius of any cyma recta or cyma reversa curves.
- The presence of small flat surfaces, known as fillets, between curves.
- The exact overall thickness of the back edge where the piece meets the drywall.
Capturing these details ensures that any new architectural millwork trim you purchase will line up flush with your existing woodwork.
Standard Lumberyard WM Profiles vs. Custom-Milled Knife Profiles
Most homes built in the last fifty years use standard moulding profiles established by the
However, older homes or custom builds often feature unique trim that stock profiles cannot match. If your home has custom trim, stock lumberyard pieces will look noticeably off when joined together. In these situations, you have three practical options:
- Custom Knife Grinding: A local mill can grind a steel cutter knife to match your exact contour gauge template and run custom architectural millwork trim in your chosen wood species. While this carries a setup fee, it ensures a 100 percent exact match.
- Built-Up Combinations: You can recreate historic mouldings by layering two or three standard stock profiles together. For instance, combining a flat 1×6 board with a small base cap moulding and a quarter-round shoe can duplicate many historic baseboard assemblies.
- Plinth Transitions: If an exact match is impossible, you can use plinth blocks to create a formal dividing line where your existing moulding meets the new architectural millwork trim.
When Profiles Do Not Match: The Art of the Intentional Step-Down
Sometimes, matching an existing moulding profile exactly is either structurally impossible or outside the project budget. In these cases, you should never attempt a near match that sits on the same flat plane. When two slightly different mouldings sit side by side on the same surface, the human eye immediately notices the error.
Instead, use what professional carpenters call an intentional step-down, also known as transitional relieving. To do this, change the depth of your bookcase face frame by pushing it forward or setting it back by at least 1/2 inch to 3/4 inch from the adjacent wall trim. When the architectural millwork trim sits on a different plane, your eye reads the difference as an intentional architectural feature rather than a mistake. This technique allows you to use complementary architectural millwork trim without creating visual discord.
Grounding the Unit: Baseboard, Toe-Kicks, and Plinth Blocks
Should Built-In Bookcases Sit on Existing Baseboards or the Subfloor?
One of the most common questions homeowners ask is whether built-in cabinets should sit on top of the finished floor and existing baseboards, or directly on the subfloor. From an engineering and structural standpoint, built-in bookcases should never sit on top of your existing baseboards.
Sitting a heavy bookcase on top of existing baseboard creates several major problems:
- It leaves an unstable rear gap behind the cabinet, preventing you from anchoring the frame securely to the wall studs.
- It raises the center of gravity, making the unit harder to secure safely.
- It interrupts the continuous visual plane of the room’s floor line.
The correct method is to remove the existing baseboard along the wall where the bookcase will sit. You can cut the baseboard cleanly using an oscillating multi-tool. Then, install the bookcase base directly onto the floor, and wrap new, matching architectural millwork trim around the front and exposed sides of the cabinetry.
Incorrect Method:                         Correct Method:
-----------------                         ---------------
|               |                         |               |
| Bookcase Unit |                         | Bookcase Unit |
|               |                         |               |
|===============|                         |===============|
| [Existing     | <-- Trapped gap         | [Riser Base]  |
|  Baseboard]   |     and wobble          |===============|
-----------------                         | Matching Base | <-- Seamless wrap
  Subfloor / Wood                           Subfloor / Wood
Building a Solid 2×4 Sub-Base Riser for Level Grounding
Floors are rarely level, especially in older houses or across wide living room spans. If you place your cabinet boxes directly on an unlevel floor, your face frames will twist, your shelf pins will wobble, and your doors will never hang straight.
The professional standard is to construct a separate sub-base platform using standard 2×4 lumber laid on edge:
- Build a sturdy ladder frame out of 2×4 framing lumber, sized to match the overall footprint of your bookcase base cabinets.
- Place this ladder frame on the floor and use composite shims to level it in both directions, checking with a long four-foot level.
- Fasten the leveled frame securely to the floor joists or concrete subfloor.
- Set your bookcase carcasses on top of this flat, level platform.
This sub-base creates a sturdy riser that supports the immense dead load of hundreds of heavy books. Furthermore, the height of a 2×4 (3-1/2 inches) provides the ideal vertical clearance to accept standard baseboard architectural millwork trim without covering the lower shelf openings.
Wrapping the Baseboard: Continuous Run vs. Front-Face Apron Returns
Once your cabinet carcasses are anchored to the level sub-base, you must decide how to terminate the baseboard. You have two primary design options for this bottom architectural millwork trim:
- The Continuous Wrap: In this approach, you miter the room’s baseboard at the outer wall corner and wrap it continuously around the outer side panel and across the front toe-kick of the bookcase. This method works best for full-depth bookcases where the base extends into the room. It firmly ties the cabinetry into the floor plane.
- The Flush Apron Return: If your bookcase is shallow or tucked into an alcove, wrapping the baseboard around the sides may crowd a doorway or look too bulky. In this setup, the side panel of the bookcase runs straight down to the floor, and the baseboard terminates into the side with a crisp 90-degree butt joint or a self-returned miter.
Both methods look exceptional when executed with precision. The key is ensuring that the top profile of your baseboard architectural millwork trim lines up perfectly with the existing room baseboard.
Plinth Blocks as Elegant Problem-Solvers for Varying Base Heights
A common challenge in custom trim work occurs when the baseboard on your bookcase needs to be a different height than the baseboard running along the room’s perimeter walls. For example, your room may have modest 3-1/4 inch baseboards, but your custom bookcase requires a substantial 5-1/4 inch base to look visually balanced against its tall shelves.
Joining two different heights of moulding directly together creates an awkward, unattractive step cut. You can resolve this issue elegantly by using a plinth block. A plinth block is a thicker, flat wooden block that sits at the junction where the bookcase meets the wall. Because the plinth block is thicker and taller than both mouldings, each piece of architectural millwork trim can terminate cleanly into its flat side. This classic detail has been used in fine woodworking for centuries and instantly elevates the architectural pedigree of your home.
The Crown Transition: Marrying Bookcase Tops to Ceiling Millwork
How Do You Tie Bookcase Crown into Existing Ceiling Trim?
Tying the top of a custom bookcase into the ceiling is often the most challenging part of the entire project. When done correctly, the crown moulding appears to flow naturally across the ceiling, wrapping the bookcase in a continuous band of architectural millwork trim.
To connect your bookcase crown to existing ceiling trim:
- Remove the section of ceiling crown directly above where the bookcase will sit, cutting it cleanly with an oscillating saw.
- Determine whether your bookcase will share the exact same crown profile or use a stepped architectural header.
- If using the same profile, cut a compound miter on the existing wall crown and run the new piece out onto the side of the bookcase.
- Continue the crown across the front face of the bookcase, mitering each outside corner at a precise 45-degree angle.
- Fasten the crown securely to solid nailer blocking installed at the top of the cabinet box.
Matching this upper architectural millwork trim draws the eye upward, giving the entire room an impression of greater ceiling height and architectural permanence.
Wall Corner Ceiling Trim            Bookcase Header Trim
  \                                 /
   \_______________________________/  <-- Compound Miter Outside Corner
   |                               |
   |     Bookcase Top Fascia       |
   |                               |
   =================================  <-- Frieze Board Transition
   |  Bay 1   |   Bay 2   |  Bay 3 |
Full-Ceiling Integration: Running the Room Crown Continuously Across the Header
For homes with standard eight-foot or nine-foot flat ceilings, building your bookcases all the way to the drywall ceiling creates the cleanest, most dramatic effect. This design eliminates the awkward open gap above the shelves that collects dust and creates dark shadows.
To achieve full-ceiling integration, your cabinet carcass should stop roughly four to six inches below the actual ceiling drywall. This leaves space for a flat fascia board, which acts as a sturdy nailing surface. You can then install your ceiling crown architectural millwork trim directly across this fascia board. The crown moulding covers the joint between the wood cabinet and the drywall ceiling, creating an unbroken transition that makes the bookcase look like an integral structural feature of the wall.
The Frieze Board Solution: Handling Uneven Ceilings and Drywall Sag
In the real world of home construction, ceilings are almost never perfectly flat. Drywall joints sag, floor joists settle, and ceiling heights can easily vary by 1/2 inch or more across a twelve-foot span. If you try to run rigid crown architectural millwork trim against an uneven ceiling, your moulding will either bend awkwardly or reveal large, ugly gaps along the top edge.
The professional solution to this problem is adding a two-piece frieze board assembly:
- First, install a wide, flat wooden board (the frieze board) along the top of your bookcase face frame, running parallel to the ceiling.
- Next, scribe the top edge of this frieze board to match the exact dips and rises of your ceiling drywall.
- Finally, install your crown architectural millwork trim on top of this scribed frieze board, keeping the crown perfectly level and straight.
Because the crown moulding is fastened to the flat frieze board rather than directly to the uneven ceiling, any ceiling dips are absorbed by the flat reveal below the moulding. The eye sees a straight, level run of architectural millwork trim, and the uneven ceiling remains completely invisible.
Stopped Crowns: Returning Molding into Itself for Units Below Ceiling Height
In rooms with very tall cathedral, vaulted, or two-story ceilings, building your bookcases all the way to the ceiling is often impractical or visually overwhelming. When a bookcase stops well below the ceiling line, the upper architectural millwork trim must terminate gracefully in mid-air.
You should never leave the raw end grain of your moulding exposed at the sides of the bookcase. Instead, use a carpentry technique known as a mitered return or self-return:
- Cut the front run of your crown moulding with an outside 45-degree miter at the cabinet corner.
- Cut a small matching 45-degree piece that angles backward at 90 degrees, running along the side panel toward the wall.
- If the unit does not touch the back wall, cut another 45-degree miter and turn the profile back in on itself, terminating it flush against the cabinet body.
This self-returned architectural millwork trim caps the top of the bookcase like a handsome picture frame, giving the free-standing top edge a refined, furniture-grade finish.
Vertical Integration and Face-Frame Harmony

What Trim Do You Use on the Front Edges of Built-In Shelves?
The vertical stiles and horizontal rails of your bookcase face frames form the visual skeleton of the piece. If you leave the raw edges of plywood shelving exposed, or finish them with thin iron-on edge banding, the bookcase will immediately look cheap and lightweight. To create a substantial, architectural look, you must trim the front edge of every shelf with solid wood architectural millwork trim.
Adding a solid wood nosing or facing piece does two critical things:
- Visual Weight: A standard 3/4 inch plywood shelf looks thin and fragile across a wide opening. Adding a 1-1/2 inch solid wood facing strip makes the shelf look thick, substantial, and custom-crafted.
- Structural Rigidity: Long shelving spans loaded with heavy art books or collectibles can easily sag over time. Attaching a solid hardwood apron to the front edge acts as a structural beam, dramatically increasing the shelf’s load capacity and preventing permanent bowing.
You can shape this front edge with a simple square profile, a gentle round-over, or an elegant bead profile that matches the surrounding architectural millwork trim.
Thin Edge Banding (Avoid):         Solid Hardwood Nosing (Recommended):
-------------------------         ------------------------------------
  _______________________           _______________________
 [__ 3/4" Plywood Core __]         [__ 3/4" Plywood Core __]=====| <-- 1-1/2" Solid
 [Thin Veneer Tape - Flakes]                                =====|     Hardwood Face
                                                                       Prevents Sag
Establishing Consistent Reveals Between Shelf Fronts and Vertical Stiles
In high-end architectural millwork, the difference between an amateur job and a master installation comes down to consistent reveals. A reveal is the small, intentional step back between two adjacent pieces of wood. If two pieces of wood are supposed to sit flush but vary by even a 1/32 of an inch, the joint will catch light and look sloppy. By designing an intentional reveal into your architectural millwork trim, you create crisp, attractive shadow lines that hide minor material variations.
When planning your vertical stiles and horizontal shelf fronts:
- Ensure that adjustable shelf edges sit slightly recessed (typically 1/8 inch to 1/4 inch) behind the front face of the vertical stiles.
- Keep the width of your vertical stiles proportional to the height of the room. A tall, eight-foot bookcase typically looks best with stiles that are at least two to two-and-a-half inches wide.
- Align horizontal rails with the surrounding architectural lines in the room, such as the top of a chair rail or the window stool line.
This deliberate alignment ensures that your architectural millwork trim supports the broader geometry of your home.
Fluting, Bead Molding, and Pilasters: Elevating Flat Cabinet Faces
If your home features traditional, colonial, or craftsman architecture, flat 1×3 vertical stiles can sometimes look a bit plain. You can enrich the visual character of your bookcases by incorporating decorative vertical architectural millwork trim:
- Applied Bead Moulding: Adding a simple quarter-inch bead moulding along the inside edge of your face frames softens hard corners and introduces classic shadow lines reminiscent of historic handmade cabinetry.
- Fluted Pilasters: For formal living rooms or libraries, replacing standard stiles with fluted pilasters adds immediate elegance. The parallel vertical grooves catch natural daylight, drawing the eye upward and emphasizing the vertical scale of the space.
- Rosettes and Corner Blocks: When fluted pilasters meet upper header trim, decorative corner rosettes can be used to navigate the transition without complex miter joints.
When choosing these decorative accents, always look to the existing doors and windows in your room. If your interior doors feature simple, flat craftsman casings, keep your bookcase architectural millwork trim equally tailored and clean. If your home features ornate entablatures and multi-piece casings, carry those same details onto your bookcase face frames.
Scribe-to-Wall Techniques: Conquering Out-of-Plumb Walls
Why No Room Is Ever Square (And Why Engineering Tolerances Matter)
One of the first rules every finish carpenter learns is simple: houses are never plumb, level, or square. Even in brand-new luxury construction, wood studs dry and twist, drywall tapers create recessed dips at corners, and settling creates noticeable angles where walls meet floors.
If you build a perfectly square bookcase in your workshop and slide it against a typical room corner, you will almost certainly discover gaps that range from zero to half an inch wide along the back edge. Attempting to fill these wide, irregular gaps with painter’s caulk results in an untidy bead that shrinks, cracks, and attracts dirt over time. To achieve a true custom look, your architectural millwork trim must be scribed directly to the wall.
Scribe Strips and Compass Techniques for a Factory Fit
Scribing is the process of transferring the exact irregular contour of a wall onto a wooden trim board so it can be trimmed for a seamless, gap-free fit. It is the gold standard for installing architectural millwork trim against uneven drywall or masonry.
Here is the step-by-step method to scribe your bookcase outer trim:
- Provide an extra 1/2 inch to 1 inch of width on the outer vertical stiles (often called scribe stiles) of your bookcase face frame.
- Push the bookcase into its final position against the wall, using a long level to make sure the cabinet box is perfectly plumb, regardless of what the wall is doing.
- Measure the widest gap between the edge of your scribe stile and the wall surface.
- Set a mechanical scribing compass to that exact width.
- Holding the compass level, run the hard point firmly along the drywall while the pencil tip transfers the exact wall contour onto the face of your architectural millwork trim.
- Remove the trim piece and cut along the pencil line using a jigsaw, track saw, or hand plane, slightly beveling the back edge (back-cutting) by two to three degrees.
This back-bevel ensures that only the very front edge of the architectural millwork trim touches the drywall, giving you an airtight fit that requires virtually no caulk.
Uneven Drywall Wall              Scribe Stile on Bookcase
       |                              |
       |  \                           |  <-- Set compass to widest gap
       |   \                          |
       |    |                         |  <-- Trace wall contour with pencil
       |   /                          |
       |  /                           |
                                      ^ Back-bevel cut along this pencil line
When joining inside corners on crown moulding or baseboard architectural millwork trim, novice installers often default to simple 45-degree miter cuts. While a mitered inside corner can look good on the day it is installed, it is prone to failure as seasons change.
Wood naturally expands and contracts across its grain as indoor humidity rises in the summer and drops during the winter. When framing studs shift, an inside 45-degree miter joint will pull open at the heel or the toe, exposing an unsightly, dark gap. The time-tested solution for inside corners is a coped joint:
- One piece of architectural millwork trim runs straight into the corner with a square, flat 90-degree cut.
- The intersecting piece is cut at a 45-degree angle to reveal the profile contour, and then back-cut along that profile line using a fine coping saw.
- The coped profile fits tightly over the face of the first board like a puzzle piece.
Because a coped joint overlaps the face of the receiving board, the wood can expand and contract slightly behind the joint without ever opening up a visible seam. For homes in climates with distinct seasonal humidity shifts, coped joints are essential for long-lasting architectural millwork trim.
Paint, Caulk, and Sheen Consistency
Do You Use Caulk or Wood Filler on Built-In Trim Joints?
One of the most frequent mistakes made during the finishing stage is using the wrong compound for the wrong type of seam. Both caulk and wood filler play important roles, but they cannot be used interchangeably on your architectural millwork trim:
- Wood Filler (Rigid Connections): Wood filler cures hard and can be sanded completely flat. Use wood filler strictly on wood-to-wood face joints, such as mitered casing corners, scarf joints in long moulding runs, and counter-sunk nail holes. Because it sands smooth, it becomes completely invisible under a coat of primer and enamel.
- Paintable Acrylic Caulk (Flexible Interfaces): Caulk remains flexible after curing, allowing it to stretch and compress as materials move. Use high-quality paintable elastomeric acrylic caulk exclusively where wood meets drywall or masonry, such as along the ceiling line or along scribed wall stiles. Never use standard wood filler along a wall seam; framing movement will crack the brittle filler within months.
Using the right compound on the appropriate seam keeps your architectural millwork trim looking smooth and crack-free year after year.
Joint Type               Correct Compound        Why It Works
---------------------------------------------------------------------------------
Wood-to-Wood Face        Sandable Wood Filler    Cures hard, sands completely flat,
(Miters, Nail Holes)                             becomes invisible under paint.

Wood-to-Drywall Line     Elastomeric Caulk       Remains permanently flexible,
(Wall & Ceiling Edges)                           accommodates structural movement.
The Rule of Substrates: Wood-to-Wood vs. Wood-to-Drywall Transitions
Understanding how different building materials interact is the key to preventing unsightly cracks in your finished millwork. Wood and gypsum drywall expand at entirely different rates when exposed to changes in temperature and humidity. Furthermore, drywall absorbs moisture from wet compounds, while hardwood swells and shrinks along its cellular grain lines.
When finishing your architectural millwork trim, apply this simple rule of substrates:
- Never bridge two different substrates with a rigid, sandable filler.
- Always wipe caulk beads with a damp microfiber cloth or a flexible profiling tool to leave a clean, concave seam that does not creep onto the face of the wood.
- Ensure all bare wood is primed with an oil-based or high-adhesion synthetic primer before applying water-based caulk, as raw wood can suck moisture out of the caulk and cause premature edge peeling.
Taking these precautionary steps ensures that your finished architectural millwork trim retains its crisp, professional appearance over time.
Matching Aging Trim: Sheen Degradation, Yellowing Oils, and Custom Color Matching
If you are adding custom built-in bookcases to an established room, simply buying a can of paint that matches the original color code on the lid will rarely yield a perfect match. Over time, sunlight, cleaning products, and interior air exposure alter the appearance of painted trim:
- Oil-Based Yellowing: Older trim painted with traditional oil-based alkyd enamels tends to yellow noticeably over time, especially in rooms with limited direct daylight.
- Sheen Degradation: High-traffic baseboards and door casings lose their original gloss over the years, settling into a softer, semi-satin patina.
- Batch Variations: Even modern waterborne acrylic enamels vary slightly from one manufacturing batch to another.
To achieve a seamless finish across all your woodwork, remove a small two-inch sample piece of your existing baseboard or casing from a hidden closet or behind an appliance. Take this physical sample to an independent paint store with a digital spectrophotometer. Have them match both the exact aged color and the current sheen level. Painting your new architectural millwork trim with this custom-matched coating ensures that your built-in bookcases blend effortlessly into the surrounding room.
Material Selection for Southern Climates: Solid Wood vs. Engineered Substrates
Seasonal Movement: Humidity Fluctuations in Appalachian and Southern Homes
In regions like the Appalachian highlands, the Tennessee Valley, and across the broader American Southeast, homes experience dramatic environmental swings throughout the year. Summers bring intense heat and indoor relative humidity levels that can easily top 65 percent, while mountain winters bring crisp, dry air that drops indoor humidity down to 25 percent.
These severe humidity swings create substantial movement in natural building materials:
- A wide, solid red oak or white pine board can swell or shrink by up to a quarter of an inch across its width over the course of a single year.
- If your bookcase carcasses and face frames are built out of solid, unseasoned wood without room for expansion, wide panels can split, face-frame miters will pop open, and cabinet doors will stick shut in July.
When designing your architectural millwork trim in regions with high seasonal humidity, you must select materials engineered to withstand these climatic shifts.
Winter (Low Humidity: ~25%)        Summer (High Humidity: ~65%)
---------------------------        ----------------------------
Wood cells release moisture        Wood cells absorb moisture
Grain contracts / shrinks          Grain swells / expands
Poorly coped joints pull apart     Tightly wedged joints buckle
Solution: Pre-conditioned Poplar & Moisture-Resistant Engineered Cores
Poplar and Finger-Joint Pine vs. Urethane and MDF: Where Each Belongs
Choosing the right substrate for each component of your built-in shelving is a balancing act between structural strength, paintability, and moisture stability. Here is how the most common materials compare for architectural millwork trim applications:
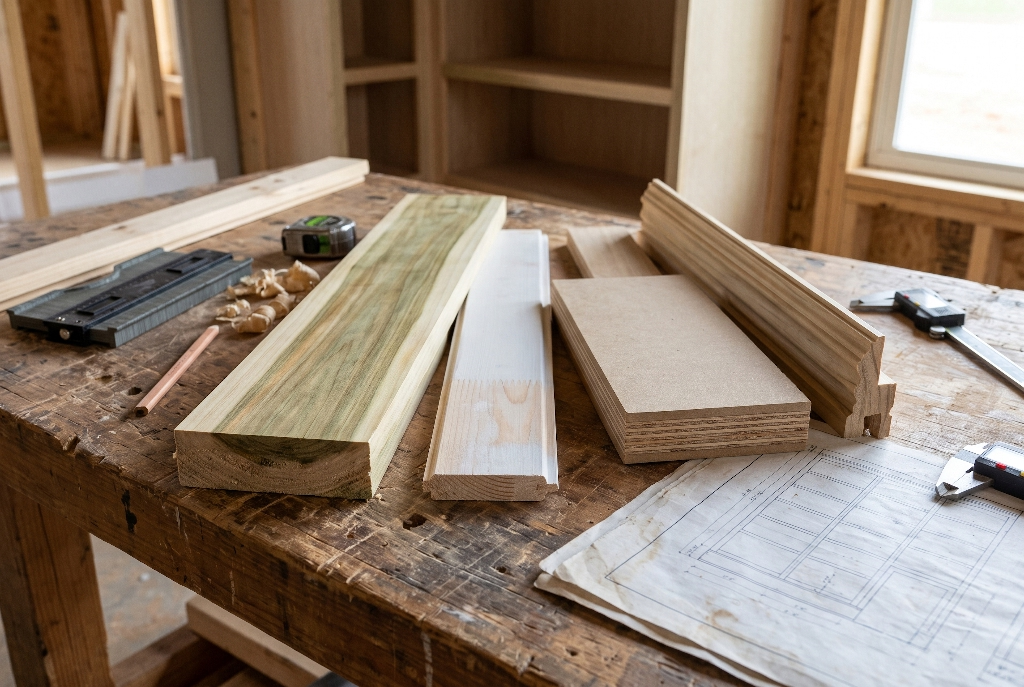
- FAS-Grade Poplar: Poplar is the undisputed champion for painted interior face frames and high-wear trim. It is a stable, medium-density hardwood that machines cleanly, holds nails exceptionally well, and resists denting from vacuum cleaners and toys. It paints to an ultra-smooth finish without visible grain patterns.
- Finger-Joint Pine: An economical choice for long, straight runs of baseboard and crown architectural millwork trim. Because it is composed of short, kiln-dried pine segments joined together with interlocking fingers, internal wood tension is minimized, resulting in boards that stay remarkably straight and resist warping.
- Moisture-Resistant MDF (Medium Density Fiberboard): Ideal for wide cabinet end panels, large shelf spans, and deep vertical dividers. High-density MDF has no internal wood grain, meaning it will not warp, cup, or split with changing seasons. However, standard MDF is vulnerable to water damage, so always specify moisture-resistant (MR) boards for base areas near floor mop zones.
- High-Density Polyurethane (Urethane Millwork): A lightweight, synthetic alternative that is completely impervious to moisture and insects. Urethane is particularly useful for deep, intricate crown mouldings and ceiling medallions, where natural wood movement would otherwise cause seams to open up over time.
By combining sturdy poplar face frames with dimensionally stable MDF cabinet boxes and finger-joint pine mouldings, you create an assembly of architectural millwork trim that will remain stable, durable, and beautiful for generations.
Frequently Asked Questions About Architectural Millwork Trim on Built-In Bookcases
How do you tie bookcase crown molding into existing ceiling crown?
To tie bookcase crown into existing ceiling trim, remove the existing trim section along the cabinet wall using an oscillating saw. Install your bookcase carcass so the upper fascia board sits level just below the ceiling. Then, run the room crown continuously around the front and sides of the bookcase using 45-degree compound miter cuts, fastening the moulding into solid wood nailer blocks mounted along the top of the cabinet box.
Should built-in bookcases sit on top of the baseboard or floor?
Built-in bookcases should always sit directly on the floor or a leveled sub-base, never on top of existing baseboards. Installing a bookcase over existing baseboard creates an unstable rear gap that prevents you from securing the unit flat against the wall studs. Remove the existing baseboard first, level the bookcase on a sturdy 2×4 riser platform, and then wrap matching baseboard architectural millwork trim around the front and sides of the unit.
What trim do you use on the front edges of built-in shelves?
The front edges of built-in shelves are typically finished with a 1-1/2 inch wide strip of solid hardwood architectural millwork trim, such as poplar or maple. This solid wood facing conceals the raw, unattractive edge of plywood shelving, creates visual depth, and provides structural stiffness that prevents long shelves from sagging under heavy loads.
Do you caulk or wood-fill trim joints on custom built-ins?
Use sandable wood filler on rigid wood-to-wood face joints, such as mitered corners, scarf joints, and counter-sunk nail holes, because it can be sanded perfectly flush before painting. Use paintable elastomeric acrylic caulk exclusively on perimeter joints where wood meets drywall or plaster, as caulk stays flexible enough to handle the natural movement between different materials without cracking.
Should bookcase trim match the wall color or the room trim color?
In traditional interior architecture, bookcase trim should match the room trim color and sheen to reinforce the impression that the shelves are a permanent architectural extension of the home. However, in modern monochromatic designs, painting the entire bookcase, including its architectural millwork trim, the same color as the surrounding walls can create a moody, cohesive, and sophisticated look that makes the space feel larger.
Final Inspection Checklist
Creating seamless built-in bookcases requires combining structural engineering with thoughtful interior design. When every reveal is intentional, every inside corner is coped, and your baseboards and crown mouldings wrap continuously around the cabinetry, you elevate your home from ordinary to extraordinary. This meticulous attention to architectural millwork trim matching for built in bookcases transforms functional storage into an architectural heirloom that brings lasting beauty, calm, and order to your daily life.
Before you apply your final coat of paint, walk through this quality-control inspection checklist to ensure your installation meets the highest trade standards.
================================================================================
                    MASTER CRAFTSMAN TRIM INSPECTION AUDIT
================================================================================
[ ] 1. SUB-BASE LEVEL & PLUMB
    - Is the 2x4 riser platform level in both directions within 1/16"?
    - Are all cabinet carcasses plumb along their front and side faces?

[ ] 2. BASEBOARD CONTINUITY
    - Does the baseboard profile wrap continuously around the bottom riser?
    - Are all outside baseboard miters tightly glued and biscuit-joined?
    - If plinth blocks were used, do they stand proud of the baseboard by 1/4"?

[ ] 3. SCRIBED WALL INTERFACES
    - Are the outer vertical stiles scribed tightly to the drywall?
    - Is the gap along the wall less than 1/16" prior to any caulking?
    - Are all perimeter wall joints sealed with flexible elastomeric caulk?

[ ] 4. SHELF & STILE REVEALS
    - Do all shelf front nosings align consistently with identical 1/8" reveals?
    - Are all shelf edges trimmed with solid hardwood to eliminate sag?
    - Are decorative pilasters or bead profiles evenly spaced across all bays?

[ ] 5. CROWN & CEILING HARMONY
    - Is the crown moulding securely fastened to solid wood backing blocks?
    - Are all inside crown corners coped rather than simple 45-degree miters?
    - Does the frieze board effectively absorb ceiling dips without visible distortion?

[ ] 6. SURFACE FINISHING INTEGRITY
    - Are all nail holes filled with sandable wood filler and sanded smooth?
    - Has raw wood been primed with high-adhesion primer before caulking?
    - Does the finish paint match the aged sheen and color of the room trim?
================================================================================
By taking the time to plan your contact zones, decode your profiles, and execute precise joinery, your finished project will stand as a testament to classic craftsmanship, enhancing both the daily comfort and long-term value of your home.