

The Aerodynamic Interface of Ridge Sites and Fenestration
Building a home on a mountain ridge gives you breathtaking panoramic views and direct access to mountain breezes. Yet living on an exposed crest brings a surprising architectural problem. Many homeowners discover that their high elevation home feels either completely stuffy inside or constantly overwhelmed by violent drafts.
Standard window layouts designed for flat suburban lots simply fail on steep terrain. When strong winds strike an exposed ridge, they create intense outdoor pressure zones that fight typical window arrangements. The result is uneven airflow, noisy whistling, rattling sashes, and rooms that remain uncomfortably warm even while a brisk mountain gale blows outside.
Harnessing natural airflow on high ground requires a deliberate strategy that links outdoor landforms directly to indoor room design. Achieving true comfort requires coordinating topographic pressure profiles, building aeromechanics, and biophilic fluid movement across interior living zones. You cannot simply install windows on opposite walls and hope for the best. Instead, you must treat every cross ventilation window as an active aerodynamic valve. When you balance windward positive pressure with leeward suction, fresh air moves through the home smoothly without causing turbulent indoor storms.
From a biophilic engineering standpoint, moving natural air through a home does far more than cool the rooms. Gentle, varying air currents introduce non-rhythmic sensory movement, which calms the human nervous system and reduces mental fatigue. When you open a cross ventilation window to welcome mountain air, you re-establish an immediate sensory connection to diurnal mountain rhythms. You smell the native pine and damp forest floor after an afternoon shower, feel the crisp drop in temperature at sunset, and hear the shifting valley winds.
By understanding how outdoor terrain guides mountain breezes, you can create a living space that stays fresh, healthy, and quiet, while drastically cutting mechanical heating and cooling expenses during pleasant shoulder seasons.
Ridge Topography Aerodynamics: How Mountain Terrain Dictates Pressure Differentials
               Ridge Crest Aerodynamics and Pressure Zones
                             Prevailing Wind
                                ========>
                                    ▲
                               [Ridge Crest]
                               (Max Velocity)
                                    |
                    Strong Negative Suction (-Cp)
                        [High Clerestory Exhaust]
                                   / \
                                  /   \
  High Positive Pressure (+Cp)   /     \     Leeward Wake Zone (-Cp)
   [Low Inflow Window] --------> /       \ ----> [Low / Mid Exhaust]
   (Living Space Airflow)       /         \       (Air Draft Exits)
  =============================             ============================
  Windward Updraft Slope                    Leeward Eddy Slope
Topographic Wind Acceleration
When wind travels across a broad valley and encounters a mountain ridge, the land acts as a massive physical ramp. As air moves up the slope, the atmosphere compresses the air mass against the rising ground. This compression forces the air to speed up dramatically as it approaches the highest point of the ridge. Architectural engineers call this crest wind acceleration.
The exact position of your home along the ridge changes the air speed and air pressure striking your exterior walls. If your home sits directly on a narrow crest, it experiences the highest wind velocities. If your home sits in a ridge saddle, which is a low dip between two higher peaks, the terrain forms a natural funnel. This funnel creates a venturi effect that accelerates local breezes even on quiet days.
A properly positioned cross ventilation window in a ridge saddle can draw in steady air currents when the surrounding valleys feel stagnant. Understanding whether your building site sits on an exposed peak, a funneling saddle, or a protected shoulder allows you to size every cross ventilation window with precision.
Windward Compression versus Leeward Separation
Airflow hitting a mountain slope behaves much like water flowing around a boulder in a fast river. The side facing the oncoming wind is the windward slope. Here, oncoming air hits the rising terrain and the home, creating a zone of high positive air pressure. Engineers identify this outward pushing force as a positive pressure coefficient. Every cross ventilation window placed on this windward facade experiences steady incoming force that wants to push outdoor air into the house.
The opposite side of the mountain is the leeward slope. As accelerated air rushes over the crest, it cannot follow the sudden drop of the back slope. The high-speed airstream detaches from the surface of the mountain, creating an expansive low-pressure pocket behind the crest. This low-pressure zone acts like a giant vacuum cleaner. It creates negative suction along the leeward side of the home.
Homes built just below the crest on the leeward side often sit directly inside a turbulent wake zone. In this wake zone, air curls backward in swirling reverse eddies. If you place a cross ventilation window on this leeward wall without accounting for negative suction, air may blow in unexpected directions. By understanding where positive pressure pushes and where negative pressure pulls, you can arrange each cross ventilation window to work with these natural pressure zones rather than fighting them.
Diurnal Microclimate Shifts
Mountain ridges do not experience steady wind directions throughout the day. Instead, they follow reliable daily thermal cycles called diurnal wind shifts. During daylight hours, the sun heats the exposed valley floors and mountain rock faces. Warm air expands, becomes lighter, and rises up the slopes toward the peaks. These daytime thermal currents are known as anabatic winds or valley breezes. A cross ventilation window positioned on the lower slope side of your home captures these rising updrafts as they climb the mountain.
As the sun sets, the process reverses. High mountain rocks and upper forest canopies lose their heat quickly into the clear night sky through radiant cooling. The air near the mountain peak cools, becomes dense and heavy, and drains down the slopes and stream hollows into the valleys below. These evening downhill currents are called katabatic winds or mountain drainage breezes.
To take full advantage of these daily reversals, a homeowner must plan fenestration on both slope faces. Opening a lower cross ventilation window facing the valley captures daytime warmth and breezes. Opening an upper cross ventilation window on the downhill side allows the home to exhaust warm daytime heat while drawing in crisp night air.
Fundamental Physics of Natural Cross Ventilation
               Airflow Circuit and Sizing Imbalance

    Windward Inflow (High Pressure)           Leeward Outflow (Low Pressure)
   +-------------------------------+         +-------------------------------+
   |                               |         |                               |
   |   [Inlet Window: Area = 1.0]  | =======>|  [Outlet Window: Area = 1.4]  |
   |       (Higher Inflow Speed)   |         |      (Broad Exhaust Draw)     |
   |                               |         |                               |
   +-------------------------------+         +-------------------------------+
                   \                                         /
                    \---> Increased Room-Wide Flushing ----->/
Wind-Driven Ventilation versus Stack Effect
Natural ventilation relies on two primary physical forces: wind-driven dynamic pressure and
Thermal buoyancy, commonly known as the stack effect, works independently of outdoor wind. Warm indoor air is less dense than cool outdoor air, so it naturally rises toward the ceiling. If you provide an opening near the ceiling and another near the floor, warm air escapes out the top, drawing cooler air in through the bottom.
On calm summer days when ridge winds die down, the stack effect becomes your primary cooling engine. By placing a low cross ventilation window in the lower living space and pairing it with a high cross ventilation window in a loft, ceiling clerestory, or roof monitor, you create a thermal chimney. This chimney keeps air moving across your skin even when outdoor leaves are completely still.
The Inflow and Outflow Circuit
A common mistake in home design is placing identical, symmetrical windows on opposite walls and assuming air will flow evenly between them. Air requires a pressure drop to move efficiently. If you open a small windward cross ventilation window and pair it with a significantly larger leeward cross ventilation window, you create a powerful airflow circuit.
Physics dictates that air moving from a smaller inlet into a larger outlet experiences an acceleration effect. Maintaining an inlet-to-outlet area ratio between 1 to 1.25 and 1 to 1.5 increases the velocity of the air moving across the living room floor. The larger leeward opening maximizes the suction created by the outdoor wake zone. This setup pulls air through the house like a gentle syringe.
Conversely, if your windward cross ventilation window is too large and your leeward exhaust is too small, air piles up inside the room, creating an indoor pressure barrier that stops incoming airflow and produces uncomfortable wind buffeting. Sizing each cross ventilation window with intention ensures that the indoor pressure remains balanced and pleasant.
Strategic Window Placement for Ridge Topography
Vertical Stratification and Sill Heights
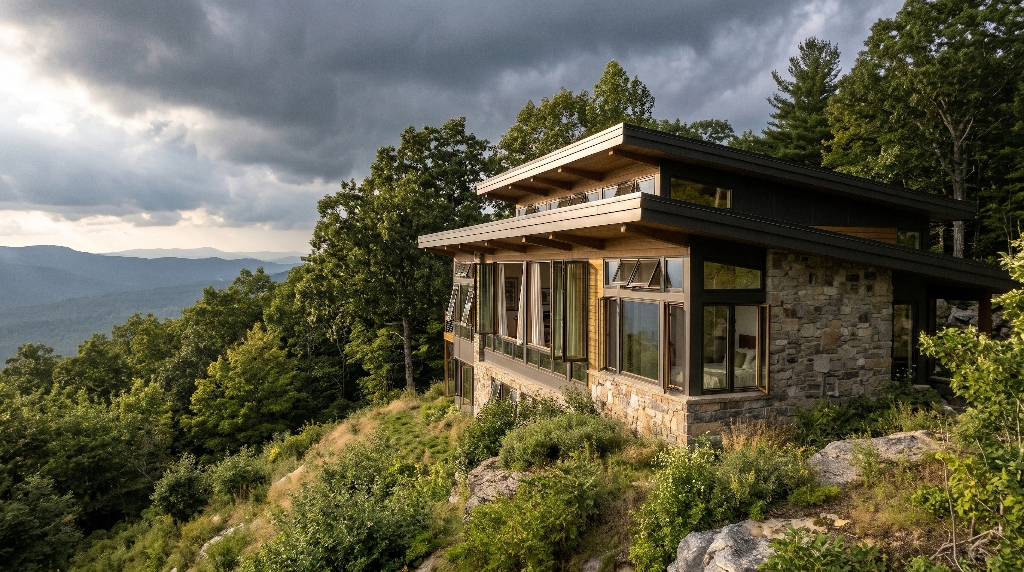
The vertical position of a window in an exterior wall determines whether fresh air actually touches the occupants or simply skims across the ceiling. Cool mountain air entering a home tends to stay low because of its density. To maximize personal comfort, the sill of a windward cross ventilation window should sit between 24 and 36 inches above the finished floor. This matches the human sitting and sleeping zone, ensuring that gentle breezes pass directly over chairs, couches, and beds.
Exhaust openings require the opposite placement. Hot air, indoor moisture, and stale odors rise to the highest point of vaulted ceilings and roof ridges. Placing an operable cross ventilation window high on the leeward wall or within an elevated clerestory band allows trapped thermal energy to exit immediately.
This vertical separation creates a natural upward path for air. As fresh air enters through the lower cross ventilation window, it absorbs heat from people, lighting, and appliances, rises toward the ceiling rafters, and exits through the upper cross ventilation window without recirculating back down into living spaces.
                  Vertical Stratification in Mountain Rooms

    Ceiling Apex
    +-------------------------------------------------------+
    |                                 [High Exhaust Window] | ---> Warm Air Out
    |                                                       |
    |                                                       |
    |                                                       |
    |                                                       |
    | [Low Inflow Window]                                   |
    | (Occupant Living Zone)                                |
    +-------------------------------------------------------+
    Floor Level: 24 to 36 Inches AFF
Plan-View Alignment and Offset Flow
Many designers place windows directly across from one another along a straight sightline. While this looks neat on a floor plan, direct alignment often creates an airflow short circuit. Air takes the path of least resistance. When an inlet and an outlet align in a straight path, a narrow jet of air shoots straight from the windward cross ventilation window to the leeward opening, leaving the surrounding corners of the room dead and unventilated.
A far better technique is offsetting your window openings across the floor plan. When you position a windward cross ventilation window near one corner of a room and the leeward outlet near the opposite corner, the incoming air stream must turn, expand, and sweep across the entire room before exiting.
You can also use interior architectural elements to guide the breeze. Half-height partition walls, double-door openings, and wide interior hallways can act as air channels. When planned carefully, a single well-placed cross ventilation window on an exterior wall can supply cooling drafts to two or three connected interior rooms before the air reaches its final exhaust outlet.
Selecting Fenestration Types for Micro-Deflection
The style of window you choose directly impacts how well you can direct mountain air. Different window styles interact with wind currents in distinct ways:
- Casement Windows: Outward swinging casement sashes act like high-performance wind scoops. When winds blow parallel along an exterior wall rather than hitting it directly, an open casement sash catches the passing air stream and deflects it straight inside. Installing a casement cross ventilation window gives you precise control over incoming air volume, even when ridge breezes strike the home at steep, oblique angles.
- Awning Windows: Hinged at the top and opening outward from the bottom, awning windows are perfect for rainy mountain climates. An awning cross ventilation window allows you to maintain continuous passive cooling during summer thunderstorms without letting blowing rain enter the home. The angled glass directs incoming drafts downward toward the occupied floor zone.
- Hopper Windows: Hinged at the bottom and opening inward at the top, hoppers are excellent choices for high clerestory exhaust bands. An operable hopper cross ventilation window directs escaping warm air upward against ceiling slopes while preventing outdoor gusts from blowing directly down onto occupants.
- Double-Hung Windows: By lowering the top sash and raising the bottom sash simultaneously, a double-hung cross ventilation window provides both air intake and exhaust within a single rough opening, making it ideal for narrow rooms with only one exterior wall exposure.
Regional Site Calibration: Designing for Southern Appalachian and Ridge-and-Valley Formations
                     Southern Appalachian Ridge Cross-Section

                   Northwest Winter Fronts (High Velocity)
                                    \
                                     \      Thermal Belt (Warm Night Zone)
                                      \       [Custom Ridge Home Site]
                                       v     /
                                 /\         /
                                /  \       v
                               /    \     /\
                              /      \___/  \
                             /               \
                            /                 \
       Valley Floor (Cold Frost Pocket)        \---> South / Southwest Summer Drafts
Seasonal Wind Shifts
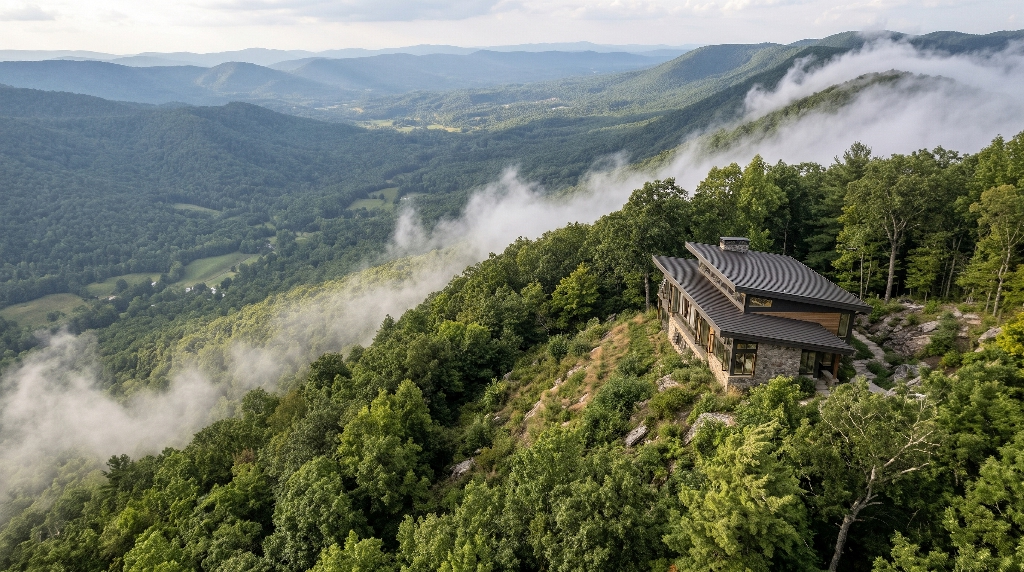
In the Southern Appalachian Mountains and the surrounding Ridge-and-Valley province, building on a high ridge requires balancing two entirely different seasonal wind patterns. During the warm months from late spring through early autumn, prevailing winds blow primarily from the south and southwest. These summer breezes carry warm, humid air from the Gulf of Mexico. To keep a mountain home comfortable without running air conditioning constantly, you need a broad, operable cross ventilation window layout along the south and southwest facades to capture these gentle drafts.
Winter brings an aggressive environmental shift. Cold continental weather systems sweep in from the northwest and west, bringing high winds, freezing temperatures, and driving sleet. If a home has too many large openings on its northwest face, winter wind pressure will push cold air into the living space through every seal and sash frame.
The solution is an asymmetrical
The Thermal Belt Phenomenon
One of the greatest climate benefits of mountain building in the Southern Appalachians is the thermal belt. During clear, calm nights, cold air drains down into deep valley bottoms, creating freezing frost pockets along valley floors. At the same time, warm air rises above this cold floor, creating a stable, temperate band along the mid-slope and lower ridge crests.
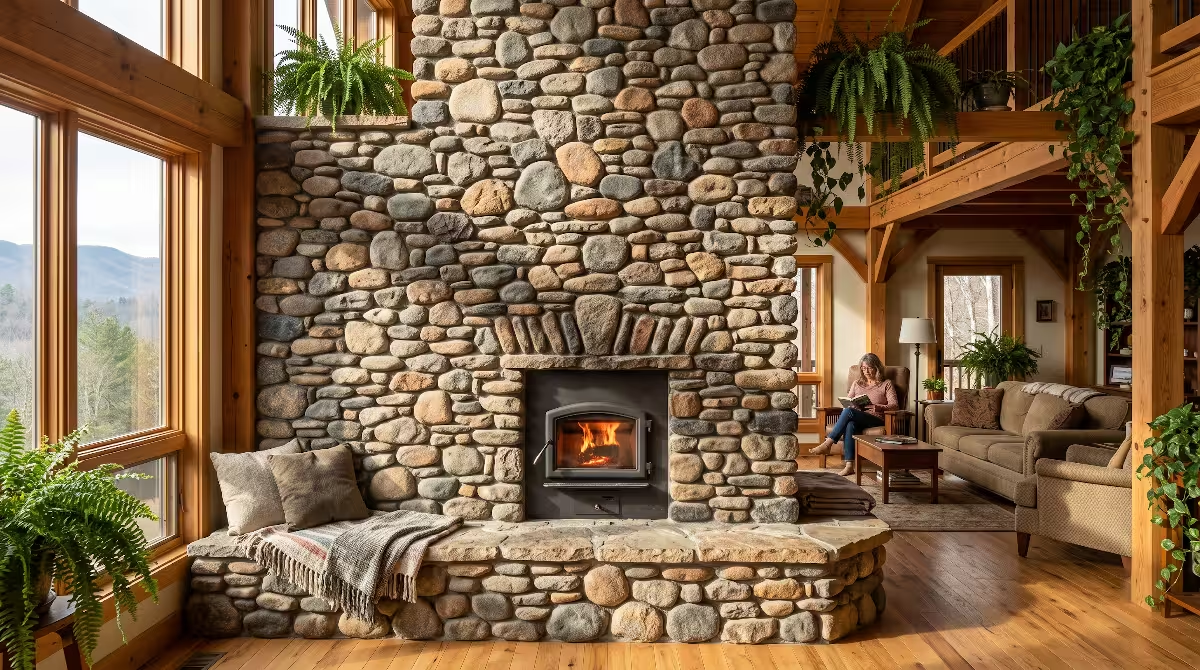
Homes built within this thermal belt experience milder winter nights and lower overall humidity than homes located on the valley floor below. An architect can take direct advantage of this microclimate by pairing a high-efficiency cross ventilation window system with exposed indoor thermal mass, such as local river rock fireplaces, slate floors, or thick plaster walls.
During cool spring and autumn evenings, opening a leeward cross ventilation window draws the mild thermal belt air across indoor masonry surfaces. The stone absorbs the gentle warmth, storing it within the building core and releasing it slowly through the night. This natural cycle keeps the interior cozy without turning on mechanical heat.
Biophilic Forest Canopy Interactions
A ridge home does not sit in empty space; it sits inside an active forest ecosystem. The native hardwood canopy, filled with mature chestnut oaks, sugar maples, and tulip poplars, dramatically alters how wind behaves before it ever reaches an exterior wall. In the summer, full leafy tree canopies break up violent ridge gusts, turning chaotic wind into soft, pleasant breezes that flow gently through an open cross ventilation window.
The deciduous forest also provides seasonal climate control. During the sweltering heat of July, dense leafy branches shade incoming air currents, cooling the air several degrees before it enters a lower cross ventilation window. In late autumn, these same deciduous trees drop their leaves, allowing low-angled winter sun to warm the home through the glass while opening clear views across the mountain ranges.
When clearing a ridge building site, you should never clear-cut the surrounding slopes. Preserving healthy trees on the windward side creates a living windbreak that calms harsh storms while funneling fresh, oxygen-rich forest air right into your cross ventilation window openings.
Solving Engineering Bottlenecks: Storm Resistance, Glare, and Passive Solar Conflict
                      Overhang Shading and Storm Geometry

                     High Summer Sun (Blocked by Overhang)
                                   \
                                    \
                               +---------+ (Deep Roof Overhang)
                               |         |
                               |    +----+
  Oblique Ridge Breeze =======>|    |    |
  (Enters Deflected)           |    | CW | (Cross Ventilation Window)
                               |    |    | (High Design Pressure Sash)
                               +----+----+
                                    |
                                    | Low Winter Sun (Permitted Inside)
                                    v
Balancing Solar Heat Gain with Wind Inflow
A frequent design conflict on high ridges occurs when the direction of prevailing summer breezes matches the direction of intense afternoon sun. In the Southern Appalachians, summer breezes often come from the southwest, which is the exact same direction that delivers hot, glaring afternoon sunlight. If you simply install a large, unprotected cross ventilation window on a southwestern wall, the cooling effect of the breeze will be completely cancelled out by extreme solar heat gain baking your interior rooms.
Solving this problem requires integrating broad architectural overhangs, exterior louvered trellises, or vertical solar fins around each opening. Deep eaves shade the glass of your cross ventilation window from high summer rays while leaving the opening unobstructed to scoop up cool slope breezes.
You can also use interior roller shades made of breathable mesh fabrics. These screens block up to 90 percent of incoming solar radiation and cut visual glare across living spaces while still allowing gentle breezes to pass freely through an open cross ventilation window.
Mitigating High-Velocity Mountain Wind Loads
Ridge crests frequently experience wind speeds two to three times greater than sheltered valley floors. During severe summer thunderstorms and winter blizzards, wind gusts over an exposed mountain ridge can exceed 60 to 70 miles per hour. Standard residential windows with lightweight vinyl tracks can flex, whistle, leak water, or even blow out under these intense pressure loads.
Every cross ventilation window specified for a ridge home must carry a high Design Pressure rating, often abbreviated as a DP rating. Choosing windows rated at DP 50 or higher ensures that the glass, sash hardware, and perimeter frame can withstand extreme positive pushing forces and negative suction without structural failure.
Furthermore, you should select heavy-duty multipoint locking systems and robust friction stays. Friction stays prevent an open casement cross ventilation window from slamming violently shut or ripping off its hinges when sudden ridge gusts catch the open sash. These mechanical stabilizers allow you to leave your windows safely open for night cooling without worrying about sudden mountain squalls damaging your home.
Airtight Enclosures versus Controlled Ventilation
Modern building codes demand high-performance, energy-efficient building envelopes that prevent air leaks. High-performance homes often target airtightness levels of 0.6 air changes per hour or lower under standard pressure tests. Some builders mistakenly believe that an airtight home should never have operable windows. This is a misunderstanding of high-performance building science.
A tight building envelope is essential for stopping uncontrolled, random air leakage through walls, floor joists, and electrical outlets during extreme winter and summer weather. However, voluntary, controlled ventilation through an open cross ventilation window during pleasant weather is an entirely different matter.
High-performance homes benefit tremendously from controlled natural flushing cycles. When outdoor temperature and humidity fall within the ideal comfort range, opening a dedicated cross ventilation window network flushes out indoor carbon dioxide, airborne cooking particulates, and lingering volatile organic compounds in minutes.
When outdoor weather becomes unpleasantly hot, muggy, or freezing, you simply latch every cross ventilation window shut. The heavy compression gaskets seal tightly against the frame, allowing the home’s mechanical heat recovery ventilator to manage fresh air without losing energy.
Common Questions Answered about Cross Ventilation Windows
How do you calculate window size for effective cross ventilation?
To calculate the proper window size for natural cross ventilation, you must measure the Net Free Vent Area of your operable window sashes, not the total size of the rough frame opening. For high-performance passive cooling, building engineers recommend that the total Net Free Vent Area of your inlet openings equal at least 4 to 8 percent of the total floor area of the room being ventilated.
For example, a living room measuring 300 square feet requires between 12 and 24 square feet of open, unobstructed window area. Remember to apply the inflow-to-outflow imbalance rule on exposed ridge sites. If your windward inlet cross ventilation window provides 12 square feet of open area, your leeward exhaust openings should total approximately 15 to 18 square feet. This imbalance maintains steady air velocity through the living space and prevents air from stalling inside the house.
Can cross ventilation work if windows are on adjacent walls rather than opposite walls?
Yes, natural cross ventilation works effectively with windows placed on adjacent walls that meet at a corner, although the physical airflow pattern changes. When windows sit on opposite walls, air travels across the room in a long, linear path. When a cross ventilation window is placed on an adjacent wall, the incoming air stream creates an active rotary pattern or indoor vortex before finding the exhaust outlet.
                     Adjacent Wall Corner Flow Pattern

       Windward Wall
       +-----------------[Inflow Window]-------------+
       |                        \                    |
       |                         \                   |
       |                          v                  |
       |                    Swirling Corner          |
       |                    Air Circulation          |
       |                          /                  |
       |                         /                   |
       | [Exhaust Window] <-----/                    |
       +---------------------------------------------+
       Adjacent Wall
To make corner cross ventilation work smoothly, you should install outward swinging casement sashes. By angling the open sash of each cross ventilation window outward, you can catch passing outdoor breezes and steer them directly into the center of the room. This setup creates wide, circular air mixing that sweeps every corner, preventing dead air pockets from forming in the opposite end of the room.
What is the ideal roof shape to enhance cross ventilation on a ridge?
The most effective roof shapes for ridge ventilation are asymmetrical gable roofs and mono-pitch shed roofs with an elevated clerestory monitor. A mono-pitch shed roof that slopes upward toward the leeward side of the ridge works like an airplane wing. As mountain air blows up the windward slope and rushes over the roof peak, it creates a powerful zone of negative pressure right at the high leeward edge.
                   Shed Roof Negative Pressure Lift

      Prevailing Ridge Wind
           ========>
                          /|  <--- Negative Pressure Peak
                         / |  [Clerestory Exhaust Window]
                        /  |
                       /   |
                      /    |
   [Low Inflow] ---->/     +-----------------------+
  ===================                               ===================
  Windward Foundation                               Leeward Foundation
Placing a continuous band of clerestory cross ventilation window units along this high edge allows the house to exploit maximum suction. The outdoor wind stream actively pulls rising warm air straight out of the ceiling clerestories. As an added bonus, this roof geometry allows you to tuck lower inflow windows under generous protective eaves along the lower windward wall, creating an ideal rain-safe ventilation circuit.
How does elevation change on a ridge affect indoor air pressure?
Air pressure decreases naturally as you climb higher in elevation. On a steep mountain ridge, a multi-story home can experience measurable differences in outdoor air pressure between its walkout basement level and its top floor ceiling. This elevation span naturally amplifies the home’s vertical stack effect.
Because air pressure is slightly lower at the upper roof peak than at the lower foundation, indoor air wants to escape through upper openings even when there is no wind blowing. Installing a low cross ventilation window in the lower foundation level and a matching high cross ventilation window in an upper loft turns this elevation difference into a self-powering air pump. Cool air enters from the shaded ground level, absorbs heat as it moves up the stairwell, and exhausts smoothly through the roof monitor, keeping multi-story ridge homes naturally comfortable all summer long.
Architectural Blueprint Checklist and Practical Implementation
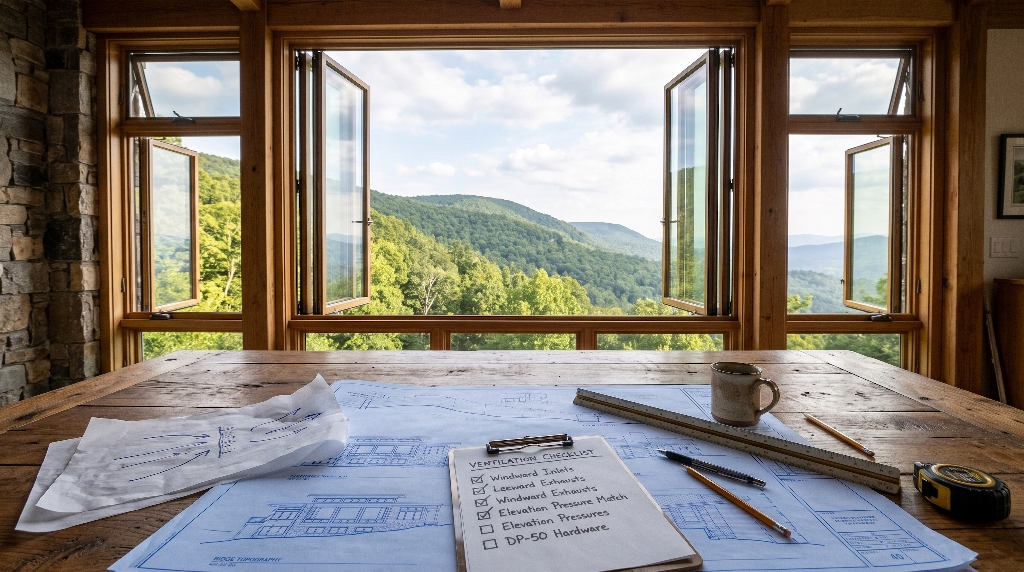
Designing a high-performance ridge home that breathes requires clear planning before pouring the first concrete footer. Use this practical blueprint checklist when reviewing your architectural plans with your builder and design team:
- Map Local Topography and Microclimates: Obtain a detailed topographic survey showing natural slope angles, ridge crest lines, and adjacent valleys. Locate your prevailing summer breeze directions and winter storm vectors using regional airport wind rose data adjusted for your specific mountain hollows.
- Establish the Pressure Circuit: Identify which exterior walls will experience positive windward pressure during the warm months and which walls will sit inside leeward negative suction zones. Ensure that every major living room contains at least one dedicated cross ventilation window positioned to intake breeze and a corresponding exhaust pathway to a low-pressure outlet.
- Verify Window Inflow and Outflow Sizing: Check that the net free ventilation area of your leeward exhaust openings is roughly 25 to 50 percent larger than your windward inlet openings. Ensure the total open area equals at least 4 to 8 percent of the floor space in every habitable room.
- Set Ergonomic Sill and Head Heights: Verify that windward living room sills sit low, between 24 and 36 inches above the floor, to deliver cooling breezes directly across seating areas. Position leeward exhaust openings as close to the ceiling apex as structurally possible.
- Select Resilient Hardware and Profiles: Confirm that every specified cross ventilation window carries a minimum rating of DP 50 to withstand severe ridge storms. Specify heavy-duty friction stays, compression weatherstripping, and multipoint latching hardware to ensure long-term durability and ease of operation.
- Integrate Rain-Safe Shading: Design deep roof overhangs, exterior porches, and louvered eyebrows above each cross ventilation window. Choose awning or hopper sash styles for high-exposure walls so you can safely welcome cool breezes into your home during summer downpours.
Building along a mountain ridge offers an extraordinary opportunity to live in harmony with the natural environment. By taking the time to align your architectural layout with local wind dynamics, pressure zones, and daily temperature rhythms, you transform your house into an active, responsive shelter. Every carefully placed cross ventilation window becomes an essential tool that fills your living space with clean mountain air, connects you to the outdoors, and provides lasting energy efficiency for decades to come.