Oftentimes, in the Tri-Cities of Tennessee, there is one project with custom homes that always stands out to us because it is so personal. That project is the craft room.
We know that for many women, a craft room is not just a place to keep your supplies. It is your sanctuary. It is the place where you go to breathe, to create, and to be yourself. For too long, we have been told to just take whatever corner of the house is left over. We use the dining room table or a dark corner of the basement. As dedicated crafter needs more than just a corner of the house. You deserve a space that is designed specifically for what you do.
Whether you are a quilter who needs to spread out huge bolts of fabric, a painter who needs the perfect light, or a digital creator who needs high-tech power, this guide is for you. We are going to look at how to build a craft room from the ground up using professional building standards. We want this room to be beautiful, but we also want it to be smart. Let’s look at how we can turn your dream into a reality and make it a place you can feel proud of.
Moving Beyond the Spare Bedroom
Most custom home buyers generally call any extra space a spare room. However, this is a mistake when it comes to your hobbies. A spare room is just four walls and a closet. A purpose-built craft room is a tool in itself. Think about it like a kitchen. You wouldn’t try to cook a five-course meal in a room that only had a microwave and a small sink. You need specific surfaces, such as special floors for knitting, and tools.
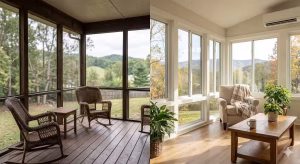
When we design a craft room in East Tennessee, we have some unique opportunities. Many of our homes have daylight basements or large bonus rooms over the garage. These are perfect spots for a craft room because they offer a bit of separation from the rest of the house. This separation is important. It allows you to leave your projects out without feeling like the house is messy. It gives you a place where you can close the door and know your work is safe.
As we plan this space, we are going to use a precise engineering mindset. We want to look at how you move, what you touch, and how much light you need. We aren’t just looking for a place to put a desk. We are looking to create a production facility for your imagination. This means we think about things like floor strength, air flow, and power needs before we ever pick out a paint color.
Phase 1: Spatial Engineering and Layout Design
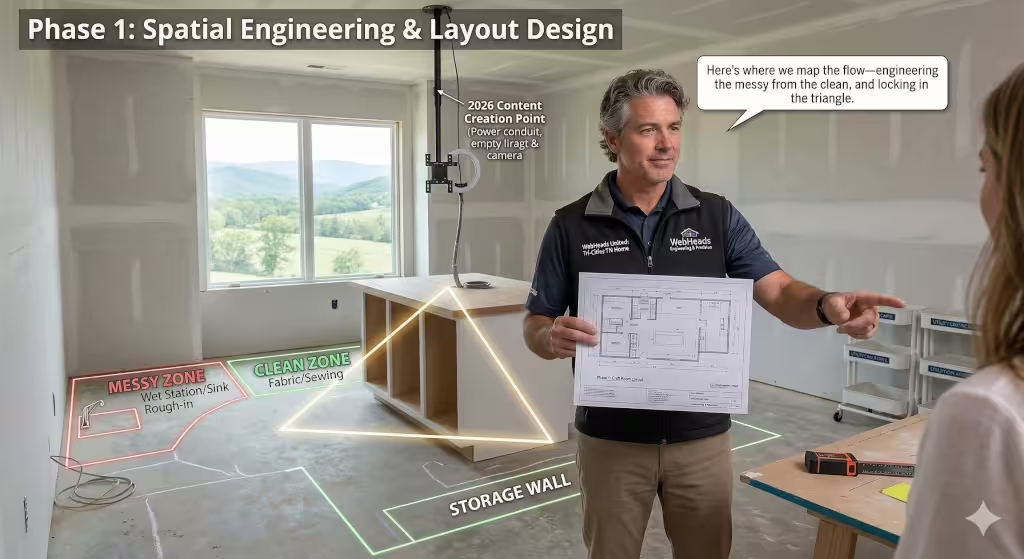
The first step in building a great craft room is the layout. In the building industry, we call this spatial engineering. You need to think about how you actually work. We suggest dividing your craft room into zones. This is a professional way to keep your space organized and functional.
One zone should be the Messy Zone. This is where you do things like painting, using glue, or cutting wood. This area needs to be near a sink if possible. In many Johnson City homes, we can tap into existing plumbing lines to add a small utility sink. This is a game changer for a craft room. You won’t have to carry dirty brushes or stained water through the house.
The second zone is the Clean Zone. This is for things like sewing, paper crafts, or working on your computer. You want this area to stay dust-free. If you are a quilter, your sewing machine needs to stay clean to work well. By separating these two zones in your craft room, you protect your expensive tools and your hard work.
We also use something called the Golden Triangle in design. This comes from kitchen planning. It means your three most used items should form a triangle. For a craft room, this might be your main work table, your storage wall, and your ironing station or sink. If these things are too far apart, you will get tired quickly. If they are too close, you will feel cramped. We want to find that perfect balance so you can work for hours without feeling worn out.
Another thing to think about in 2026 is content creation. Many makers today like to share their work on social media. When you are designing your craft room, think about where your camera will go. We can install permanent mounts in the ceiling or on the walls. This means you don’t have to set up a tripod every time you want to take a photo. It makes your craft room a professional studio as well as a workspace.
Phase 2: Technical Specifications
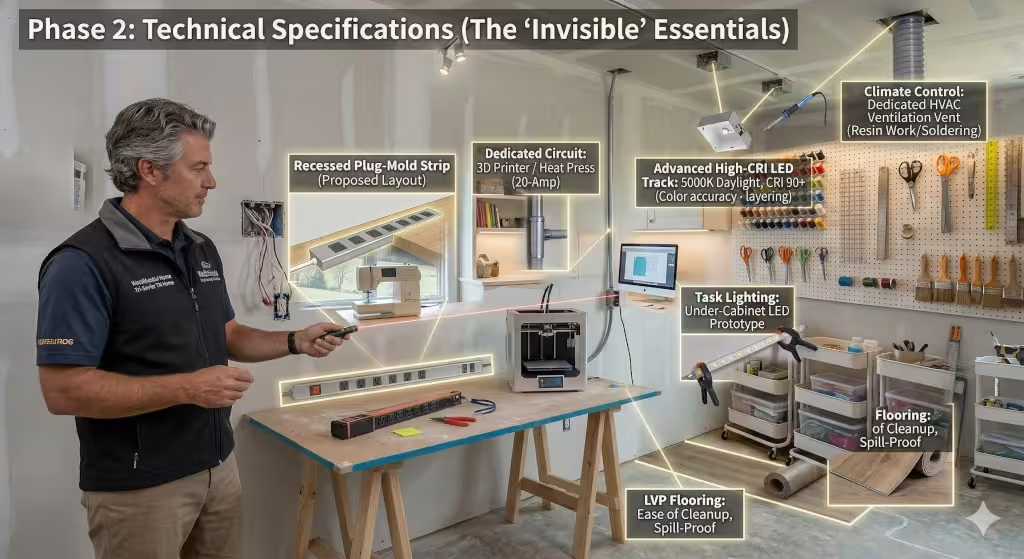
This is where it helps to have an engineering background. People often forget the “hidden” parts of a room, but these are the most important for a craft room. Let’s talk about power first. Most bedrooms only have a few outlets. A real craft room needs much more.
We recommend installing plug-mold strips. These are long strips of outlets that run along the back of your worktable. This allows you to plug in your glue gun, your sewing machine, your light, and your laptop all at once. You should also consider dedicated circuits. If you use a 3D printer or a high-heat press, those can pull a lot of electricity. You don’t want to trip a breaker in the middle of a project. Putting these items on their own circuit is a smart, professional move.
Next, we have to talk about lighting. This is the number one complaint I hear about a craft room. Most home lighting is too yellow. This makes it hard to see colors correctly. You want bulbs with a high CRI, which stands for Color Rendering Index. A CRI of 90 or higher will make colors look like they do in natural sunlight. This is vital if you are matching thread or mixing paint.
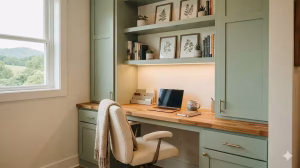
In your craft room, you need three layers of light. First is ambient light, which is the general light for the room. Second is task light, which is bright light focused right on your hands. Third is accent light, which makes the room feel cozy and bright. I love using under-cabinet lighting for task work. It keeps the shadows off your project and keeps the workspace clear of bulky lamps.
We also need to think about the air you breathe. Some crafts use chemicals, resins, or create a lot of dust. A standard home HVAC system might not be enough. We can install a small vent fan that leads outside, similar to a bathroom fan but more powerful. This keeps your craft room smelling fresh and keeps you safe from fumes. It is a technical detail that makes a huge difference in how much you enjoy the space.
Phase 3: Storage Precision and Cabinetry

Storage is the heart of any craft room. But we don’t just want boxes. We want precision storage. In the Tri-Cities, many of our newer homes have high ceilings. I always tell my clients to use that vertical space. Go all the way to the ceiling with your cabinets. You can keep things you don’t use often, like holiday decor or bulk supplies, on the very top shelves.
We like a hybrid approach to storage in a craft room. This means using some open storage and some closed storage. Open storage, like pegboards or clear bins, is great for things you use every day. It allows you to see what you have so you don’t buy duplicates. It also makes the craft room feel like an active, creative place.
Closed storage, like drawers and cabinets, is for things that look messy or need to stay clean. I recommend using custom inserts in your drawers. Think about having a drawer just for your vinyl rolls or a shallow drawer with dividers for your embroidery floss. When every item has a specific home, your craft room stays organized effortlessly.
One thing to keep in mind, is that the quality of the cabinets matters. You don’t need the most expensive wood, but you do need sturdy hinges and drawers that slide smoothly. Your craft room storage will get a lot of use. You want it to hold up over time. If you are on a budget, you can use high-quality stock cabinets and add custom organizers inside. This gives you a professional look without the custom price tag.
Phase 4: Ergonomics and Human-Centered Design
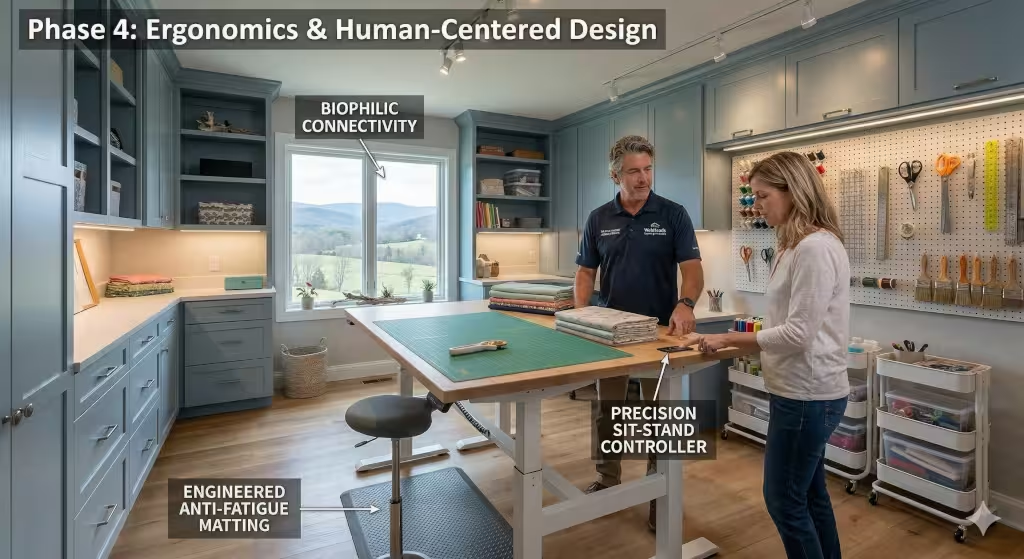
Design is not just about how a room looks. It is about how it feels to your body. As we get older, we have to be more careful about how we sit and stand. A well-designed craft room should protect your back and your joints.
The most important piece of furniture in your craft room is your work table. I highly recommend an adjustable-height table. Sometimes you need to sit down for fine detail work. Other times, you need to stand up to get leverage for cutting or assembly. Being able to change the height of your table with the touch of a button is the best thing you can do for your health in the craft room.
If you do a lot of standing, we need to think about the floor. In a professional craft room, I often suggest luxury vinyl plank or LVP. It is very popular in Johnson City right now because it is waterproof and easy to clean. But if you stand on it for hours, it can be hard on your feet. You can build anti-fatigue mats right into the floor layout or place them in front of your main work areas.
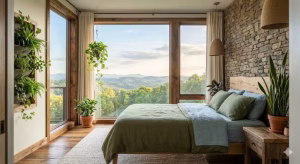
We also talk about biophilic design. This is a fancy way of saying we should bring nature inside. In East Tennessee, we are surrounded by beauty. If your craft room has a window, make sure your desk faces it. Looking at the trees or the sky helps your brain relax. It can even help you be more creative. If you don’t have a window, we can use colors and textures that remind you of the outdoors. Using natural wood or soft greens can make your craft room feel like a peaceful getaway.
Anserwering Your Questions about Craft Rooms
When people start planning their craft room, they usually have a few common questions. We want to answer those for you now.
- How do you organize a craft room on a budget? This is a great question. You don’t have to spend a fortune. My best advice is to spend your money on the things that are hard to change later, like the lighting and the flooring. For storage, look for used kitchen cabinets. You can often find them at local salvage shops in the Tri-Cities. A fresh coat of paint and some new handles can make them look perfect in your craft room. You can also use simple bookshelves and add pretty baskets to hide the clutter.
- What is the best lighting for a windowless craft room? If you are working in a basement or a room without windows, you need to be very intentional. Use daylight-balanced LED bulbs. These mimic the sun. You should also use light colors on the walls. A soft white or a very pale grey will help bounce the light around the room. This prevents the craft room from feeling like a cave. Adding a few mirrors can also help reflect the light and make the space feel bigger.
- How do I design a craft room in a small space? If you don’t have a whole room, you can create a “cloffice.” This is a craft room built into a closet. You can remove the doors and put a desk inside. Use the walls for shelving all the way to the top. When you are done, you can even pull a curtain across it. Another tip for small spaces is to use furniture on wheels. A rolling cart can hold all your supplies and be moved to the kitchen table when you want to work, then tucked away later.
- Should a craft table be desk height or counter height? This depends on what you do. If you do mostly computer work or fine hand-sewing, desk height (about 30 inches) is usually best. If you are cutting fabric, gift wrapping, or doing woodworking, counter height (about 36 inches) is much better for your back. This is why I love the adjustable tables I mentioned before. They give you the best of both worlds in your craft room.
The Integrity of the Build
Building a purpose-built craft room is an investment. It is an investment in your home’s value, but more importantly, it is an investment in your happiness. When we build things with integrity, we do them right the first time. We think about the wires in the walls, the strength of the shelves, and the quality of the light.
When your craft room is finished, it should feel like it was made just for you. It should be a place where you can walk in, take a deep breath, and feel ready to create. Whether you are in Kingsport, Bristol, or Johnson City, the goal is the same. We want a space that works as hard as you do.
Remember to take your time with the planning. Walk through the room and imagine where you will stand. Think about where you will put your trash can and where you will plug in your iron. These small details are what make a craft room truly functional. If you plan with precision and build with care, your craft room will be your favorite place in the world for years to come.
Summary of the Craft Room Build Process
To make sure you hit every point, here is a quick checklist for your project.
Check your power needs and add extra outlets or circuits.
Install high-CRI lighting to see your colors clearly.
Use vertical space for storage to keep the floor clear.
Pick a flooring that is easy to clean and won’t stain.
Invest in an adjustable table to save your back and neck.
Make sure you have a plan for ventilation if you use messy supplies.
Designing a craft room is a big task, but it is so rewarding. You are creating a place where your ideas come to life. Most satisfied custom home buyers will tell you that there is nothing better than a room that perfectly serves its purpose. Your craft room is more than a hobby space. It is the heart of your creative life.